


Hardware Setup
Getting Started with the MCUSLK for MC9S12C32 Application Module, Rev. 0
Freescale Semiconductor
9
11.
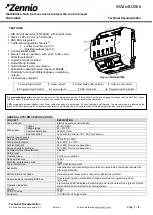
Successful installation is verified by Found New Hardware (Screen 3) illustrated by
Figure 6
. Click
on “Finish” button to complete installation and close wizard.
Figure 6. Found New Hardware Wizard (Screen 3)
12.
Verify that the +3.3 V LED, +5 V LED, and both green and yellow USB LEDs on the MCU Project
Board – 2 are lit.
13.
Verify that the V
DD
LED on the MC9S12C32 MCU application module board (CSM12C32) is lit.
14.
If the LEDs in steps 13 and 14 are not lit, make sure the jumper options are set as described in
steps 2 through 6. Also, see the troubleshooting tips section in the MCU Project Board – 2 user
guide.
15.
The MCU Project Board – 2 and the MC9S12C32 MCU application module are now ready for use.