


24
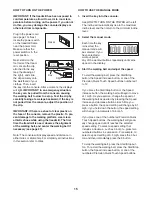
HOW TO USE THE MAINTENANCE MODE
The console has a maintenance mode that keeps track
of the total number of hours that the treadmill has been
operated and the total distance that the walking belt
has moved. The maintenance mode also allows you to
adjust the maximum workout time, the pause timeout,
and the sleep timeout. You can also select the desired
language and disable or enable the safety key.
1.
Select the maintenance mode.
To select the maintenance mode, hold down the
Clear button and the Enter button for several
seconds.
Press the Display button to move between screens.
Press the Back button to return to a previous
screen. To change the settings, press the increase
and decrease buttons next to the Enter button.
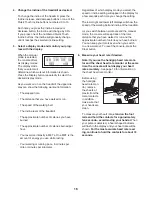
2. Set user preferences.
When you select the maintenance mode, the
display will show the total number of hours and the
total number of miles (or kilometers) that the walk-
ing belt has moved. Press the Display button to
move to the next screen.
If desired, set the maximum workout time for the
Interval, Terrain, Random, Manual Time, and Heart
Rate workouts using the increase and decrease
buttons.
Next, press the Display button to move the cur-
sor to the pause timeout. Set the pause timeout,
if desired. The pause timeout begins when the
walking belt stops. When the pause timeout ends,
the display will return to the main screen and your
distance and calories count will be reset.
Press the Display button to move the cursor to the
sleep timeout. Set the sleep timeout, if desired.
The sleep timeout begins when the display returns
to the main screen. When the sleep timeout ends,
the incline will lower to the lowest setting and the
screen saver will appear.
Press the Display button to move to the default
volume. Set the default volume, if desired.
Next, press the Display button to move to the next
screen. You may be able to select one of five
languages for the displays. If desired, select a lan-
guage for the displays.
3. Create a custom workout.
If desired, create a custom workout. Press the
Display button until the desired custom workout is
highlighted. Then press the Enter button. Program
a speed setting and an incline setting for the first
one-minute segment by pressing the Speed and
Incline buttons. Press the Enter button to move
to the next segment and continue programming
segments for 30 segments. Press the Enter button
after you have programmed the last segment. Then
press the Display button until you exit the mainte-
nance mode.
To exit the maintenance mode at any time, remove the
key from the console.
You can also disable or enable the safety key. When
the safety key is enabled, the key must be inserted into
the console for the treadmill to turn on. To disable or
enable the safety key, remove the key from the console
and hold down the Clear button and the Enter button
for several seconds. Push the increase or decrease
button. To enable the safety key, insert the key into the
console. For best results, operate the treadmill with the
safety key enabled.
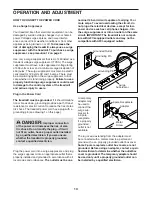
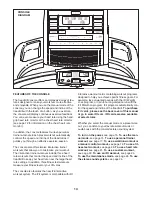
HOW TO USE THE STEREO SOUND SYSTEM
To play music or audio books through the console’s
stereo speakers, you must connect your MP3 player,
CD player, or other personal audio player to the
console. Plug your audio wire into the MP3 jack on
the side of the console labeled IN. Then, plug your
audio wire into a jack on your MP3 player, CD player,
or other personal audio player. Make sure that your
audio wire is fully plugged in.
Next, press the play button on your MP3 player, CD
player, or other personal audio player. Then, adjust the
volume on your personal audio player. To use head-
phones, plug the headphones into the headphone jack
near the audio jack.
If you are using a personal CD player and the CD
skips, set the CD player on the floor or another flat sur-
face instead of on the console.