


FortiGate-7060E hardware assembly and rack mounting
Fortinet Technologies Inc.
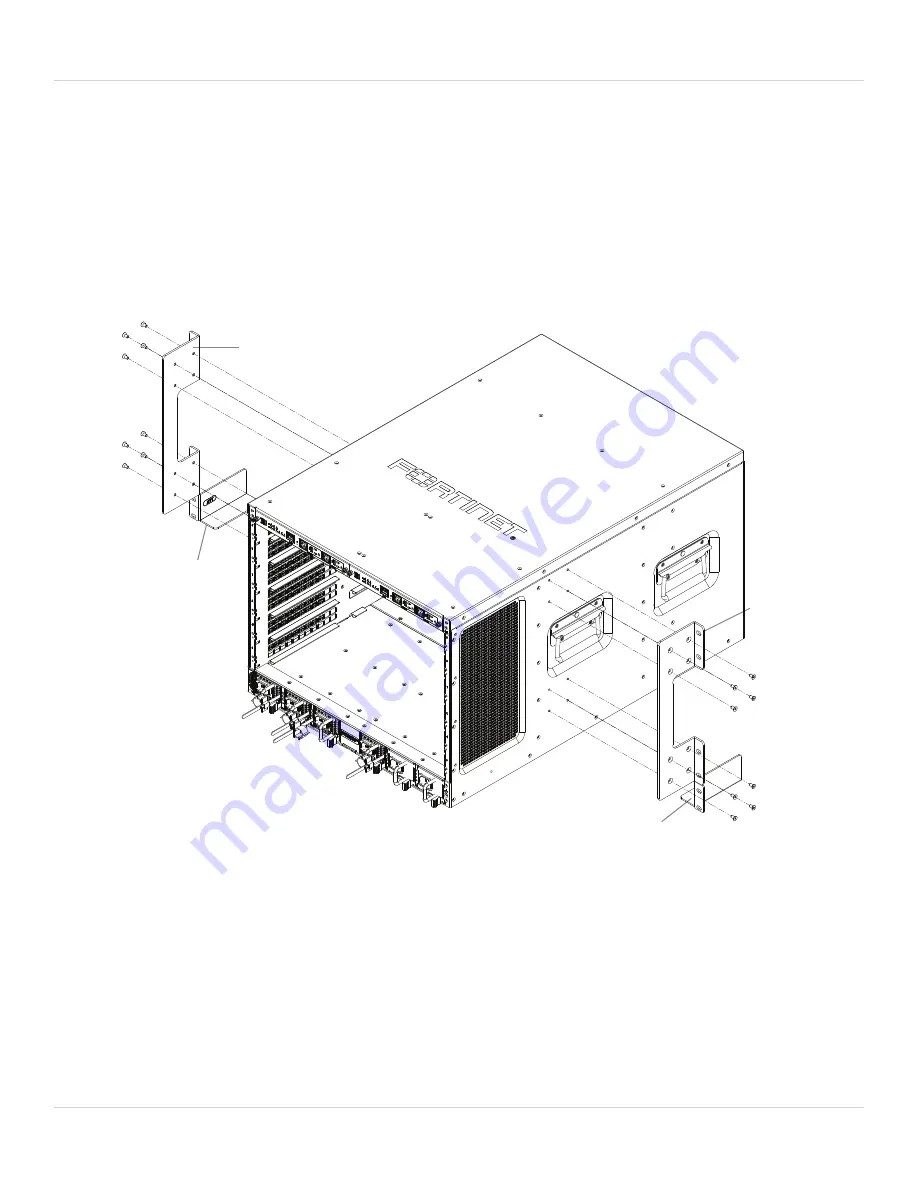
Mounting the FortiGate-7060E chassis in a two-post rack
The FortiGate-7060E package includes two mid-mount trays and two mid-mount ears that you can use to mount the
chassis in a 2-post rack. As shown in the diagram, first attach the mid-mount trays to the rack making sure to leave
enough space above the trays for the chassis. Then attach the mid-mount ears to the chassis also as shown in the
diagram. Finally line up the mid-mount trays with the mid-mount ears so that the chassis is supported in the rack. Then
use screws to attach the mid-mount ears and the chassis to the rack.
Mounting the chassis in a 2-post rack
Left Mid Mount Tray
(Attach to the Rack
First)
M4x8 flat head
screws
M4x8 flat head
screws
Right Mid Mount Tray
(Attach to the Rack First)
Left Mid Mount Ear
(Attach to the
Chassis)
Right Mid
Mount Ear
(Attach to the
Chassis)
Cooling air flow and required minimum air flow clearance
When installing the chassis, make sure there is enough clearance for effective cooling air flow
.
The following diagram
shows the cooling air flow through the chassis and the locations of fan trays. Make sure the cooling air intake and warm
air exhaust openings are not blocked by cables or rack construction because this could result in cooling performance
reduction and possible overheating and component damage.
FortiGate-7060E 6.4.2 System Guide
27


