User Manual
E115-P
Page 16
FW_E115-P_M_v0301-01_EN
5.2.1
CONFIGURING USING PC CONFIGURATION TOOL
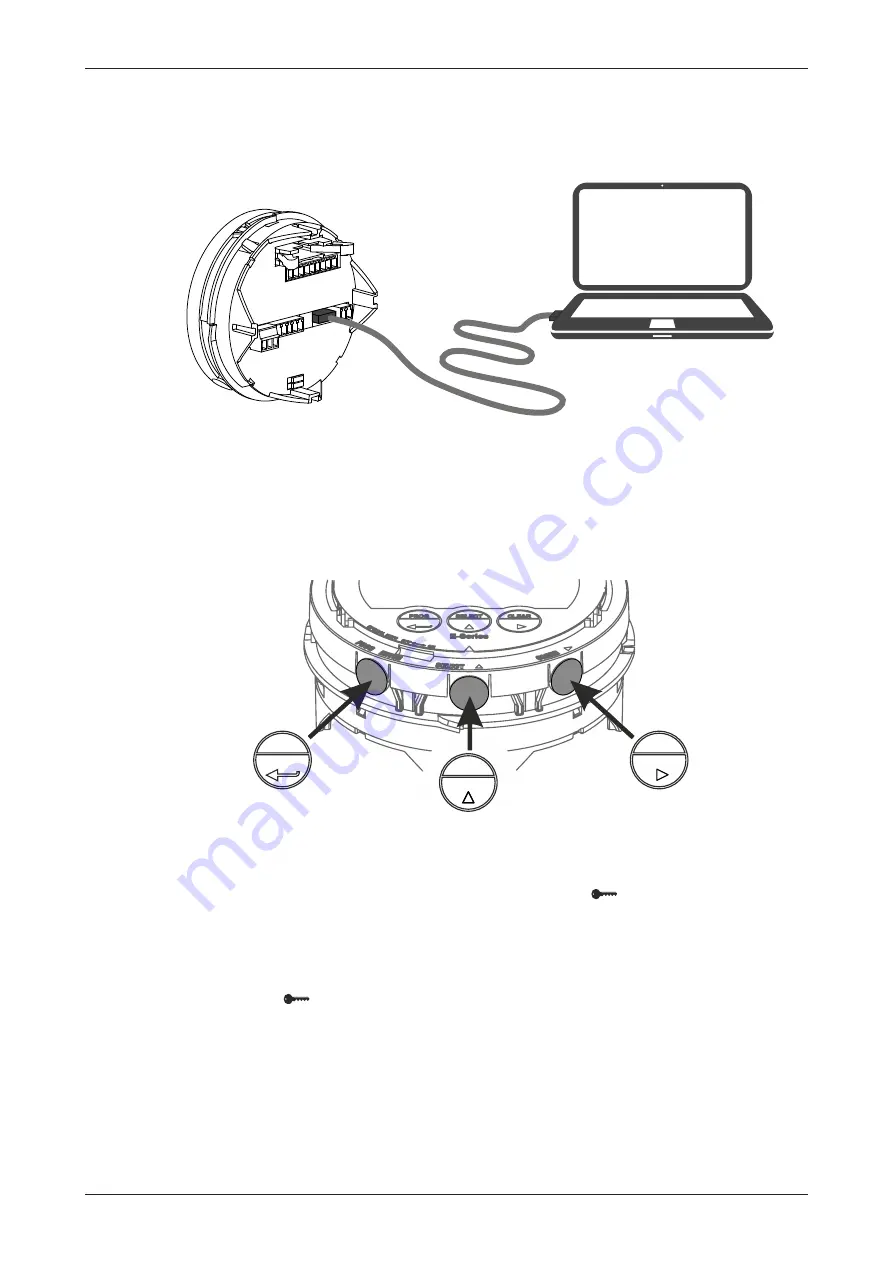
Configuration of the E115-P can be done using a PC with our free of charge Remote Configuration
Tool software. Consult
Section D: Remote Configuration Tool [»68]
for details. Connection to a PC is
made by means of the communication port, located at the back side of the MEM.
CONFIG
Fig. 11:
USB connection between MEM and PC
All settings available in the PC Configuration tool correspond with menu items available in SETUP-
mode. Please see
Section 5.5: SETUP menu explanations [»21]
.
5.2.2
MECHANICAL KEYS
A quick and convenient way to configure the E115-P is by means of SETUP-mode and three
mechanical keys (push buttons) at the side of the MEM (available with the cover removed).
PROG
CLEAR
SELECT
Fig. 12:
Control panel pushbuttons
The mechanical keys copy the functionality of the corresponding optical keys at the front side of the
MEM. After operating the mechanical keys, the optical keys are disabled for 30 seconds to avoid
interference and to allow to replace the cover. The Key lock symbol
indicates that the optical
keys are temporarily disabled, see
Section 4.2.2: Optical keys [»10]
5.2.3
OPTICAL KEYS SWITCH
The optical keys can be disabled to save battery power or to avoid false activation under some
circumstances. The switch can be found at the outside rim of the MEM.
The Key lock symbol
is shown on the display when the optical keys are disabled, see


