


22
Note:
When the countdown clock on the display reaches 1, the Strip
Holder will carry the strip inside and begin testing.
An automatic calibration is done before each test.
The results will be displayed on the screen and stored in memory
after each test. Any abnormal results will be highlighted on the
screen and flagged on the print out.
If
Auto-print
is set to
on
the results will be printed. If
Auto-print
is set to
off
, press
to print the results.
Remove the used strip from the Strip Holder when the strip carrier moves out.
Discard the used strip according to local regulations.
Repeat the previous steps to test more urine.
Strip Test – Continuous Test Mode
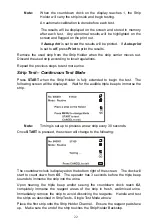
Press
START
when the Strip Holder is fully extended to begin the test. The
following screen will be displayed. Wait for the audible triple beep to immerse the
strip.
Note:
Timing is set up to process a new strip every 30 seconds.
Once
START
is pressed, the screen will change to the following:
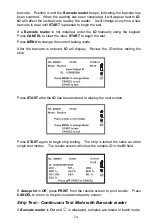
The countdown clock is displayed on the bottom right of the screen. The clock will
start to count down from
65
. The operator has 3 seconds before the triple beep
sounds to immerse the strip into the urine.
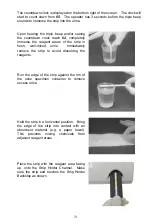
Upon hearing the triple beep and/or seeing the countdown clock reach
62
,
completely immerse the reagent areas of the strip in fresh, well-mixed urine.
Immediately remove the strip to avoid dissolving the reagents. Handle and test
the strips as described in Strip Tests - Single Test Mode above.
Place the first strip onto the Strip Holder Channel. Ensure the reagent pads face
up. Make sure the end of the strip touches the Strip Holder Backstop.


