background image

Before you permanently install 

10 


3.


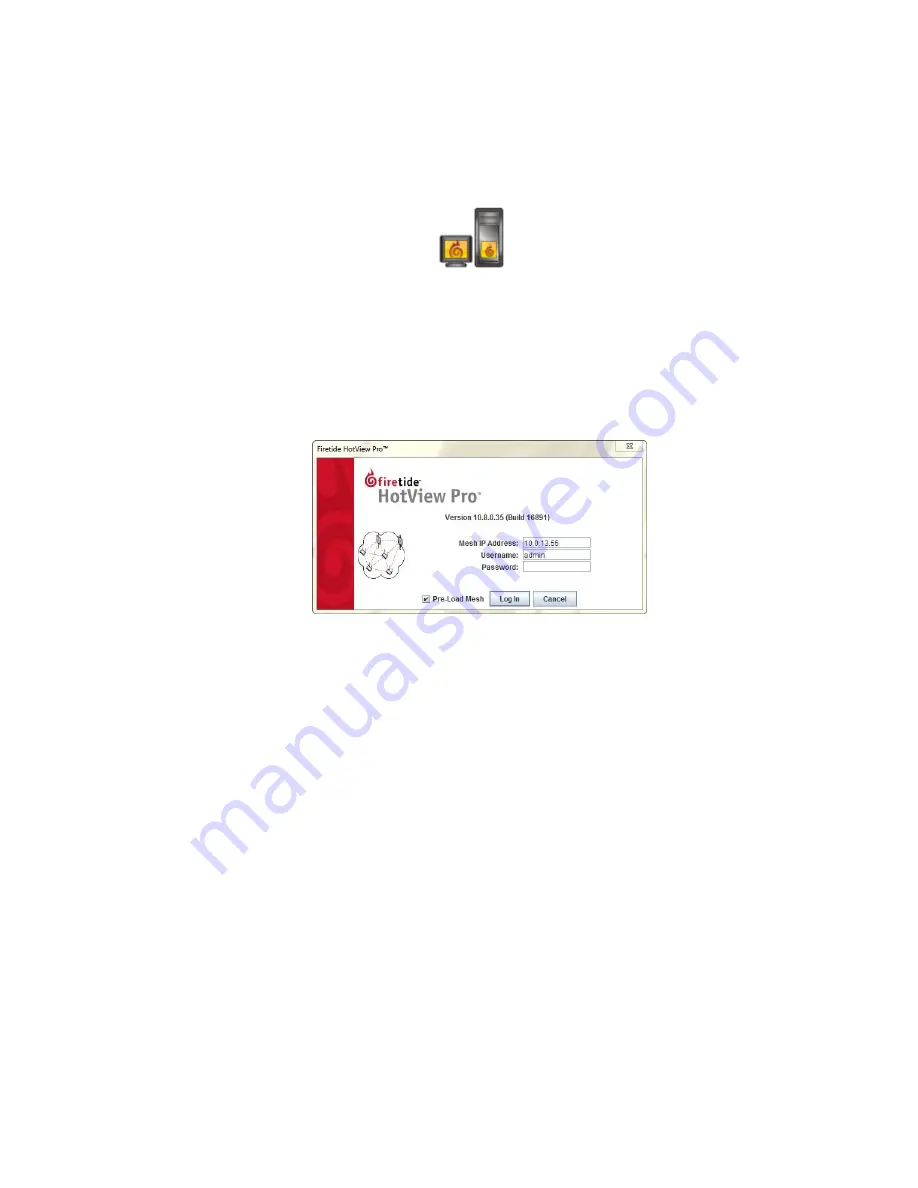
Single-click to start the Quick Launch feature of HotView Pro, which opens 
the server and client software at the same time. 


4.


Login with the correct user name and password. The default user name is 
hv_admin; and the default password is firetide. 
The system initializes. 

5.


Go to 

Mesh > Add Mesh > 

login with the default user name and password. 

The default user name is admin; and the default password is firetide. 


6.


Make sure that the node is visible in HotView Pro. 
If you cannot see the node in the mesh network view, see the 

troubleshooting information in the 

HotView Pro Reference Manual

7.


Apply the saved configuration from a HotPort 7010/7020 mesh node. 

Note: 

Set manual overrides, such as wireless mode and channel, if necessary. 


8.


Configure the node as needed: 

-


Configure the radio or radios. 

-


Set the extended range feature if the distance between the nodes is 
more than 0.8 km (0.5 mile). Set the range for the longest individual 

link in the mesh. 

Example: 9 links are about 0.25 miles apart and 1 link 

is 3 miles apart. The range is 1 to 3 miles.


-


Set the multi-hop optimization feature if needed. 

Note: 

For information about specific features and configuration procedures, see 

the 

HotView Pro Reference Manual

Содержание HotPort 5020

Страница 1: ...HotPort FiretideInstallationGuide HotPort 5020 Edge Nodes Published March 2014 Revised 2016...

Страница 2: ......

Страница 3: ...bleconnectivityanywhere HotPort andHotPoint areall trademarksofFiretide Inc Allothertrademarksarethepropertyoftheir respective owners Informationinthisdocumentissubjecttochangewithoutnotice Firetide I...

Страница 4: ...hazardsarethoseenvironmentswherethedangerof electrocutionisprobable Animageappearsbeforeeachelectrical hazard statement Warnings contain safety information that you must obey If you do notobeytheinstr...

Страница 5: ...information Youmustalsohaveadministratoraccesstothemeshtobeabletoreceive technical support Thenexttableliststhecontactinformationforcustomersupport Worldwide customer support Days Hours Contact Americ...

Страница 6: ...r 2 Product comparison 3 Beforeyoupermanentlyinstall 5 Preparing what you need to install 5 Box contents for a HotPort 5020 E node 5 Parts of an edge node 6 Ground screw 7 LEDs 7 Reset button 7 Antenn...

Страница 7: ...hing straps 24 Weatherizing the connectors 25 Troubleshooting 26 DFS 26 Cannot see a node in HotViewPro 26 After multiple reboots a node is missing 27 Static routes 27 Performance not as expected 28 R...

Страница 8: ......

Страница 9: ...adiotoextendtheedgeofameshnetwork withasingle25Mbpsdatalink ThenextimageshowsthreeHotPort7020meshnodeswithoneHotPort5020 E node TheHotPort7020meshnodesjointogethertomakeacorenetwork The HotPort5020 En...

Страница 10: ...intswith5 55 0 0orlaterfirmware HotViewPro10 15 0 0andlater HotPort5020edgenodescomeintwomodels HotPort5020 Eextendsdataconnectivityinameshnetwork HotPort5020edgenodescomewith7 15 0 0orlaterfirmwarein...

Страница 11: ...er gatewayinterface and mobile modes They behave differently from mesh nodes Gatewayservernode Gatewayinterfacenode Meshnode Mobilenode Ethernet ports One GigE port 10 100 1000 Mbps Four GigE ports UD...

Страница 12: ...HotPort 5020 edge nodes 4...

Страница 13: ...HotPort 5020 E node TheHotPort5020 Enodeboxcontainstheseitems HotPortedgenodeinaNEMA 4Xenclosureandanassembledmountbracket One3dBiomni directionalstagingantenna Caution Donotusestagingantennasoutdoor...

Страница 14: ...ewhen it is oriented correctly for installation ona pole Radio1andRadio2LED Power LED 1 Radio1 11agn 2 3 Pressurereliefvalve Ethernet port D Cport Thenextpictureshowstheconnectors resetcoverscrew andg...

Страница 15: ...portandtheDCpowerconnector LEDs ThepanelthathastheFiretidelogohastheseLEDs Radio1andRadio2 whichindicateradiostatus HotPort5020 Enodeshave oneradio whichisalwaysRadio1 TheRadio1LEDcomeson TheRadio2 LE...

Страница 16: ...o software Dataandotherapplicationthroughputteststomakesurethenodescan sendandreceivedata Learntousetheradioalignmenttool Train installation personnel Materials thatarenot included Theseitemsarerequir...

Страница 17: ...esh configuration and apply the file on the edge node ToconfigureanedgenodeanddotestswithHotViewProsoftware 1 Put the node on a table 2 Maketheconnectionsshowninthenextfigure Note Theadministratorcomp...

Страница 18: ...themesh network view see the troubleshooting information in the HotView Pro Reference Manual 7 ApplythesavedconfigurationfromaHotPort7010 7020meshnode Note Setmanualoverrides such aswirelessmodeandch...

Страница 19: ...wappearsfromwhichtoselectatest Ping Apingtest checksfora linkbetween thenodes Itdoesnot generateenoughtraffictoaffectmeshoperation Theidealresultisa low consistent pingresponsetime Highlyinconsistentt...

Страница 20: ...s outdoors Thestaging antennasareratedforindooruseonly Damagecausedfrom outdooruseofindoorratedantennasisnot covered by product warranty Youarenowreadytopermanently installthenode Next youhaveto attac...

Страница 21: ...Beforeyoupermanentlyinstall 13...

Страница 22: ...Installthenodeandantennasassemblyandotherdevices suchascameras oraccesspointstoapermanentlocation Tools required ForHotPort5020edgenodes youneedtohave 2 Phillips screwdriver Small adjustable wrench Wi...

Страница 23: ...er poleorantennatothenearestpowerline shouldbeatleasttwicethetotallengthofthepole antennacombination This distance ensures that the polewillnot contact a powerlineif it falls duringor after installati...

Страница 24: ...ing Make sure that all safety equipment is in good condition Do notusebrokenordamagedtoolsorequipment Alwaysusesafework practicesandobeyalllocalandnationalguidanceforearthground requirements and elect...

Страница 25: ...Antenna bracket Optional Otherdevices 4 Attach the antenna to the antenna bracket Refer to theinstallation proceduresfortheantenna 5 Attach thenode to thebracket so that whenit is inits permanent loca...

Страница 26: ...groundingequipmentiscorrectlyinstalled 3 Makeallconnectorsweatherproof See Weatherproofprocedures on page 35 Caution Donotuseport2orport3ofaHotPort7020meshnodeto poweraHotPort5020node AHotPort5020node...

Страница 27: ...eoneachsideofthedevice Captive screws Thenextpictureshowsthebracketpiecesandorientationtothenode The mountbrackethasmultipleholesandslots soyoucanusebolts straps orother materialstoattachthenode toasu...

Страница 28: ...unt bracket Fourscrews includedinthemountkit ormasonryanchors notincludedin the mount kit nodewithonebracketpiecewithhooks Toattach a node to a wall 1 Usefourscrewsor masonry anchors toattachthe mount...

Страница 29: ...ach thenodeto a verticalpole 1 Put the two U bolts through the holes in the gripper 2 On each U bolt put a washer alock washer and a nut Note A pole with a small diameter usually requires a second nut...

Страница 30: ...Outdoor node installation 22 6 UselockwashersandnutstosecurethebrackettotheU bolts Rails 7 Hangthenodewith thehooks overtherailofthebracket...

Страница 31: ...nttothepole Bestpractice Useaspraytopreventcorrosiononthebracketandmount hardware Attaching a node to a horizontal pole Recommendedtool hexwrench included orsmalladjustablewrench Toattachthenodetoahor...

Страница 32: ...ole Bestpractice Useaspraytopreventcorrosiononthebracketandmount hardware Attaching straps Youneedtousestrapswhenyouusepolesof5cm 2inches ormoreindiameter Youcanalsousestrapsforextrasupportanddurabili...

Страница 33: ...rease durability of the attachmenttothepole Bestpractice Useaspraytopreventcorrosiononthebracketandmount hardware Weatherizing the connectors TheHotPort5020 Mnodecomeswithafield installableweatherized...

Страница 34: ...ave internet access Thisproductalsorequiresamanagementlicensesothatyoucanmanagethe device from the HotView Pro network management software FormoreinformationaboutDFSmanagement refertotheHotViewProRefe...

Страница 35: ...rationchangesyoumaketothenewimageare notcopiedtothebackupimage Sometimes whenyoureverttothebackup image anodemightnotimmediatelyrecover Checkforself interference Radios1 and2inanodecannotconnecttoeach...

Страница 36: ...ed YoucanresetaHotPort5020edgenodewiththeresetbutton Theresetbutton isbehindthepressurereliefvalveonthebottompanelofthenode Forthisprocedureyouneed Paperclip stiff wire orthinpieceofplasticorwood such...

Страница 37: ...atesthefirmwareimmediately If you select the Activate Later check box the scheduler copies the firmware imagetothenodebutdoesnotactivatethefirmware Whenyouscheduleanupgradetime SchedulerOperation Late...

Страница 38: ...rs andthenselect themesh or devicebyID or name Note Thesystemselectsallnodeswithinameshforsimultaneousupgrade becauseallofthenodeshavetorunthesamefirmware Ifanodeshouldnot receivetheupgradeimage youca...

Страница 39: ...5020 E via the included PoE or a DC power source that you have designed per datasheet specifications 4 ThepowerLEDcomeson Thenodebootsandisreadytouseinoneminute 5 Attach the stagingantennas 6 Single...

Страница 40: ...thecountrycorrectly thedevicemightoperateina mannerthatisnotlegalorcreateproblemswithotherwirelessdevices a Selectthecountryofoperationfromthedrop downlist b ClickSetCountryCodeNow Whenyousetthecountr...

Страница 41: ...Troubleshooting 33...

Страница 42: ...tPort 7020 meshnodewithasunshield Antenna with weatherproof connector Weatherproof connectors Meshnodewithsunshield Best practice You can use colored tape for easy identification of the connectors fro...

Страница 43: ...astictapeputdirectlyonthecable Vinyl electricaltapeasacoveroverthemastictapepreventsthemasticfrommelting in hot weather Rubbersplicingormastictape alsoknownasself amalgamating self sealing self fusing...

Страница 44: ...rethattheFiretidedeviceworks 5 Wrapalayerofelectrical tape stickyside out overthe connector fromthe end to approximately2 5 cm 1inch of cable Overlap the tape by 40 with eachturn Note Wrap the electri...

Страница 45: ...verthefirst layerofelectrical tape Theantennaconnectorisreadyforinstallationinanoutdoorenvironment Makingaweatherproofcabletonodeconnection You need to make weatherproof two connections Fromtheantenna...

Страница 46: ...r 3 Ensurethatthecableandconnectors areclean Cleanoff oil water grease anddirtbeforeyoucontinue 4 Wrap a layer of electrical tape sticky side out over the arrestor to node connectorandwrapapproximatel...

Страница 47: ...f mastictapeovertheelectrical tape Makea 40 overlap on each turn Start from the base of the unit to at least 2 5 cm 1 inch of the cable 7 Wrap a layer of electrical tape smoothsideout sticky sidein ov...

Отзывы:

Похожие инструкции для HotPort 5020