Ferm
81
13. ªÂÙ·Û¯ËÌ·ÙÈÛÙ‹˜ ÊÔÚÙ›Ûˆ˜
14. ºÈ˜ ÙÔ˘ ÊÔÚÙÈÛÙ‹
¶ÂÚȯÔÌÂÓ· Ù˘ Û˘Û΢·ÛÈ·˜
1
ÃÔÚÙÔÎÔÙÈ΋ Ì˯·Ó‹ Ì ¯ÔÚ‰‹ ‰›¯ˆ˜ ηÏÒ‰ÈÔ
1
™˘ÏÏÔÁ‹ Ì·Ù·ÚÈÒÓ
1
ºÔÚÙÈÛÙ‹˜ Ì·Ù·ÚÈÒÓ
1
¶ÚÔÊ˘Ï·ÎÙÈÎfi˜ ÂÍÔÏÈÛÌfi˜
1
™ÂÙ ‚ȉÒÓ ÙÔ˘ ÚÔÊ˘Ï·ÎÙÈÎÔ‡ ÂÍÔÏÈÛÌÔ‡
6
§Â›‰Â˜
1
√‰ËÁȘ ¯ÚËÛˆ˜
1
√‰ËÁ›Â˜ ·ÛÊ·Ï›·˜
1
∫¿ÚÙ· ÂÁÁ‡ËÛ˘
∂ϤÁÍÙÂ, Â¿Ó Ë Ì˯·Ó‹, Ù· ÂχıÂÚ· ÂÍ·ÚÙ‹Ì·Ù· Î·È Ù· ·ÍÂÛÔ˘¿Ú ‰ÂÓ ¤·ı·Ó ‚Ï¿‚˜ ηٿ
ÙË ÌÂÙ·ÊÔÚ¿.
2. √¢∏°π∂™ ∞™º∞§∂π∞™
∂ÂÍ‹ÊËÛË Û˘Ì‚fiψÓ
™’ ·˘Ùfi ÙÔ ÂÁ¯ÂÈÚ›‰ÈÔ Î·È/‹ ÛÙÔ Ì˯¿ÓËÌ· ¯ÚËÛÈÌÔÔÈÔ‡ÓÙ·È Ù· ·ÎfiÏÔ˘ı· ۇ̂ÔÏ·:
¢È·‚¿ÛÙ ÙȘ Ô‰ËÁ›Â˜.
™Â ÂÓ·ÚÌfiÓÈÛË Ì ԢÛÈÒ‰Ë ÈÛ¯‡ÔÓÙ· ÚfiÙ˘· ·ÛÊ·Ï›·˜ ÙˆÓ ∂˘Úˆ·˚ÎÒÓ
√‰ËÁÈÒÓ.
ªË¯·Ó‹ ÎÏ¿Û˘ πI – ¢ÈÏ‹ ÌfiÓˆÛË - ¢ÂÓ ··ÈÙÂ›Ù·È ÁÂȈ̤ÓÔ˜ ÚÂ˘Ì·ÙÔÏ‹Ù˘.
ÀÔ‰ËÏÒÓÂÈ Î›Ó‰˘ÓÔ ÙÚ·˘Ì·ÙÈÛÌÔ‡, ı·Ó¿ÙÔ˘ ‹ ˙ËÌÈ¿˜ ÙÔ˘ ÂÚÁ·Ï›Ԣ, ÛÂ
ÂÚ›ÙˆÛË Ô˘ ‰ÂÓ ·ÎÔÏÔ˘ı‹ÛÂÙ ÙȘ Ô‰ËÁ›Â˜ Ô˘ ·Ó·Ê¤ÚÔÓÙ·È Û ·˘Ùfi ÙÔ
ÂÁ¯ÂÈÚ›‰ÈÔ.
ÀÔ‰ËÏÒÓÂÈ Î›Ó‰˘ÓÔ ËÏÂÎÙÚÔÏËÍ›·˜.
¡· ·Ó·Î˘ÎÏÒÓÂÙ ¿ÓÙÔÙ ÙȘ ̷ٷڛ˜.
ªfiÓÔÓ ÁÈ· ÂÛˆÙÂÚÈÎÔ‡˜ ¯ÒÚÔ˘˜.
12
Ferm
5. USE
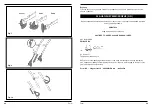
Head adjustment
Fig. 6 + 7
Adjusting the angle of the head (Fig. 6):
•
Grip the head of the trimmer and press and hold the button which has the word “push”
printed on it.
•
Adjust the head to the desired angle.
•
Release the button to lock the head in your selected position.
Rotating the head to switch from trimming position to edging position (Fig. 7):
•
Grasp the head of the trimmer and twist it half a turn around the handle.
Caution! Ensure that your keep your fingers clear of the trigger during these
operations!
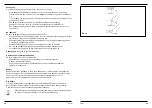
Extension tube adjustment
Fig. 8
The handle length on this product can be varied, allowing you to reach difficult places without
the use of a ladder.
•
Grip the trimmer firmly and lift the latch on the lower handle.
•
Extend the handle to the required length.
•
Press the lever firmly down again to lock the handle.
Central handle adjustment
Fig. 9
The angle and the reach of the central handle can be adjusted to your preference.
•
Loosen the bolt on the side of the central handle.
•
Adjust the angle and reach to the position that is most comfortable.
•
Tighten the bolt again to fix the central handle in its new position.
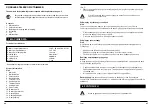
Starting and stopping
Fig. 10
The handle of this product is designed with a safety button to prevent accidental starting.
•
Press and hold the safety button located on either side of the handle, then press the start
button. You can now release the safety button.
•
Release the start/stop lever to stop the blades.
Note:
The blades continue to spin after the trigger is released, wait for it to stop before putting
your feet or hands near the cutting area.
Содержание FGT-12V
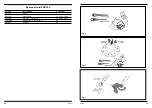
Страница 2: ...Ferm 91 Explodedview 02 Ferm Fig 1 Fig 2 Fig 3...
Страница 5: ...Ferm 05 88 Ferm Ferm 6 12 12 Fig 10...


