20
en
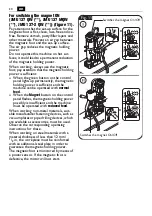
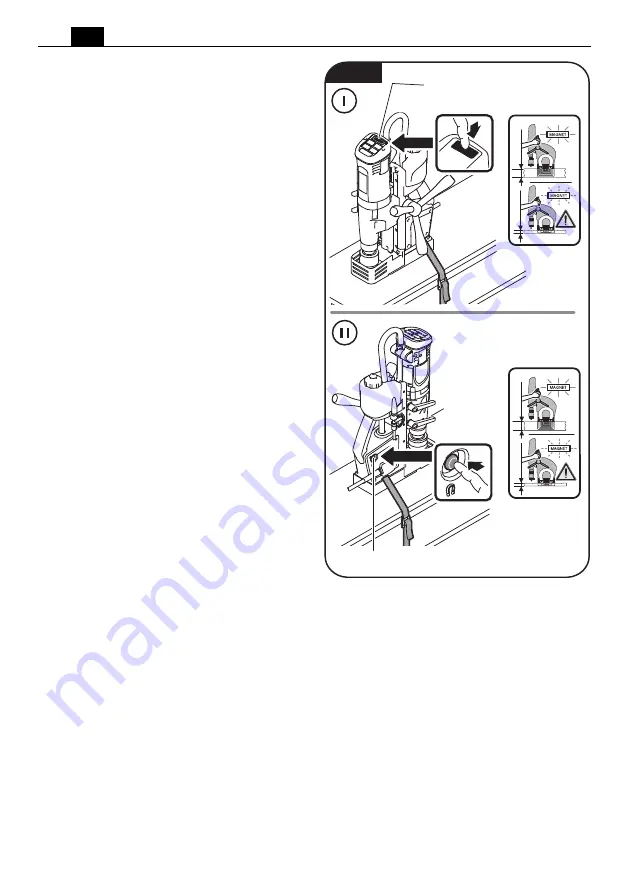
For switching the magnet ON
(JMU 137 QW (**), JMU 137 MQW
(**), JMU 137-2 QW (**)) (figure 11).
Pay attention that the set-up surface for the
magnetic foot is flat, clean, rust-free and ice-
free. Remove varnish, putty/filler layers and
other materials. Prevent an air gap between
the magnetic foot and the set-up surface.
The air gap reduces the magnetic holding
power.
Do not operate this machine on hot sur-
faces; it could lead to a permanent reduction
of the magnetic holding power.
When working, always use the magnetic
foot; pay attention that the magnetic holding
power is sufficient:
–
When the green button on the control
panel lights up permanently, the magnetic
holding power is sufficient and the
machine can be operated with
normal
feed
.
–
When the
Magnet
button on the control
panel flashes, the magnetic holding power
possibly is insufficient and the machine
must be operated with
reduced feed
.
When working non-metal materials, suit-
able manufacturer fastening devices, such as
vacuum plates or pipe drilling devices, which
are available as accessories, must be used.
Observe the corresponding operating
instructions for these.
When working on steel materials with a
material thickness of less than 12 mm /
1
/
2
in, the workpiece must be reinforced
with an additional steel plate in order to
guarantee the magnetic holding power.
The magnetic foot is monitored by means of
a power sensor. If the magnetic foot is
defective, the motor will not start.
=
Switches the magnet On/Off
=
Switches the magnet On/Off
> 12 mm
< 12 mm
> 12 mm
< 12 mm
Fig. 11
Содержание JMU 137 PQW
Страница 1: ...JMU 137 QW 7 270 7 273 JMU 137 MQW 7 270 7 273 JMU 137 2 QW 7 270 7 273 JMU 137 PQW 7 270 ...
Страница 2: ...2 Instruction Manual Mode d emploi Instrucciones de uso en 3 fr 32 es 62 ...
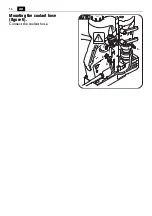
Страница 16: ...16 en Mounting the coolant hose figure 6 Connect the coolant hose 4 3 Fig 6 2 1 ...
Страница 76: ...76 es Montaje de la manguera de refrigerante Figura 6 Conecte la manguera de refrigerante 4 3 Fig 6 2 1 ...

