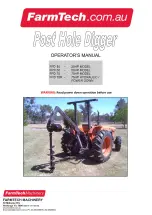
FARMTECH FPD 30 Скачать руководство пользователя страница 5


4

x

FTM post hole diggers are designed and 
manufactured solely for the purpose of bor-
ing holes earth and clay materials.  Under 
no circumstances should they be used for 
any other purpose. 

x

Before using the post hole digger carefully 
read and ensure you understand the con-
tents of this manual and the contents of the 
operators manual for the associated tractor, 
including all relevant safety instructions. 

x

Before operating the post hole digger read 
all the safety warnings that are carried on 
the machine.  Refer to the next page for the 
location and the wording of these warnings. 

x

Never allow an inadequately trained person 
to attach or operate the post hole digger. 

x

Do not operate the post hole digger whilst 
wearing loose clothing, unrestrained long 
hair, jewelery or anything which could be-
come entangled in rotating parts or limit 
your vision. 

x

Only operate the post hole digger on a trac-
tor fitted with a roll-over protective structure 
(ROPS), or a cab incorporating a ROPS, 
complying with AS1636 or equivalent. 

x

Wear ear protection when operating the 
post hole digger on a tractor that is not fitted 
with a sound proofed cabin. 

x

Ensure that the tractor engine power and 
linkage capacity match the requirements of 
the post hole digger.  Refer to the tractor 
operator’s manual for safe working loads, 
including any counter-weighting that may be 
required to balance the weight of the post 
hole digger. 

x

Do not operate the post hole digger without 
all its safety shields and the tractor safety 
shields in place. 

x

Before operating the post hole digger in-
spect the area to be worked to ensure that 
you are familiar with the ground conditions. 

x

Ensure that there are no underground elec-
trical cables, telephone cables, gas, water, 
sewerage or drainage pipes in the area to 
be drilled.  If in doubt about any of the 
above do not start digging until the circum-
stances have been fully investigated and it 
is safe to begin. 

x

Exercise extreme care when operating in 
wet or slippery conditions or on sloping or 
uneven terrain.  Allow for the effect that 
the weight of the post hole digger has on 
the tractor’s stability.  Refer also to the 
tractor manufacturer’s operating and 
safety instructions. 

x

Do not operate the post hole digger with 
people or animals in the vicinity where 
they could be caught in the mechanism 
or injured by the machine.  Keep onlook-
ers at least 6 metres from the digger 
whilst in operation. 

x

Always operate the post hole digger from 
the tractor seat.

x

Never clear earth away from the auger 
whilst it is operating or allow any helper 
to do so.

x

Never allow a person to pull down on the 
digger boom or attach any type of coun-
terweight to the boom to increase pene-
tration.

x

Before dismounting from the tractor or 
allowing any person to approach the post 
hole digger, disengage the PTO, switch 
off the tractor engine and apply the park-
ing brake. 

x

Ensure the tractor engine is switched off 
and the parking brake is applied before 
performing any inspection or mainte-
nance on the digger.  If it is necessary to 
raise the machine for such work ensure it 
is properly supported.  Do not rely on the 
tractor hydraulics for support. 

x

Never allow any person to ride on the 
post hole digger or the tractor when the 
digger is attached. 

x

Relieve all hydraulic pressure before dis-
connecting hoses on hydraulic diggers.  
Oil escaping under pressure can pene-
trate the skin, causing serious injury.  
Seek medical advice immediately if in-
jured by escaping oil. 


Whilst your FTM post hole digger has been designed and manufactured to incorporate all necessary 
safety features it is essential that any person who operates or works on the machine is aware of the 
safety precautions that should be exercised. 

Before operating the post hole digger read the following safety instructions. 


Failure to comply with these warnings may result in serious injury or death.

Содержание FPD 30

Страница 1: ...WA R N I N G R e a d p o w e r d o w n o p e r a t i o n b e f o r e u s e...

Страница 2: ...ic model 6 Connecting hydraulic hoses 7 Attaching Gearbox Auger all models 7 Connecting PTO shaft all models 7 Detaching digger from Tractor 8 Attaching assembled digger to the Tractor 8 Changing the...

Страница 3: ...owned and family operated company We first started manufacturing in 1976 Our company has an excellent production plant in Wodonga set up to specialize in the design and manufacture of post hole digge...

Страница 4: ...as FTM welcomes any warranty repair and apologises for any inconvenience See the last page for the express warranty coverage offered The following information will assist your understanding of warran...

Страница 5: ...start digging until the circum stances have been fully investigated and it is safe to begin x Exercise extreme care when operating in wet or slippery conditions or on sloping or uneven terrain Allow f...

Страница 6: ...of the safety decals fitted to all FTM post hole diggers is shown below It is important that all operators read and follow the information given on the decals They should be kept clean and legible at...

Страница 7: ...ulic cylinder with hoses connected and gearbox with auger attached are supplied as separate items The following instructions apply for the first installation The Hydraulic digger is fitted with bolt o...

Страница 8: ...nput shaft of the gearbox is facing towards the tractor so that the PTO shaft can be fitted Raise the boom to full height to allow the auger to hang vertically then lower it so the end of the auger re...

Страница 9: ...above the ground Stop the tractor engine and apply the parking brake Remove the two attaching bolts from the upper end of the auger and pull down so that it slides off the gearbox shaft If the auger...

Страница 10: ...ecessary to adjust the clutch remove the PTO shaft and turn each of the nuts on the clutch spring bolts by one half turn Turning the nuts clockwise increases spring loading and reduces clutch slip Tur...

Страница 11: ...off the auger flighting then continue drilling When raising or lowering the auger move the tractor forward or backward to keep the auger vertical and compensate for the arc of the boom If the safety...

Страница 12: ...out oil in the gearbox and it is the dealer s responsibility to add it before delivering the machine However before starting the digger for the first time the oil level should be checked and if necess...

Страница 13: ......

Страница 14: ...F G G H H I I J J K K L L 2 1 10 1 14 5 2 9 6 7 8 3 8 7 SPARE PARTS 75 HP POST HOLE DIGGER STANDARD AND POWERDOWN SEE SHEET 2 FOR BILL OF MATERIALS BREAKDOWN OF ITEM 4 4 8 4 12 4 6 4 5 4 3 4 4 4 11 4...

Страница 15: ...HEX NUT 400022 75 HP STD POWERDOWN 4 8 2 M10 FLAT WASHER 400038 75 HP STD POWERDOWN 4 9 2 HEX BOLT M10x70 MM 400040 75 HP STD POWERDOWN 4 10 6 BOLT M12x90 MM UNF 400069 75 HP STD POWERDOWN 4 11 6 FLAT...

Страница 16: ...G G H H I I J J K K L L 2 1 11 1 5 6 2 10 7 8 9 3 9 8 SPARE PARTS 50 HP POST HOLE DIGGER STANDARD AND POWERDOWN SEE SHEET 2 FOR BILL OF MATERIALS BREAKDOWN OF ITEM 4 4 8 4 12 4 6 4 5 4 3 4 4 4 11 4 2...

Страница 17: ...50 HP STD POWERDOWN 4 8 2 M10 FLAT WASHER 400038 50 HP STD POWERDOWN 4 9 2 HEX BOLT M10x70 MM 400040 50 HP STD POWERDOWN 4 10 6 BOLT M12x90 MM UNF 400069 50 HP STD POWERDOWN 4 11 6 FLAT WASHER M12 400...

Страница 18: ...E E F F G G H H I I J J K K L L SPARE PARTS FOR POST HOLE DIGGER 30 HP SEE SHEET 2 FOR BILL OF MATERIALS 6 1 3 8 8 2 10 7 9 COMES IN A PACK OF 4 x BOLT NUT WASHER SEE BREAK DOWN OF ITEM 4 ON RIGHT 4...

Страница 19: ...PRESSURE PLATE B4168 400533 4 5 6 BLUE HD SPRING B3729 400531 4 6 2 M10 HEX NUT 400011 4 7 6 M12 HEX NUT 400022 4 8 2 M10 FLAT WASHER 400038 4 9 2 HEX BOLT M10x70 MM 400040 4 10 6 BOLT M12x90 MM UNF 4...

Страница 20: ...3 1 B8024 24 AUGER 400546 POST HOLE DIGGER ALL 3 1 PAIR OF AUGER TEETH B7512 400525 B8004 B8011 4 2 PAIR OF AUGER TEETH B7512 400525 B8007 B8009 B8014 B8012 4 3 PAIR OF AUGER TEETH B7512 400525 B8015...

Страница 21: ...P O BOX 638 WODONGA VIC 3689...

Отзывы: