background image

LUBRICATING AND MAINTENANCE

INSTRUCTIONS

CH 140 CHIPPER

www.farmiforest.fi

--- 33 ---

9.MAINTENANCE AND LUBRI-

CATION SCHEME

GENERAL

EVERY 8

HOURS

EVERY 20

HOURS

EVERY 40

HOURS

EVERY

2000

HOURS

OR 1

YEAR

PROCEDURE

SEE

PAGE

KNIVES AND

AND ANVILS

X OR

WHEN

NEEDED

Check for

sharpness and

clearance

32

X OR

AFTER

ONE WEEK

Check for the

bolt tightness

32

PTO SHAFT

X

X

Lubricate as

advised in

chapt. 8.2.2.

24

BOLTS AND

FASTENERS

X

Check the

knives and the

anvils and when

neccesary

sharpen or

correct the

clearance

between them.
On a new

machine after

one hour of use.

29

BEARINGS

X

Grease the

bearings.

24 and

26

Содержание VALBY CH 140

Страница 1: ...1102 JaK www farmiforest fi 03513950 03514400 FARMI Forest Ahmolantie 6 FIN 74510 PELTOSALMI FINLAND Tel 358 0 17 83 241 Fax 358 0 17 823 606 It is very important to read this instruction handbook thoroughly before using the machine CHIPPER CH 140 From machine 351 1200 ...

Страница 2: ......

Страница 3: ...rnings are ignored Read this manual carefully page by page until you under stand it completely Failure to do so will reslult in personal injury and or equipment dam age All personnel including operators maintenance crew etc should read this manual be fore start up This manual should be considered a permanent part of your machine and should remain with the machine when you sell it IMPORTER NORTHEAS...

Страница 4: ... appear on the ma chine with the color combination of yel low and black CAUTION This message denotes a specific poten tial hazard The sign will be displayed on the machine in areas of potential hazard The sign will have the color combination of yellow and black WARNING This message denotes the most serious specific potential hazard The sign will be displayed on the machine in areas of po tential h...

Страница 5: ...rs of the universal shaft are in their place and the ransmis sion chains are fastened D D D D Safety goggles earmuffs and a hard hat are obligatory when chipping Use respirator mask if necessary D D D D Do not wear loose clothing loose sleeves scarves or long uncovered hair around moving parts of machinery Also avoid gloves of poor condition or with loose fitting because they might get caught in t...

Страница 6: ...ays use the lock bolt before and during maintenance on the machine D D D D Place the PTO shaft in the holding device when disconnected from tractor 3 1 ROTATING KNIVES Risk of cutting injury or hits by flying debris Do not reach into the feed chute for any reason Failure to follow these instructions could result in serious injury or death Danger 3 2 SAFETY INSTRUCTIONS FOR THE HYDRAULIC FEEDER AND...

Страница 7: ... after which go to doctor Use safety goggles D D D D Avoid mixing lubricants of different grade and quality Use only recom mended oils or oils with corresponding characters 3 4 SAFETY INSTRUCTIONS FOR THE SEPARATE HYDRAULIC MOTOR USE D D D D Check the moving parts They should be fastened in place in good working condition and all shields and guards must be in place D D D D Inform everyone who work...

Страница 8: ... 4 5 PLATES AND STICKERS FOR THE CHIPPER 13 43511730 Plates and stickers for chipper CH 140 16 5 TRAFFIC ON PUBLIC ROADS 17 5 1 TRANSPORT POSITION 17 6 PREPARATIONS FOR START UP 17 6 1 LIFTING 17 6 2 MOUNTING THE CHIPPER UNIT 18 6 3 MOUNTING THE EXTENSION PLATE 18 6 4 PTO SHAFT 19 6 4 1 CUTTING THE PTO SHAFT TO THE CORRECT LENGHT 19 7 OPERATING THE CHIPPER 20 7 1 SAFETY WHEN OPERATING 20 7 2 PRIOR...

Страница 9: ...LINED AXLE 28 8 5 KNIVES AND ANVILS 29 8 5 1 SHARPENING THE KNIVES 29 8 5 2 ADJUSTING THE CLEARANCE BETWEEN THE KNIVES AND THE HORIZONTAL ANVIL 30 8 5 3 SHARPENING THE ANVIL 31 8 6 TIGHTENING THE BOLTS 32 8 6 1 TORQUES AND CLEARANCES 32 9 MAINTENANCE AND LUBRICATION SCHEME 33 10 TROUBLE SHOOTING 34 11 STORING AND DISCARDING 35 11 1 STORING THE CHIPPER 35 11 2 DISCARDING THE CHIPPER 35 12 CRIME PRE...

Страница 10: ... 38 Bearing feeder side 42 Bearing splined axle side 43 Mounting frame assy Drawbar assy 44 03342144 F150 Mechanical feed chute 45 M4 PTO SHAFT 46 WHEN ORDERING SPARE PARTS PLEASE INDICATE MACHINES TYPE FROM THE MACHINE PLATE SPARE PARTS ORDER NUMBER DESCRIPTION AND QUANTITY REQUIRED EXAMPLE CH140 43510220 Knife 2 pcs ...

Страница 11: ...e used as fuel CH140 is a mobile light weight machine for handling all kinds of wood waste from parks roadsides and other environmental cleaning The chipper can be fittedwith a separate hydraulic power feed 4 2 MAIN COMPONENTS 1 UPPER CHAMBER 2 LOWER CHAMBER 3 DISC 4 KNIVES 5 VERTICAL ANVIL 6 HORIZONTAL ANVIL 7 TWIG BLADE 8 DISCHARGE CHUTE 9 LID 10 HOLDING DEVICE FOR THE PTO SHAFT 1 3 2 5 7 8 6 4 ...

Страница 12: ... fi 12 4 3 DIMENSIONS Fig 2 Dimensions of CH 140 4 4 CHIPPER ACCESSORIES D Single or dual motor hydraulic feed manual or gravity hopper D Independent hydraulic unit HD11 D Separate hydraulic motor drive HD 100 D Skid Steer adaptation D Transmission T160 ...

Страница 13: ...est fi 13 4 5 PLATES AND STICKERS FOR THE CHIPPER IMPORTANT Do not remove any plate or sticker placed by the manufacturer on the chipper or the accessories Replace missing ones immediately You can order them as a spare parts 1 2 3 4 5 6 8 7 9 10 11 ...

Страница 14: ...PLATES AND STICKERS CH 140 CHIPPER www farmiforest fi 14 3 4 5 40142080 3 pc 1 pc 41011750 1 pc 41014140 CH 140 1 30140602 1 pc 2 1 pc 6 41014170 1 pc 41014310 ...

Страница 15: ...PLATES AND STICKERS CH 140 CHIPPER www farmiforest fi 15 41014270 5 pc 30141147 1 pc 41014110 2 pc 10 9 8 7 40141160 1 pc 41015750 1 pc 11 ...

Страница 16: ...ety goggles earmuff and a hard hat are oblicatory when chipping 3 5 41014140 Do not operate this machine until the owner s manual has been completely read and understood 1 6 41014120 Safety precautions before maintaining the chipper 1 7 40141160 Rotation speed and rotation direction of the PTO shaft 1 8 30141147 Sharpening the knives 1 9 41014270 Lifting point 1 10 41014110 Beware of cutting tools...

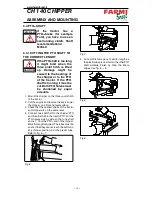
Страница 17: ...per is firmly connected to the tractor and all fasteners are in place IMPORTANT Make sure that the rear lights of the tractor are visible Use a separate light panel if needed 6 PREPARATIONS FOR START UP Do not attempt to operate this chipper without proper training Read and understand the owner s manual before operating the machine WARNING Failure to heed the warnings printed on the chipper or in ...

Страница 18: ...s Adjust the lid control with the rod 5 A Power Take Off shaft PTO shaft transfers the power to the chipper The chipper has a 1 3 8 diameter 6 spline PTO hookup 6 Check for the correct length of the PTO shaft Refer to 6 4 Fig 4 D Turn off the engine D Lower the chipper on its legs on a hard level surface D Turn the chipper s axle by hand to ensure that the disk can turn freely and that thereare no...

Страница 19: ...Mount the chipper on the three point hitch of the tractor 2 Cut the engine and remove the keys Lower the chipper on a firm and level surface 3 Check that the splined shafts of the tractor and chipper are on the same level 4 Connect one shaft half to the chipper PTO and the other half to the tractor PTO Put the PTO halves side by side so that one shaft end is 1 from the PTO end of the chipper Mark ...

Страница 20: ...n their place and the transmission chains are fastened Safety goggles earmuffs and a hard hat are obligatory when chipping Use respirator mask if necessary Do not wear loose clothing loose sleeves scarves or long uncovered hair around moving parts of machinery Also avoid gloves of poor condition or with loose fitting because they might get caught in the branches Stay alert Do not operate the chipp...

Страница 21: ...king Safety goggles earmuffs and a hard hat are obligatory when chipping Use respirator mask if necessary Do not wear loose clothing loose sleeves scarves or long uncovered hair around moving parts of machinery Also avoid gloves of poor condition or with loose fitting because they might get caught in the branches If a wood jams inside the chipper cut the engine remove the keys and wait for all mov...

Страница 22: ...e bolt Screw on the lock nut and tighten it to 45 Nm 38 foot pounds 8 Place another spring washer on the bolt and thread the bolt through the knife into the disk as shown in figure 11 Tighten the bolts to 45 Nm 38 foot pounds IMPORTANT To re tain the balance always use all four fas tening bolts of the knife Interchange the cutting and counterweight knives at timesto ensure that they are equally mu...

Страница 23: ...rpm s This will cause risk of cavitation and might damage the hydraulic motor Check that no sounds of cavitation emit from the hydraulic motor CAUTION To prevent cavitation it is very important to slowly reduce the base machine rpm s to idle before disconnecting the hydraulics IMPORTANT 7 7 PARKING THE CHIPPER D Ensure that the chipper is placed on a hard level and horizontal surface D Ensure that...

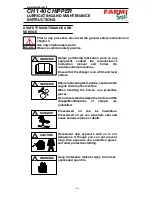
Страница 24: ...e chipper is on a firm and level surface WARNING WARNING Before lubricating the machine shut down the engine and stop the machine When handling the knives use protective gloves Do not ever stand between the tractor and the chipper Modifications of chipper are prohibited DANGER Pressurized oil can be hazardous Pressurized oil jet can penetrate skin and cause serious injuries or death CAUTION Occasi...

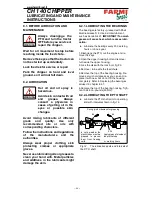
Страница 25: ...etal particles and additives in the lubricants might damage the skin 8 2 1 LUBRICATING THE BEARINGS The bearings are factory greased with Shell Alvania Grease R 3 Use a similar lubricant such as Kendall L427 IMPORTANT Too much grease will cause heat which reduces lubri cation D Lubricate the bearings every 200 working hours or once a year 1 Disengage the PTO cut the engine and re move the keys 2 O...

Страница 26: ...a hook spanner until the bearing is tightly on the cone or to 80 Nm However the outer ring of the bearing should turn freely Note the locati on of the tightening cone on the shaft 16 Bend one claw of the securing ring 3 into a notch on the axle nut 17 Install the other half of the dust cover and end plate on the bearing housing Install the spacer ring 4 on the shaft 18 Lower the disk to the bearin...

Страница 27: ... and outer ring see Fig 17 Do not force the feeler gauge through the clearance 7 If the clearance exceeds 0 03 mm bend the claw of the securing ring 2 out from the notch on the axle nut 1 8 The bearing is tightened by turning the axle nut clockwise with a 70 mm or 2 3 4 hook spanner until the right clearance is achieved Do not tighten by hammering the axle nut 9 Turn the axle nut clockwise until t...

Страница 28: ...s fig 13 IMPORTANT Welding damages the bea rings 7 Grind a 7 16 11 mm deep groove about 11 16 17 mm from the edge of the axle fig 19 8 Turn the axle so that it comes loose and can be removed 9 Clean the hole before mounting the new axle Tap the new axle slightly in place 10 Protect the joint faces from splashes before welding 11 Weld a fillet weld for example ESAB 68 81 OK 48 OK Femax 38 65 with 3...

Страница 29: ...gh By keeping the knives as original pairs they will wear equally and the disk will stay in balance IMPORTANT Avoid getting the knife hot when sharpening Sharpen both knives the same amount 1 Disengage the PTO cut the engine and re move the keys 2 Open the upper housing bolts 3 4 or 19mm wrench Turn the upper housing to the side 3 Lock the disk with the lock bolt fig 20 4 Remove or turn the feed c...

Страница 30: ...o be adjusted Adjust the anvil if the clearance to the edge of the knives exceeds 1 5 mm or 1 16 of an inch Re fer to fig 24 1 Disengage the PTO cut the engine and re move the keys 2 Open the upper housing bolts 3 4 or 19mm wrench Turn the upper housing to the side 3 Lock the disk with the lock bolt fig 20 4 Remove or turn the feed chute to the side 5 Loosen the three fastening bolts A B of the an...

Страница 31: ... 1 2 1 5mm ROTOR ANVIL LOCK BOLT A TIGHTENING TORQUE 155 FOOT POUNDS 200 Nm KNIFE ANVIL ADJUSTING NUTS C ANVIL KNIFE BOLT TIGHTENING TORQUE 38 FOOT POUNDS 45 Nm Fig 24 8 5 3 SHARPENING THE ANVIL If you notice wear or rounding of the inner edge of the anvil sharpen the anvil so that original angles are retained ...

Страница 32: ...brication schedule chapter 9 Tighten as indicated in the specifica tions below 3 2 1 4 5 Fig 25 8 6 1 TORQUES AND CLEARANCES ITEM Socket size Torque Nm Foot pounds 1 Check knife bolts tightness 17mm 11 16 45 38 2 Check bearing housing bolts tightness on both sides 19mm 3 4 50 38 3 Check anvil bolts tightness 24mm 15 16 200 155 ITEM Socket size Measurement 4 Check clearance between knives and anvil...

Страница 33: ...OCEDURE SEE PAGE KNIVES AND AND ANVILS X OR WHEN NEEDED Check for sharpness and clearance 32 X OR AFTER ONE WEEK Check for the bolt tightness 32 PTO SHAFT X X Lubricate as advised in chapt 8 2 2 24 BOLTS AND FASTENERS X Check the knives and the anvils and when neccesary sharpen or correct the clearance between them On a new machine after one hour of use 29 BEARINGS X Grease the bearings 24 and 26 ...

Страница 34: ... BRANCHES TOO LOW RPM S INCREASE RPM S STRANGE CHIPPER NOISE BEARINGS NOT OK 1 GREASE THE BEARINGS 2 REPLACE THE BEARINGS LOOSE BOLTS OR FASTENERS TIGHTEN THE BOLTS AND FASTENERS INCORRECT CLEARANCE BETWEEN KNIVES AND ANVILS ADJUST THE CLEARANCE INSUFFICIENT CHIPPING POWER INCORRECT CLEARANCE BETWEEN KNIVES AND ANVILS ADJUST THE CLEARANCE DULL EDGED KNIVES SHARPEN THE KNIVES TRACTOR STALLING WHEN ...

Страница 35: ...mation 12 CRIME PREVENTION D Contact local authorities and or your retailer D If a theft occurs notify the law enforcement agency having jurisdiction and the insurance carrier immediately D Give a full description and a complete set of serial and identification numbers to the investigating officer and insurance carrier D If available provide the investigating officer with photographs of the actual...

Страница 36: ...3 Rotor weight 100 kg 220 lbs Rotor s rotation speed 900 1700 RPM Bearings Spherical roller bearings Discharge chute 360 adjustable Discharge chute height 86 1 2 m Opening of upper chamber Single hinge Chipper weight no feeder 625 lbs 285 kg Oil demand P T O speed chip 13 mm 1 2 540 rpm 3 10 gal min Type of feed chute Manual chute or hydraulic feed Sound pressure level Sound power level CEN TC144 ...

Страница 37: ...der no Description Remarks Qty 03510120 Discharge pipe complete 1 43510250 Discharge pipe 1 2 43510240 Lid 1 3 52117108 Lock nut 5 4 03510300 Chain 1 5 94612082 Draw spring DU26 DL2 6 L106 1 6 43340769 Nut 1 7 43511670 Safety bolt M10x35 1 8 52840295 Cotter pin 1 9 43340751 Reel 2 10 43511650 Safety bolt M10x50 2 ...

Страница 38: ...PPER www farmiforest fi 03514400 38 03514400 CH 140 Chipper 1 2 2 4 2 1 2 2 2 3 3 9 10 11 12 13 17 16 19 20 21 24 25 26 27 31 32 48 49 50 51 3 11 11 11 11 9 8 31 30 10 60 18 25 14 15 22 15 22 56 56 1 56 2 56 3 56 4 15 12 47 ...

Страница 39: ...ew M12x60 DIN931 4 10 41215682 Washer 4 11 52117124 Lock nut M12 DIN985 7 12 52062916 Screw M16x60 DIN933 1 13 52110079 Nut M16 DIN934 1 14 43510420 Shaft 1 15 16 43511630 Screw M12x50 2 17 33510180 Upper housing 1 18 52062031 Screw M12x40 DIN933 2 19 43340546 Screw 1 20 33341009 Vertical anvil 1 21 33340993 Horizontal anvil 1 22 23 24 43291103 Anvil adjuster 2 25 52110053 Nut M12 DIN934 8 26 5206...

Страница 40: ...PPER www farmiforest fi 03514400 40 03514400 CH 140 Chipper 1 2 2 4 2 1 2 2 2 3 3 9 10 11 12 13 17 16 19 20 21 24 25 26 27 31 32 48 49 50 51 3 11 11 11 11 9 8 31 30 10 60 18 25 14 15 22 15 22 56 56 1 56 2 56 3 56 4 15 12 47 ...

Страница 41: ...sher M10 DIN127 1 47 43341429 Locking pin 1 48 52842143 Cotter pin 5x10⁵ 1 49 43511660 Safety screw M16x240 1 50 52117165 Lock nut M16 DIN985 1 51 43341270 Mounting plate 2 52 53 54 55 56 43513140 Extension plate mounting 1 56 1 43512490 Extension plate 1 56 2 52062023 Screw M12x30 DIN933 1 56 3 52200508 washer M12 DIN440 1 56 4 52117124 Lock nut M12 DIN985 1 57 58 59 60 43511630 Safety screw M12x...

Страница 42: ... 1 54513569 End plate 1 2 54512371 Tightener sleeve complete 1 2 1 Shaft nut 1 2 2 Lock plate 1 2 3 Tightener sleeve 1 3 43513360 Spacer ring D90x12 7 1 4 54512363 Bearing 1 5 54513551 Bearing housing 1 5 1 52401215 Grease nipple 1 8 1 5 2 Screw M10x50 DIN931 10 9 2 6 43513350 Spacer ring D90x5 4 1 7 52334232 Seal Order no including four pieces 1 ...

Страница 43: ... 2 1 2 1 Part Order no Description Remarks Qty 1 52334232 Seal Order no including four pieces 1 2 54512371 Tightener sleeve complete 1 2 1 Shaft nut 1 2 2 Lock plate 1 2 3 Tightener sleeve 1 3 54512363 Bearing 1 4 54513551 Bearing housing 1 4 1 52401215 Grease nipple 1 8 1 4 2 Screw M10x50 DIN931 10 9 2 ...

Страница 44: ...7 4 1 4 52060175 Screw M8x25 DIN933 10 1 5 43482290 Hose fastener 1 1 6 52200037 Washer M8 DIN126 10 1 7 52117082 Lock nut M8 DIN985 10 1 8 43511780 Cover of universal shaft 1 1 9 52200334 Washer M8 DIN440 2 1 10 43514210 Plate 1 2 Drawbar assy 1 2 1 43341254 Drawbar 1 2 2 40293797 Sleeve 2 2 3 52842150 Ring pin 10x45 2 2 4 52832094 Rivet 4 8x15 Fe 2 2 5 54826110 Chain 300 mm 2 1 5 2 1 2 4 2 3 1 4...

Страница 45: ...art Order no Description Remarks Qty 1 03342151 Feed chute 1 2 43340876 Flap compl incl parts 3 4 5 6 7 1 3 43340884 Flap 1 4 43340900 Flap rubber 1 5 43340918 Support 2 6 52832094 Pop rivet 4 8 x 15 14 7 52200011 Washer M5 DIN 126 4 8 52060399 Bolt M8 x 80 DIN 931 2 9 52117082 Nut M 8 DIN 985 2 ...

Страница 46: ...SPARE PARTS CH 140 CHIPPER www farmiforest fi 03514400 46 ...

Страница 47: ...5 D DECALS 13 DIMENSIONS 12 DIRECTIVES 36 DISC 11 DISCARDING 35 DISCARDING 35 DISCHARGE CHUTE 11 E EXTENSION PLATE 18 F FIELD OF APPLICATION 11 G GENERAL SAFETY 5 H HOLDING DEVICE 11 HORIZONTAL ANVIL 11 HYDRAULIC MOTOR USE 23 I INSTALLATION 18 K KNIVES AND ANVIL 29 L LID 11 LIFTING 17 LOWER CHAMBER 11 LUBRICATION 25 M MAINTENANCE 25 N NATIONAL STANDARDS 36 O OPERATING 20 OWNER OPERATOR 3 ...

Страница 48: ... SHAFT 19 S SAFETY INSTRUCTIONS 4 SPLINED AXLE 28 STANDARDS 36 STARTING THE CHIPPER 21 STICKERS 13 STORING 35 SYMBOLS 4 T TECHNICAL DATA 36 TERMS 4 TRAFFIC 17 TRANSPORT POSITION 17 TROUBLE SHOOTING 34 TURNING THE CHIPPER OFF 22 TWIG BLADE 11 U UNIFIED STANDARDS 36 UPPER CHAMBER 11 V VERTICAL ANVIL 11 ...

Страница 49: ......

Страница 50: ......

Страница 51: ......

Страница 52: ......

Отзывы: