background image

English

English

GB-9

GB-8

p

Ay


Attention


to


the


ingredients


used

. h

Ard


items


must


not


be


plAced


in


your


AppliAnce


As


they


could


risK


stopping


the


Accessories


from


moving

As


well


As


the


motor

. f

or


exAmple

:

 Hazelnuts, almonds, walnuts etc.

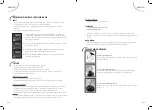
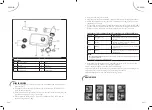
Speed control dial

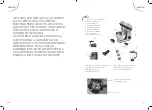
A speed control dial (No. 7 on the diagram) with 7 settings manages the speed: 

• 

PULSE:


Corresponds to the “Manual” setting

• 

0:


Switches the appliance off

• 

Power settings 1 to 6 


The power settings increase progressively from 1 to 6 

(the maximum speed)

COOKING ADVICE

•  Refrigerated ingredients, such as butter and eggs, must be at room temperature 

before mixing them. Remove these ingredients from the fridge in advance.

•  Gather all the ingredients and utensils near the mixer.

•  In order to avoid egg shells or broken eggs being found in a recipe, break the eggs 

into a separate container first and then add them to the mix.

•  When beating egg whites, ensure that the bowl and whisks are clean and dry. The 

slightest amount of grease on the whisks or bowl will prevent the egg whites from 

aerating.

•  Always ensure that you start mixing at a low speed. Increase the speed 

progressively until you reach the recommended speed as indicated in the recipe.

•  Never mix ingredients excessively. Make sure that you mix ingredients according 

to the instructions given in the recipe. Incorporate dry ingredients only until they 

have been combined. Always use the lowest speed; at any stage of preparation, 

excessive mixing can cause viscosity, a tight texture, a lack of air and too much 

shrinkage. Weather conditions, seasonal temperature variations, the temperature 

of the ingredients and their variation in texture from one place to another affects 

the length of time needed to mix and the final results.

•  During mixing, ingredients may stick to the sides of the bowl. To scrape the bowl, 

switch the appliance to “0” and using a plastic or rubber spatula, scrape the sides 

of the bowl. Never use a metal knife, spoon or fork, which may damage the whisks 

and the bowl. Lightly scraping ingredients from the sides of the bowl when adding 

them will improve the quality of the mix.

MAINTAINING YOUR APPLIANCE

Avoid any knocks to the appliance to ensure that it is not damaged or broken. 

Always leave to cool and unplug before cleaning.

•  Immerse the bowl, dough hook for bread/pizza and the whisks in water and 

washing up liquid. (Never rub the bowl with a metal sponge). Dry well before re-

fitting them to the appliance.

• 

IMPORTANT: It is also possible to wash the accessories in a dishwasher.

•  Clean the base and motor unit with a damp cloth: Never immerse it in water!

•  Store your appliance in a dry, well ventilated place.

IN CASE OF A PROBLEM

Problem

Possible cause

Solution

The motor doesn't work

Safety mechanism not 
engaged correctly

Reposition the bowl and 
secure it correctly to the 
base

The motor is overheating 
and there is a bad smell 
being released

Too much food or being 
used for too long

Remove the ingredients and 
reuse the appliance once it 
has cooled down

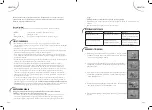
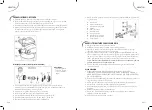
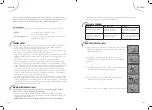
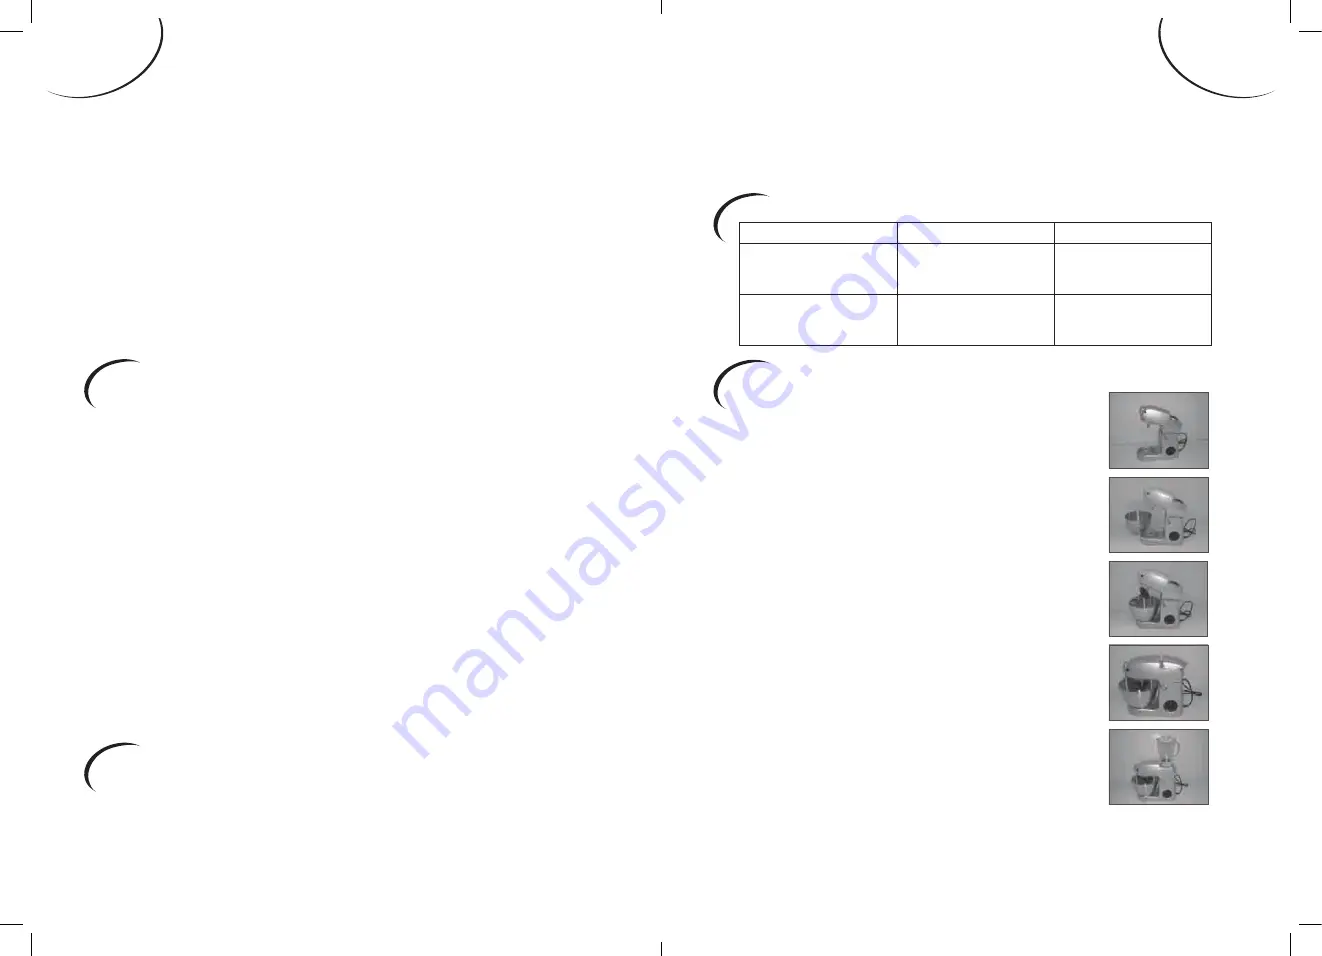
HOW TO USE THE APPLIANCE

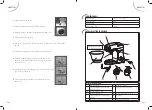
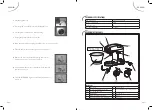
1. 

First of all, mix the food items according to the steps instructed, 

and then lift the handle in a clockwise direction to open the 

appliance splash guard.

2. 

Fit the bowl (with the ingredients) to the base with the 

mechanical mixer fitting, and then turn in an anticlockwise 

direction.

3. 

Insert the dough hook, beater or whisk into the mixer’s beater 

socket, then turn in an anticlockwise direction.

4. 

Press the casing cover down while turning the handle in a 

clockwise direction using the other hand.

5. 

Place the casing cover or blender on the top section of the unit.

Содержание GARY CI

Страница 1: ...GARY CI...

Страница 2: ...N CAS DE PROBL ME FR 9 COMMENT UTILISER L APPAREIL FR 9 DONN ES TECHNIQUES FR 11 VUE G N RALE SUR LES COMPOSANTS FR 11 UTILISATION DU BATTEUR FR 12 HACHOIR VIANDE FR 13 FONCTIONNEMENT INITIAL G N RALI...

Страница 3: ...ils ne jouent pas avec l appareil Attention aux risques de blessures en cas de mauvaise utilisation Des pr cautions doivent tre prises lors de la manipulation des couteaux aff t s lorsqu on vide le b...

Страница 4: ...assez pas les quantit s maximum ni les dur es d op ration indiqu es dans cette notice Ne pas poser ni utiliser cet appareil sur une plaque chaude ou proximit d une flamme Installez l appareil sur un p...

Страница 5: ...VOULOIR CONTACTER LE SERVICE APR S VENTE DE VOTRE MAGASIN REVENDEUR LE FABRICANT SON SERVICE APR S VENTE OU UNE PERSONNE DE QUALIFICATION SIMILAIRE AFIN D VITER UN DANGER DESCRIPTION 1 Transmission co...

Страница 6: ...n cessaire et dans les r sultats obtenus Pendant le m lange les ingr dients peuvent se d poser sur les c t s du bol Pour racler le bol placer l appareil en position 0 et l aide d une spatule en plast...

Страница 7: ...ens des aiguilles d une montre il peut alors commencer fonctionner 13 Tirer d abord le capot arri re vers l arri re puis vers le haut afin de retirer celui ci 14 Tourner le r cipient du BLENDER dans l...

Страница 8: ...doit astre maintenu dans cette position en Fonction de la longueur de l intervalle d sire Quand on rel che le commutateur celui ci revient automatiquement la position 0 R glage des niveaux et utilisa...

Страница 9: ...YER LE HACHOIR 1 D brancher le carter moteur et retirer les l ments 2 Ne jamais immerger l ensemble d alimentation en nergie dans de l eau ni dans un autre liquide 3 Laver tous les l ments sauf l ense...

Страница 10: ...les des orifices Essuyez les avec un chiffon humide puis s chez les N utilisez jamais d abrasifs et n immergez jamais dans l eau Bol Lavez le la main puis essuyez le ou lavez le occasionnellement en l...

Страница 11: ...ale 600W Fr quence nominale 50 60Hz Dur e d utilisation nominale 10min Intervalle de dur e nominale 8 min Tours par minute 16 000 t min ENLEVEMENT DES APPAREILS M NAGERS USAG S La directive europ enne...

Страница 12: ...8 MANTENIMIENTO DE SU APARATO ES 9 RESOLUCI N DE PROBLEMAS ES 9 C MO UTILIZAR EL APARATO ES 9 DATOS T CNICOS ES 11 VISTA GENERAL DE LOS COMPONENTES ES 11 USO DEL BRAZO BATIDOR ES 12 PICADOR DE CARNE E...

Страница 13: ...parato Preste atenci n al riesgo de lesiones provocadas por un uso indebido Deber n tomarse precauciones a la hora de manipular las cuchillas afiladas al vaciar el bol y en la limpieza Apague el apara...

Страница 14: ...agua ni en ning n otro l quido No lo aclare con agua No sobrepase las cantidades m ximas ni las duraciones de funcionamiento indicadas en las presentes instrucciones No coloque ni utilice este aparato...

Страница 15: ...AN REPRESENTAR UN RIESGO DE ACCIDENTE PARA CUALQUIER PROBLEMA O REPARACI N P NGASE EN CONTACTO CON EL SERVICIO T CNICO DE SU DISTRIBUIDOR DEL FABRICANTE SU SERVICIO T CNICO O UNA PERSONA DE CUALIFICAC...

Страница 16: ...tro juegan un papel en el tiempo requerido para mezclar los ingredientes y en los resultados obtenidos Durante la preparaci n los ingredientes pueden ir deposit ndose en los bordes del bol Para repasa...

Страница 17: ...sentido horario ahora est lista para su uso 13 Tire de la cubierta posterior hacia atr s y hacia arriba para quitarla 14 Gire la batidora de vaso en el sentido antihorario para retirarlo DATOS T CNICO...

Страница 18: ...durante el periodo de tiempo que desee batir la mezcla Cuando suelte el selector de velocidad ste volver autom ticamente a la posici n 0 Ajuste el nivel y utilice el brazo batidor o amasador para mezc...

Страница 19: ...ado orificio medio I Disco perforado orificio peque o J Anillo de sujeci n LIMPIEZA DEL PICADOR DE CARNE 1 Desenchufe el bloque motor y desmonte todos los accesorios 2 Nunca sumerja el conjunto del ap...

Страница 20: ...narlos Robot tapas de los orificios L mpielos con un pa o h medo y s quelos a continuaci n No utilice jam s productos de limpieza abrasivos ni los sumerja en el agua Bol L velo a mano y utilice l quid...

Страница 21: ...240V Potencia nominal 600W Frecuencia nominal 50 60Hz Uso nominal 10 min Intervalo de tiempo nominal 8 min Revoluciones por minuto 16 000 t min ELIMINACION DEL ELECTRODOMESTICO VIEJO En base a la Norm...

Страница 22: ...A PT 8 MANUTEN O DO SEU APARELHO PT 9 NO CASO DE PROBLEMAS PT 9 COMO UTILIZAR O APARELHO PT 9 DADOS T CNICOS PT 11 VISTA GERAL DOS COMPONENTES PT 11 UTILIZA O DA BATEDEIRA PT 12 FACA DE PICAR CARNE PT...

Страница 23: ...iliza o Deve ter cuidado quando manipula as l minas afiadas quando esvazia a ta a e quando procede limpeza Deve parar o aparelho e retirar a ficha da tomada antes de mudar os acess rios ou de se aprox...

Страница 24: ...dura o das opera es indicadas neste folheto N o colocar nem usar este aparelho sobre uma placa aquecida ou na proximidade de uma chama Instale o aparelho num plano de trabalho est vel longe de proje...

Страница 25: ...IO AO CLIENTE DA LOJA ONDE O ADQUIRIU O FABRICANTE OU O RESPETIVO SERVI O DE APOIO AO CLIENTE OU UMA PESSOA IGUALMENTE QUALIFICADA A FIM DE EVITAR PERIGOS DESCRI O 1 Transmiss o liga o dos batedores 2...

Страница 26: ...ura o da mistura necess ria e nos resultados obtidos Durante a mistura os ingredientes podem ficar nas paredes do recipiente Para raspar o recipiente coloque o aparelho na posi o 0 e com uma esp tula...

Страница 27: ...piente de mistura e rode no sentido dos ponteiros do rel gio Este pode ent o come ar a funcionar 13 Puxe a cobertura traseira para tr s e depois para cima para a retirar 14 Rode o recipiente da liquid...

Страница 28: ...ador deve ser mantido nesta posi o de acordo com o tempo de intervalo desejado Quando libertamos o comutador este volta automaticamente para a posi o 0 Regula o dos n veis e utiliza o do gancho para u...

Страница 29: ...corte fino J Anilha enroscada COMO LIMPAR A FACA DE PICAR CARNE 1 Desligue o c rter do motor e retire os elementos 2 Nunca coloque o conjunto da alimenta o dentro de gua ou de qualquer outro l quido 3...

Страница 30: ...com um pano h mido e depois seque Nunca utilize produtos abrasivos e nunca coloque dentro de gua Recipiente Lave m o e depois enxag e ou lave ocasionalmente na m quina de lavar loi a Nunca utilize es...

Страница 31: ...e utiliza o nominal 10 min Intervalo de dura o nominal 8 min Rota es por minuto 16 000 t min RECOLHA DOS ELECTRODOMESTICOS A directiva Europeia 2002 96 CE referente gestao de residuos de aparelhos ele...

Страница 32: ...8 PULIRE L APPARECCHIO IT 9 IN CASO DI MALFUNZIONAMENTO IT 9 UTILIZZO DELL APPARECCHIO IT 9 SPECIFICHE TECNICHE IT 11 PANORAMICA DEI COMPONENTI IT 11 UTILIZZO DELLO SBATTITORE IT 12 TRITACARNE IT 13 F...

Страница 33: ...tamento del recipiente e le operazioni di pulizia Spegnere l apparecchio e scollegarlo dall alimentazione prima di sostituire gli accessori o di avvicinarsi alle parti che sono in movimento durante il...

Страница 34: ...calda o in prossimit di una fiamma Installare l apparecchio su un piano di lavoro stabile al riparo da schizzi d acqua L apparecchio deve essere scollegato se presenta malfunzionamenti durante il funz...

Страница 35: ...ONTATTARE IL SERVIZIO CLIENTI TRAMITE IL RIVENDITORE IL FABBRICANTE IL CENTRO DI ASSISTENZA O UN TECNICO QUALIFICATO PER EVITARE PERICOLI DESCRIZIONE 1 Albero di trasmissione perno 2 Recipiente per al...

Страница 36: ...ttenuti Durante il mescolamento gli ingredienti potrebbero depositarsi sui lati del recipiente Per reincorporarli posizionare l interruttore su 0 e con l aiuto di una spatola in plastica o in gomma ra...

Страница 37: ...orario quindi pronto per l uso 13 Per rimuovere il coperchio posteriore tirarlo all indietro e poi verso l alto 14 Per rimuovere il FRULLATORE ruotarlo in senso antiorario SPECIFICHE TECNICHE Alimenta...

Страница 38: ...regolatore deve essere tenuto in questa posizione a seconda delladurata desiderata dell intervallo Quando l interruttore viene rilasciaro questo ritorna automaicamentein posizione 0 Impostazione dei...

Страница 39: ...ite COME PULIRE IL TAGLIERE 1 Scollegare l apparecchio dalla corrente e rimuovere i componenti 2 Non immergere l apparecchio in acqua o altri liquidi 3 Lavare tutti i componenti tranne il blocco motor...

Страница 40: ...ufficiente rimuoverlo Corpo dell apparecchio e coperchi degli orifizi Pulirli con un panno umido e asciugarli Non utilizzare abrasivi e non immergere nell acqua Recipiente Lavarlo a mano e asciugarlo...

Страница 41: ...l simbolo riportato sull apparecchiatura indica che il rifiuto deve essere oggetto di raccolta separata Pertanto l utente dovr conferire o far conferire il rifiuto ai centri di raccolta differenziata...

Страница 42: ...LER TR 8 C HAZIN BAKIMI TR 9 B R SORUNLA KAR ILA MANIZ DURUMUNDA TR 9 C HAZ NASIL KULLANILIR TR 9 TEKNIK VERILER TR 11 CIHAZ PAR ALARININ GENEL G R N M TR 11 KARI TIRICININ KULLANIMI TR 12 ET KIYICI T...

Страница 43: ...Keskin b aklar tutarken hazne bo alt l rken veya temizlik s ras nda dikkatli olunmal d r Aksesuarlar de i tirmeden nce veya al ma s ras nda hareketli par alara yakla madan nce cihaz durdurun ve fi in...

Страница 44: ...izden ekilmelidir al ma s ras nda normal olmayan bir durumla kar la lmas durumunda Her bak m ve temizlik ncesinde Kullan m sonras nda Cihaz n fi ini asla kablosundan ekerek karmay n Sadece m kemmel bi...

Страница 45: ...I SERV S VEYA BENZER B R K LE TEMASA GE N TANITIM 1 Kar t r c lar n aktar m ba lant s 2 Yiyecek haznesi 3 st kapak 4 Kald rma kolu 5 Motor blo u taban 6 Kontrol d mesi 7 A eklindeki rp c 8 rp c 9 Yo u...

Страница 46: ...ekli kar t rma s resi zerinde rol oynar Kar m s ras nda malzemeler haznenin kenarlar na yap abilir Hazneye yap an malzemeyi kaz mak i in cihaz 0 konumuna getirin ve plastik veya kau uk bir spatula kul...

Страница 47: ...kab n yerle tirin ve saat y n nde evirin art k al maya ba layabilirsiniz 13 Arka kasay nce arkaya do ru ard ndan yukar do ru ekin 14 BLENDER kab n yerinden karmak i in saatin aksi istikamette evirin T...

Страница 48: ...una g re anahtar bu pozisyonda tutulmal d r Anahtar serbest b rak ld nda otomatik olarak 0 konumuna geri d ner Seviye ayar burgunun kullan m i in n g r len miktar 2 kg ge memelidir Kar m Seviye Kulla...

Страница 49: ...SIL TEM ZLEN R 1 Motorun fi ini prizden ekin ve aksesuarlar kar n 2 Elektrik besleme nitesini su veya herhangi ba ka bir s v i ine dald rmay n 3 Motor hari t m par alar s cak sabunlu su ile y kay n ol...

Страница 50: ...dir Robot deliklerin kapaklar Nemli bir bez ile silin ve kurulay n Asla a nd r c zellikte bir madde kullanmay n su i ine sokmay n Hazne Elde y kay n ard ndan silin veya duruma g re bula k makinesinde...

Страница 51: ...0 60Hz Nominal kullan m s resi 10 dakika Nominal s re aral 8 dakika Dakika ba d n say s 16 000 tur dakika ESKI ELEKTRIKLI CIHAZLARIN BERTARAF EDILMESI At k Elektrikli ve Elektronik Cihazlar WEEE hakk...

Страница 52: ...E URE AJA HR 8 RJE AVANJE POTE KO A HR 9 KAKO KORISTITI URE AJ HR 9 TEHNI KI PODACI HR 11 PREGLED SASTAVNIH DIJELOVA HR 11 UPORABA MIJE ALICE HR 12 NASTAVAK ZA MLJEVENJE MESA HR 13 PRVO UKLJU IVANJE O...

Страница 53: ...li dok istite posudu za mije anje Isklju ite ure aj te odspojite napajanje prije izmjene pribora ili prije nego se pribli avate dijelovima koji se prilikom rada okre u Ako je kabel napajanja o te en z...

Страница 54: ...podalje od izvora vatre ili vode Ure aj je potrebno isklju iti ako nepravilno radi prije svakog i enja ili poslova odr avanja nakon uporabe Nikada nemojte isklju ivati ure aj povla enjem kabela za nap...

Страница 55: ...LA TENOM OSOBOM KAKO BI SE IZBJEGLA BILO KAKVA OPASNOST OPIS 1 Prijenos spoj s mije alicama 2 Posuda za namirnice 3 Gornji poklopac 4 Poluga za podizanje 5 Postolje bloka motora 6 Kontrolni prekida 7...

Страница 56: ...jekom mije anja mogu nakupiti na bo nim stranama posude Da biste ih sastrugali s posude podesite ure aj na polo aj 0 i koriste i gumenu ili plasti nu lopaticu sastru ite posudu Nikada nemojte koristit...

Страница 57: ...e mije alice 8c Nastavak za mije anje Mije anje okretanjem u svim smjerovima 6 Spojite ure aj na napajanje 7 Uklju ite ure aj okretanjem kontrolnog prekida a 8 Nakon postupka mije anja podesite kontro...

Страница 58: ...ajanja vremenskog perioda obrade Kada pustite prekida on se automatski vra a u polo aj 0 Pode enja razine i uporaba pribora ne bi smjela pre i te inu od 2 kg Mije anje Razina Uporaba Vrsta mije anja 1...

Страница 59: ...ezanje srednji I Disk za rezanje zavr ni J Stezni prsten KAKO ISTITI NASTAVAK ZA MLJEVENJE MESA 1 Odspojite ku i te motora i uklonite elemente 2 Nikada ne uranjajte sklop napajanja u vodu ili druge te...

Страница 60: ...ikada nemojte koristiti abrazivna sredstva za i enje ili ih uranjati u vodu Posuda za mije anje Operite je ru no i zatim obri ite ili je povremeno operite u perilici za pranje posu a Nikada nemojte ko...

Страница 61: ...00W Nazivna frekvencija 50 60Hz Nazivni ivotni vijek 10 min Raspon nazivnog trajanja 8 min Okretaja u minuti 16 000 o min ZBRINJAVANJE STARIH ELEKTRI NIH URE AJA Europska smjernica 2002 96 EG o otpadu...

Страница 62: ...MAINTAINING YOUR APPLIANCE GB 8 IN CASE OF A PROBLEM GB 9 HOW TO USE THE APPLIANCE GB 9 TECHNICAL SPECIFICATIONS GB 11 OVERVIEW OF THE PARTS GB 11 USING THE BEATER GB 12 MEAT GRINDER GB 13 OPERATING...

Страница 63: ...ptying the jug and cleaning Switch the appliance off and disconnect it from the power supply before changing accessories or handling parts that move when in operation If the power cable is damaged it...

Страница 64: ...e appliance must be unplugged if There are any abnormalities when being operate Before cleaning or maintaining After use Never unplug your appliance by pulling on the power cable Only use an extension...

Страница 65: ...AFTER SALES SERVICE OR A SIMILARLY QUALIFIED PERSON IN ORDER TO AVOID ANY DANGER DESCRIPTION 1 Transmission beater socket 2 Bowl 3 Top cover 4 Head lift lever 5 Base motor unit 6 Speed control dial 7...

Страница 66: ...time needed to mix and the final results During mixing ingredients may stick to the sides of the bowl To scrape the bowl switch the appliance to 0 and using a plastic or rubber spatula scrape the sid...

Страница 67: ...t can now be operated 13 First of all slide the rear cover towards the back and then upwards to remove it 14 Turn the BLENDER jug in an anticlockwise direction to remove it TECHNICAL SPECIFICATIONS No...

Страница 68: ...The switch must be held in the On position for the length of time desired When you release this switch it will automatically reverts to the 0 position Setting the levels for and using the hook for a q...

Страница 69: ...knife H Grinder plate medium I Grinder plate fine J Ring HOW TO CLEAN THE GRINDER 1 Unplug the motor unit and remove the parts 2 Never immerse the power cable into water or any other liquid 3 Wash all...

Страница 70: ...y Do not use abrasive materials and never immerse in water Bowl Hand wash the bowl and then dry it or wash occasionally in the dishwasher Never use a metal brush bristles iron wool or chlorine to wash...

Страница 71: ...ng 600W Nominal frequency 50 60Hz Nominal operating time 10 min Nominal interval time 8 min Revolutions per minute rpm 16 000 rpm DISPOSAL OF OLD ELECTRICAL APPLIANCES The European directive 2002 96 E...

Страница 72: ...Imported by Import par CONFORAMA France SA 80 Boulevard du Mandinet Lognes 77432 Marne la Vall e Cedex 2 FRANCE...

Отзывы: