EN
8 / 12
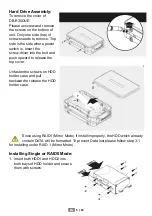
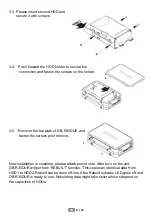
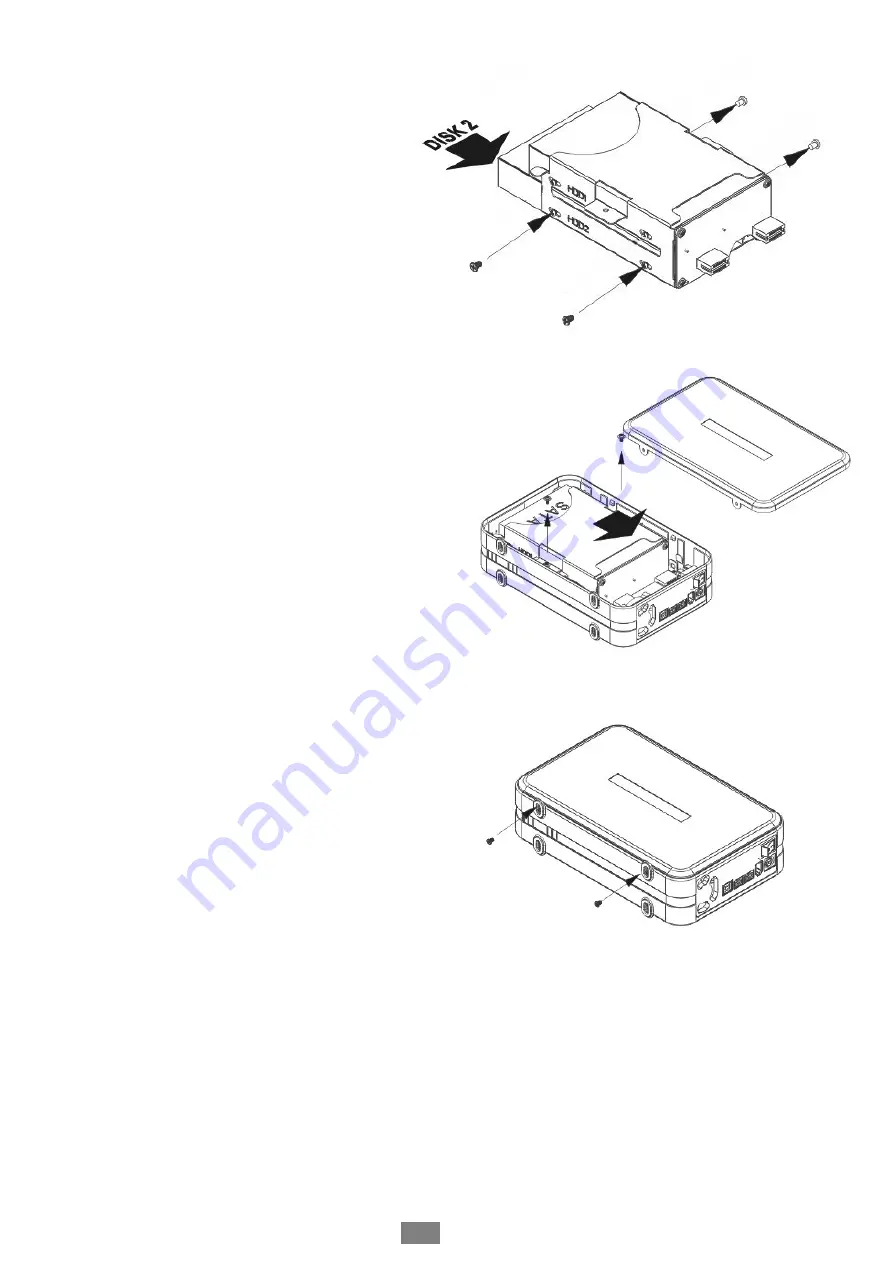
3-3. Please insert second HDD and
secure it with screws.
3-4. Push forward the HDD holder to secure the
connection and fasten the screws on the holder.
3-5. Recover the top plate of DB-R35DUE and
fasten the screws prior remove.
Now installation is complete, please attach power core. After turn on the unit,
DB-R35DUE will perform “REBUILT” function. This copies an identical data from
HDD1 to HDD2. Rebuilt can be done off-line. After Rebuilt indicator LED goes off and
DB-R35DUE is ready to use. Rebuilding data might take several hours depend on
the capacities of HDDs.
Содержание DB-R35DUE
Страница 1: ...DB R35DUE User Manual English ...


