10
5.4 Climbing
5.4.1 Ascending:
1. Connect the device around the pole about
waist high.
2. Adjust the device so that both Cleats are in
contact with the pole.
3. Adjust the Rope so that your body is a
comfortable distance away from the pole,
about 2 feet away.
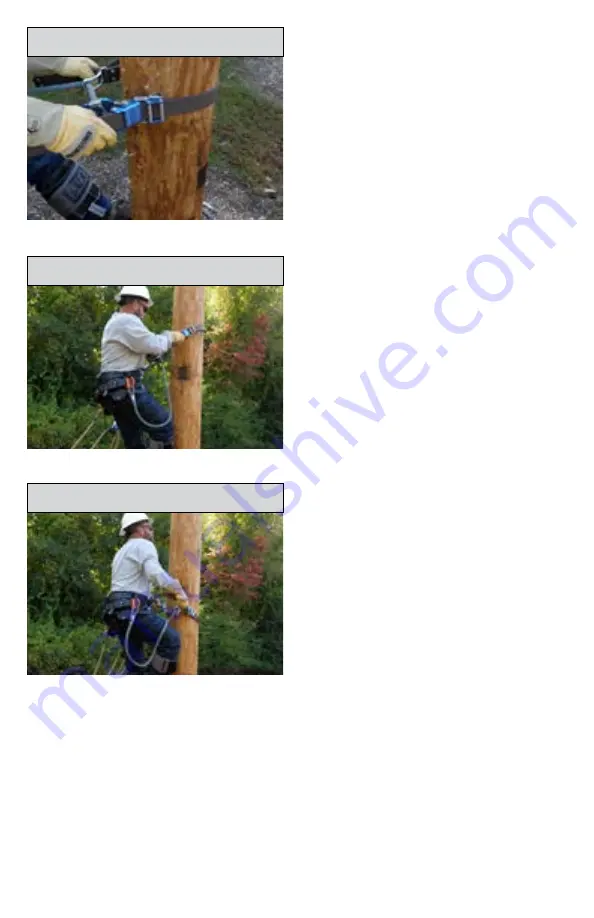
4. Hold the brown Web Strap Handles as
shown in Figure 17 below. Do NOT hold
the inner rope or snap hook as this may
prevent the cleats from engaging in the
event of a fall.
5. With your pole climbers, take a step into
the pole and pull your body forward,
towards the pole. Note: Staying close to
the pole takes less energy and allows for a
smoother climb.
6. With your body pulled in close to the pole,
raise the strap as high as comfortably
possible on the pole as shown in Figure 18.
7. Walk up the pole in the strap until its
approximately waist level as shown in
Figure 19 below.
8. With your body pulled in as close as
possible to the pole, raise the strap again
as high as comfortably possible. Repeat
the process and develop a rhythm. Note:
Raising or flipping the strap simultaneously
while stepping up with your lead leg allows
you to move the strap further up the pole.
5.4.2 Descending:
1. Step down as low as comfortably possible
in the device.
2. Holding the Strap Handles, pull your body
in towards the pole.
3. With one foot removed from the pole, lock
your knee and aim below your foot towards
the heart of the pole and drop.
4. Flip the strap down as low as possible and
repeat.
Figure 17: Hold Brown Web Strap Handles
Figure 18: Strap Raising Position
Figure 19: Strap Height for Repositioning
5.4.3 Transferring over Obstructions:
To cross over an obstruction, the use of a secondary device or system must be used to maintain
100% fall protection tie-off. A secondary work positioning rope device is the recommended and most
efficient way to meet this requirement.
1. Climb up and position the WPFRD as close to the bottom of the obstruction as possible.
2. Pass the secondary rope around the pole and over the obstruction, connecting from one Body
Belt D-ring to the other as shown in Figure 20 below. Note: Do not allow the secondary rope to
have enough slack to exceed a potential 2-foot freefall at any point during its attachment to the
Body Belt.
3. Disconnect the WPFRD from the pole and step up to reconnect it above the obstruction. See
Figure 21 above.
4. Pass the WPFRD through the secondary rope and connect it a few inches above the obstruction.
5. Remove the secondary rope and continue the climb/ascent.


