4
Inlet
Burner pressure
pressure
at manifold
Natural Gas 20mbar 14mbar (+/- 0.75mbar)
Propane Gas 37mbar 34mbar (+/- 1mbar)
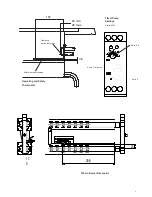
The incoming service must be of sufficient size to supply
full rate without excessive pressure drop. A gas meter is
connected to service pipe by gas supplier. Any existing
meter should be checked preferably by gas supplier to
ensure that it is adequate to deal with rate of gas
supply required.
Installation pipe work should be fitted in accordance with
IGE/UP/2. The size of pipes from meter to unit must not
be less than that of appliance inlet connection. A 3/4" BSP
inlet connection is fitted to unit.
An isolating valve must be located close to the appliance
to facilitate shut down during an emergency or routine
servicing. The cock must be easily accessible to the user.
The installation must be tested for gas soundness as
stated in IGE/UP/1.
Domestic type, flexible rubber tube connections
must NOT be used with this appliance.
Only tube complying with BS669 Part 2, Specification
for corrugated metallic flexible hoses for catering
appliances, shall be used.
1.5 ELECTRICAL SUPPLY
The unit is equipped with a 3-core flexible cord with
standard 3 pin plug fitted with a 13A fuse. A regular
13A socket outlet can be used.
If supply is through a distribution fuse box, this must be
via a fuse with a maximum rating of 13A.
In the event of mains cable being replaced, any new
cable should comply with 60245 IEC 57 designation.
(H05 RN - F)
Rated Voltage
Rated Current
G401F/G402F 230V~
3.55amps
THE APPLIANCE MUST BE EARTH BONDED.
1.6 TOTAL RATED HEAT INPUTS
Natural and Propane Gas
23kW (net) 86,300 btu/h (gross)
1.7 INJECTOR SIZES
Natural gas
Burner Pilot
2 x Ø2.7mm Polidora G31.2
Propane gas
Burner Pilot
2 x Ø1.7mm Polidora G25
SECTION 2 - ASSEMBLY and
COMMISSIONING
The gas supply piping and connection to appliance must
be installed in accordance with the various regulations
listed on the cover of this manual.
2.1 ASSEMBLY
a) Unpack appliance
b) Unpack fryer baskets and accessories.
c) Place basket support grid and basket in pan.
d) Level appliance and fit all service protection kits.
(Anti-tilt kit, if ordered as accessory).
2.2 CONNECTION TO A GAS SUPPLY
Connect gas supply and test for gas soundness.
Caution - Ensure that pan contains an acceptable level
of liquid before igniting burner.
Due to the presence of mains electrics, integral pipe work
should be checked for gas soundness using an
appropriate gas leak detector.
Caution - Installation engineers should note that for first
time connection of appliance to supply, it is essential that
inlet gas supply to fryer is completely purged of air prior
to first lighting attempt. Otherwise, since this is a light pilot
first every time system, it will take a significant number of
tries to light due to the small amount of air bled from pipe
by pilot at each attempt. This should not initially be treated
as a fault.
Please note that several attempts will still be required
after air purge to fryer for first time lighting. This is due to
capacity of valve and governor.
2.3 CONNECTION TO AN ELECTRICAL SUPPLY
Ensure flexible cable does not come into contact with any
hot parts. The fuse rating should be 13A.
The colour coding of power supply cables are as follows:
Live - Brown, Neutral - Blue, Earth - Green/Yellow
2.4 STARTING UP
If you are in the fat melting cycle (FMC – G401F only)
and loading solid fat for the first time, always remove
basket support plate as detailed in Section 9. Solid fat
should be in direct contact with fryer pan.
Refer to Section 9.
Содержание G402F
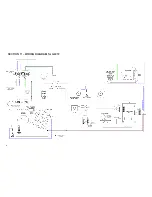
Страница 16: ...SECTION 11 WIRING DIAGRAM for G401 16...
Страница 17: ...SECTION 11 WIRING DIAGRAM for G401F 17...
Страница 18: ...SECTION 11 WIRING DIAGRAM for G402 18...
Страница 19: ...SECTION 11 WIRING DIAGRAM for G402F 19...
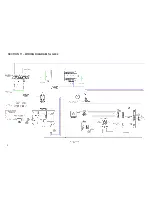
Страница 20: ...SECTION 11 CIRCUIT DIAGRAM for G401 20...
Страница 21: ...SECTION 11 CIRCUIT DIAGRAM for G401F 21...
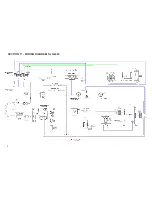
Страница 22: ...SECTION 11 CIRCUIT DIAGRAM for G402 22...
Страница 23: ...SECTION 11 CIRCUIT DIAGRAM for G402F 23...

