background image

14


SECTION 8 -


CLEANING and MAINTENANCE


RECOMMENDATION


Personal  protective  equipment  (PPE's)  should  be  used 

when cleaning or handling medium within this appliance.


WARNING  -  NEVER  PUMP  WATER  THROUGH  THE 

FILTRATION PUMP AT ANY TIME!


Warning


The fryer is supplied with castors at rear and should be 

connected to supply piping by means of a connector for 

moveable  appliances.  An  anti-tipping  restraint  can  be 

attached  to  unit  and,  if  so,  this  must  be  disconnected 

before  fryer  is  moved.  Ensure  restraint  is  re-connected 

when unit is returned to original position.


Moving  the  fryer  with  hot  or  cold  oil  in  fry  pot  can  be 

dangerous to the operator. Scalding could occur. Spilled 

oil  or  fat  on  the  kitchen  floor  could  cause  slipping 

accidents  and  any  such  deposit  should  be  cleaned  up 

straight away.


To prevent any such hazard, DO NOT move fryer until all 

liquid has been drained from fry pot.


The    following    procedure    should      be      undertaken, 

AT LEAST DAILY.


IMPORTANT:  Disconnect  electrical  supply  before  any 

cleaning is undertaken.


Warning


Oil must be allowed to cool to a safe temperature before 

draining. Do not overfill draining receptacle.


THE  APPLIANCE MUST  NOT  BE  CLEANED  WITH 

A JET OF WATER OR BE STEAM CLEANED. DO NOT 

USE  ACID  OR  HALOGEN-BASED  (e.g.  chlorine) 

DESCALING 

LIQUIDS, 

FLAMMABLE 

LIQUIDS, 

CLEANING AIDS OR CLEANING  POWDERS.


Stainless Steel Surfaces


It  should  be  noted  that  certain  scouring  pads  including 

nylon    types,    could    easily    mark    stainless    steel. 

Care should be exercised during cleaning process.


When  rubbing  stainless  steel  with  a  cloth,  always  rub 

along in grain direction.


8.1 CLEANING THE APPLIANCE


1) Carry out actions detailed in Sections 8 and 9.


2) Unit should be switched OFF and fry pot drained of oil.


3)  Remove  baskets,  fish  plate  and  crumb  catcher. 

Soak these components in hot soapy water.


4)  With drain  valve open,  remove  any traces of debris 

from fry pot using a clean, damp cloth.


NOTE:  Care  should  be  taken  not  to  damage  sensors 

located at pan front.


5)  Remove  strainer  and  microfilter,  soak  these  in  hot 

soapy water.


6)  Wash,  rinse  and  dry  removed  items  thoroughly. 

Set these aside.


7) Close drain valve.


8) Fill fry pot 3/4 full with hot water.


9)  Clean  pan  using  a  soft,  clean  cloth  and  hot  soapy 

water,   rub    away    any    stubborn    staining    with 

a scouring pad and suitable detergent.


10) Open drain valve. Drain water into bucket below.


11) Use clean water to rinse fry pot and dry thoroughly.


12) Close drain valve.


13) Return crumb catcher, fish plate and baskets to pan.


14) Remove oil bucket by pulling forward then upward.


15) Use handles and lift oil bucket to sink.


16) Pour away soiled water.


17) Thoroughly  wash,  rinse  and  dry  oil  bucket  and  oil 

suction pipe.


18) Replace  strainer  and  micro  filter  in  oil  bucket  and 

return oil bucket to cradle.


19) Fill  fry  pot  with  clean  oil/solid/shortening  to  -MIN- 

mark.  To relight, refer to Section 6.2.


Содержание G402F

Страница 1: ...arge for reference during servicing Further to this the user instructions should be handed over to the user having had a demonstration of the operation and cleaning of the appliance PREVENTATIVE MAINT...

Страница 2: ...een clearly caused by misuse Where an engineer finds no fault with a product that has been reported faulty Re setting or adjustment of thermostats when unit is operating to specification Cleaning and...

Страница 3: ...nstructions for every model determine the necessary clearance wall or overlying surface Some appliances require greater than others The largest determine overall distance adjoining appliances 1 3 VENT...

Страница 4: ...ner Pilot 2 x 2 7mm Polidora G31 2 Propane gas Burner Pilot 2 x 1 7mm Polidora G25 SECTION 2 ASSEMBLY and COMMISSIONING The gas supply piping and connection to appliance must be installed in accordanc...

Страница 5: ...sed for programming purposes 2 Program Button Used to enter timer programme mode to change each of the 4 pre set timer select channels See Section 6 3 Temperature Button Used to view Actual Set temper...

Страница 6: ...urner flame Additional controls Item 9 Turn gas supply on 10 Press lockout reset switch indicator will extinguish 11 Burner will ignite and heat signify that burner is on If lockout should occur repea...

Страница 7: ...omponents 2 Flue for any blockages 3 Visual inspection of components and fryer pan 4 Temperature limit thermostat calibration 3 3 ACCESS PROCEDURES Before removal of any fryer components a Ensure appl...

Страница 8: ...in valve g Undo drain pipe Use appropriate size of spanner to remove drain valve h Replace in reverse order and check for oil leaks 3 12 FILTRATION PUMP a Remove back panel and flexi hose at filtratio...

Страница 9: ...at probe Safety thermostat probe Operating and Safety Thermostat 17 5 24 min 26 max Timer Settings Set 3 6 Set to 10 minutes 258 Pilot to Burner Dimension 9 Timer Pump Settings Set for 230V Set to 0 8...

Страница 10: ...ING No attempt must be made to operate this appliance during a power supply failure Please ensure that any plastic coated items are removed prior to use Before operation pan requires to be thoroughly...

Страница 11: ...nce 14 secs after completion of first attempt if no flame is detected during first attempt Unit will only lock out after 2nd attempt g Reset burner by pressing burner lock out reset switch h If burner...

Страница 12: ...de 6 3 PROGRAMMING THE G402F Display Descriptions Louu Controller is in operating mode Actual vat temperature is more than 10 below programmed vat temperature rEdy Controller is in operating mode Actu...

Страница 13: ...mptied on a regular basis or if oil is left in the receptacle it may solidify and overflow or spill on to the kitchen floor to create a hazard 7 1 STARTING THE FILTRATION PROCESS 1 Turn burner tempera...

Страница 14: ...WDERS Stainless Steel Surfaces It should be noted that certain scouring pads including nylon types could easily mark stainless steel Care should be exercised during cleaning process When rubbing stain...

Страница 15: ...slowly into fry pot as solid fat melts Warning If fish plate does not sit flat lift plate from centre slightly and lower carefully to ensure that no splashing of hot shortening occurs Check that corre...

Страница 16: ...SECTION 11 WIRING DIAGRAM for G401 16...

Страница 17: ...SECTION 11 WIRING DIAGRAM for G401F 17...

Страница 18: ...SECTION 11 WIRING DIAGRAM for G402 18...

Страница 19: ...SECTION 11 WIRING DIAGRAM for G402F 19...

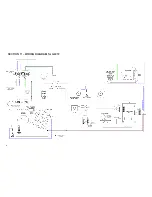
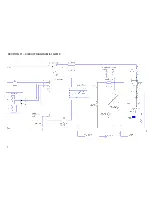
Страница 20: ...SECTION 11 CIRCUIT DIAGRAM for G401 20...

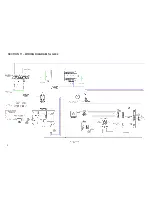
Страница 21: ...SECTION 11 CIRCUIT DIAGRAM for G401F 21...

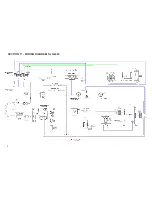
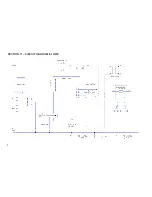
Страница 22: ...SECTION 11 CIRCUIT DIAGRAM for G402 22...

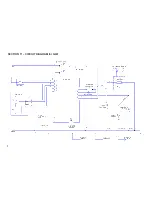
Страница 23: ...SECTION 11 CIRCUIT DIAGRAM for G402F 23...

Отзывы: