


9
EN
•
We do not recommend the use of adaptors,
plugs and/or extension leads. If it is
absolutely necessary to use such elements,
use only those which comply with current
safety standards, taking care not to exceed
the power limit indicated on the adaptor
and/or extension lead.
•
This appliance is for domestic use only. Any
other use is considered unsuitable and
dangerous.
•
In case of breakdown or malfunctioning,
switch off the appliance. Do not attempt to
repair it. If any repairs are necessary, they
must only be made by a Technical
Assistance Service authorised by the
manufacturer. Insist on the use of original
spare parts. Failure to comply with these
points could be a safety hazard.
•
The user must not replace the cable. If it is
damaged or needs replacing, this must only
be done by a Technical Assistance Service
authorised by the manufacturer. Do not use
the appliance if the cable or plug are
damaged.
•
The manufacturer holds no liability for any
damages arising from unsuitable or
improper use of the appliance or from
repairs carried out by non-qualified
personnel.
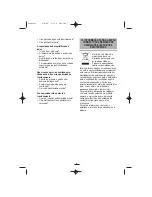
• IMPORTANT: Never for any
reason cover the appliance
during operation as this could
lead to dangerous overheating.
The use of any electrical appliance requires
compliance with a series of basic rules:
PARTICULARLY:
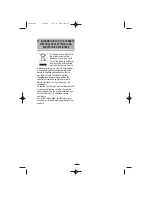
• Important:
This appliance must not be used
near baths, showers, sinks, etc.
•
Do not install the appliance close to sources
of heat, or in spaces where the air may
contain gases, oil or sulphur, or in areas
exposed to radiation.
•
Do not spill any water or flammable liquids
on the appliance.
•
Do not handle the appliance with wet hands.
•
Do not switch the appliance on and off by
plugging it in and unplugging it.
•
Altering or modifying the appliance’s
functional characteristics could be
dangerous.
•
Before using the appliance for the first
time, read this instruction manual carefully
and keep it for later reference.
•
Before using the appliance, ensure that
the domestic mains voltage is the same as
that indicated on the plaque fixed to the
appliance.
•
The appliance must be installed in
accordance with the national regulations
for electrical installations.
•
On removing the packaging, check the
appliance is in perfect condition. In case of
doubt, contact the nearest authorised
Technical Assistance Service.
•
Keep all packaging elements (plastic
bags, polystyrene foam, etc.) out of the
reach of children, as they could be
dangerous.
•
The electrical safety of the appliance is
only guaranteed if it is connected to an
installation with an earth connection.
3. SAFETY WARNINGS
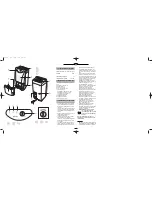
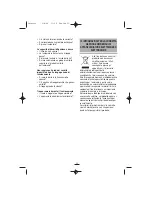
1.
Carrying handle
2.
Air inlet grille
3.
Tank float
4.
Water tank
5.
Air inlet filter
6.
Control panel
6.1
Green on/off pilot light
6.2
Red tank full pilot light
6.3
Defrost pilot light
6.4
Humidistat control
7.
Air outlet grille
8.
Cable compartment
9.
Continuous drain outlet
2. APPLIANCE DESCRIPTION (Fig. 1)
Voltage / Frequency
220V-240V~50Hz
Power
360W
Tank capacity
5L
Working temperatures
5ºC - 35ºC
1. TECHNICAL SPECIFICATIONS
interior 5/6/06 11:35 Página 8
Содержание DH-16
Страница 46: ...45 BG 3 1 220V 240V 50Hz 360W 5L 5 C 35 C 1 2 3 4 5 6 6 1 6 2 6 3 6 4 7 8 9 2 1 interior 5 6 06 11 35 P gina 44...
Страница 49: ...48 9 10 interior 5 6 06 11 35 P gina 47...
Страница 50: ...49 RU 1 220 240 50 360 5 5 C 35 C 1 2 3 4 5 6 6 1 6 2 6 3 6 4 7 8 9 2 1 3 interior 5 6 06 11 35 P gina 48...
Страница 51: ...50 4 50 5 C 35 C 5 C 5 5 6 2 6 1 6 2 6 3 interior 5 6 06 11 35 P gina 49...
Страница 53: ...52 5 6 9 10 interior 5 6 06 11 35 P gina 51...
Страница 54: ...53 interior 5 6 06 11 35 P gina 52...


