SAFETY
Page B-3
Repair and Service Manual
Read all of Section A and this section before attempting any procedure. Pay particular attention to all Notes, Cautions and Warnings.
B
B
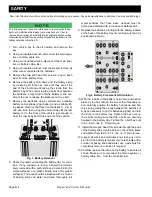
Accessories connected to this vehicle that do not use
the accessory harness must be connected across the
entire 48 volt battery pack. This can be done by con-
necting to the two battery terminals shown in Figure 1.
This can be done by connecting to the two battery termi-
nals shown in the illustration.(Ref. Fig. 10) If the acces-
sory requires voltage other than 48 volts a DC to DC
converter must be used to change the voltage to the
amount required by the accessory. A DC to DC convert-
er is available through E-Z-GO Service Parts.
The Operational Performance Guarantee of 2 rounds
per day shall be void if non-factory accessories that use
more than 1 Amp/Hour of energy per round are installed
on the vehicle.
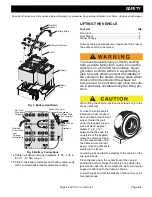
Fig. 2 Batteries, Charger Receptacle & Controller
BATTERY REMOVAL & INSTALLATION
Tool List
Qty.
Insulated Wrench, 9/16" .............................................. 1
Socket, 1/2" Deep-well ................................................ 1
Socket, 9/16" ............................................................... 1
Torx Bit, 50 IP .............................................................. 1
Ratchet........................................................................ 1
Battery Carrier Strap ................................................... 2
Torque Wrench, in. lbs................................................. 1
Portable Lifting Device ................................................ 1
When lifting a battery always use all 4 lifting
lugs provided. Do not attempt to lift a battery
with only one strap, this may break lifting lugs
and result in personal injury or damage to the
battery.
CHARGER RECEPTACLE
CONTROLLER
RESISTOR
BATTERY HOLD DOWN
BATTERY STRAP
BATTERY TRAY


