


Adjusting the geometry
The geometry of the cube must be adjusted or aligned over the entire video
wall. A test picture is used for this purpose.
With the eyevis eyeDESIGN software, the size, position, keystone distortion and
rotation can be adjusted.
)
NOTE:
Test images and the software for the geometry setting refer to the eyevis
software CD.
Installing the software
Program installation and startup
The program must not be installed.
1.
Copy the entire program folder to a desired directory on your PC (for
example, c:\Software\).
2.
Open the file eyeDesign.exe by double-clicking to start the software.
Starting the software
Open the eyeDESIGN software to configure the video wall.
The program interface is open.
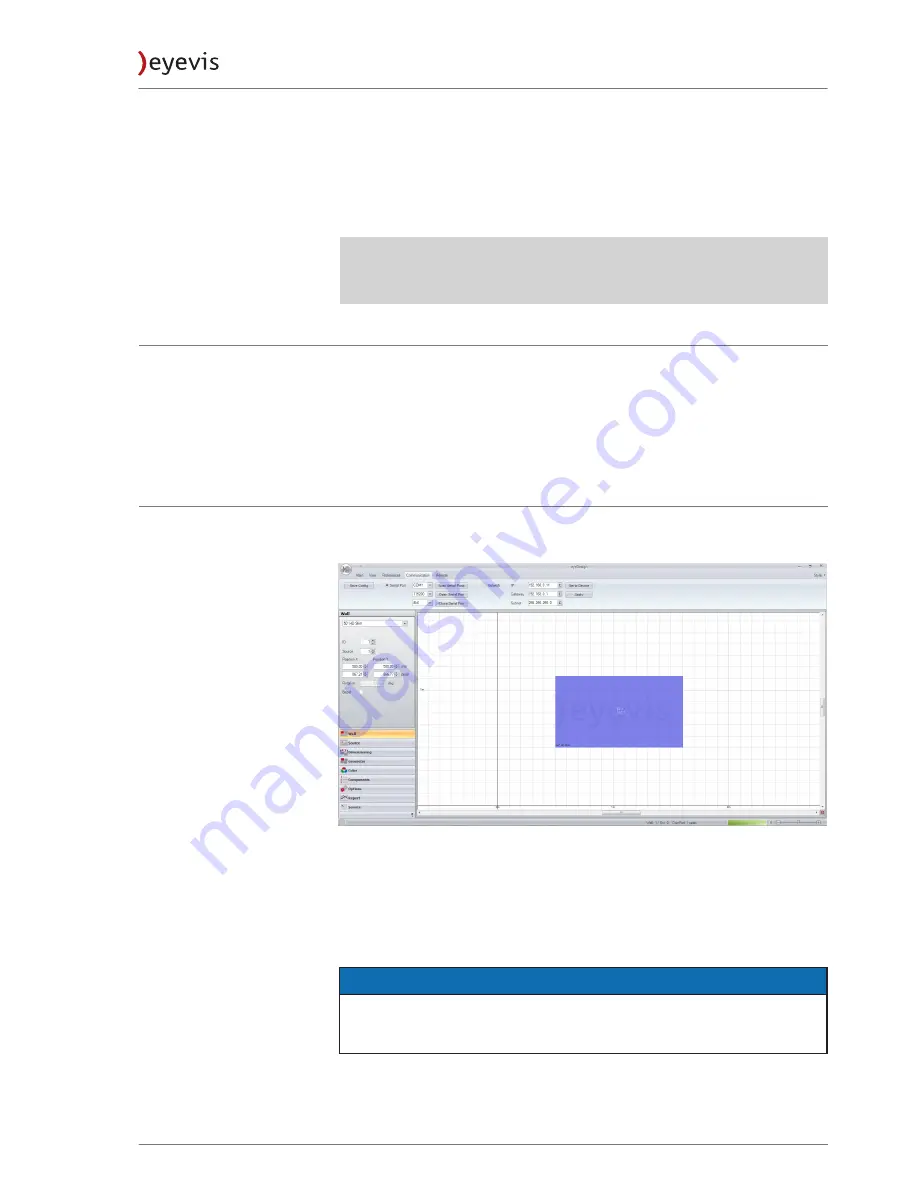
Fig. 47: View of the main window of the eyevis SLIM-Motor-Control-Software
1. In the first step create your wall.
Choose your cube model in the left menu and add it to the wall by clicking
on the “Add” button.
2. Change the tab in the top to “Communication” and establish the
connection with the cube wall.
NOTICE
eyeDESIGN manual
For more details about the eyeDESIGN software please refer the eyeDESIGN
manual.
EC-LED-SLIM Series
43
Version 1.2 | October 2018
Содержание EC-LED-SLIM Series
Страница 59: ...Notes...


