8
Cable Cubby 1252 MS • Installation Guide (Continued)
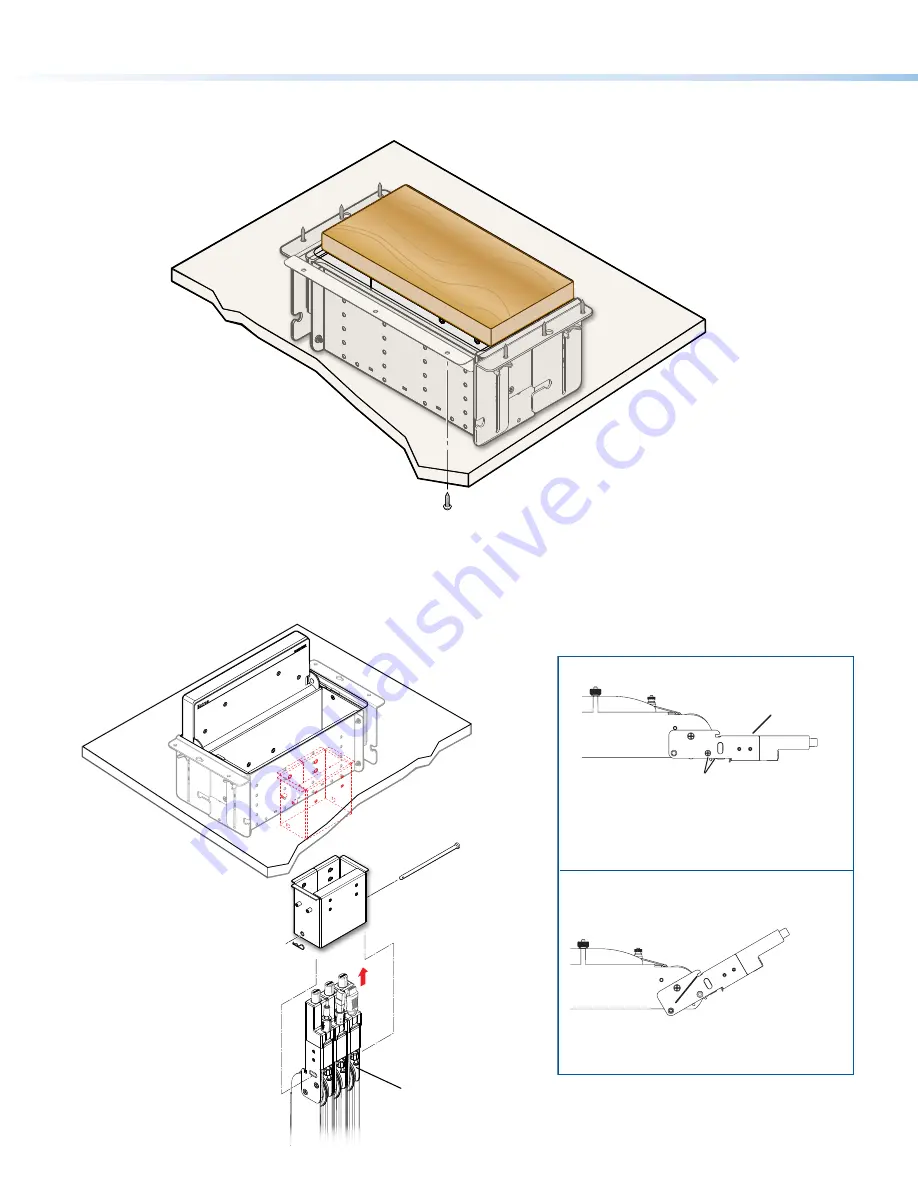
Step 2 — Install trim brackets
If there is a gap, front and back, between the underside of the table and the Cable Cubby frame, install the trim brackets as follows:
Hold the trim bracket
against the underside of the
table, flush against the Cable
Cubby and centered on the unit.
Mark the three mounting holes.
Drill 1/8 inch (3 mm) diameter pilot holes,
1/2 inch (12.7 mm) deep.
Secure the trim bracket to the table using the
provided #8 wood screws.
Repeat through on the opposite of the Cable
Cubby.
2
3
4
1
1
3
Installing Optional Accessories
Installing Retractors
For horizontal or angular retractor mounting, see the information at right, then follow the steps below.
Insert the pin through the
Retractor mounting hole
on the side of the
Cable Cubby and
Retractor assembly.
Secure the clip
on the pin.
Insert Retractors into
the Retractor bracket.
Secure the locking screw
on each Retractor. Do not
overtighten.
2
1
4
3
Pin
Clip
Extr
on
Angular Mounting
Remove the enclosure screws as shown above, then follow
this step:
Horizontal Mounting
Cable Release
Assembly
Move the cable release assembly upward until
the angular mounting hole is visible. Reinstall the
enclosure screws in this hole (both sides).
Remove two enclosure screws
(one on each side) from this position.
Then, mount the Retractors as shown
at left.
Cable Release
Assembly
See the
Cable Retractor Series Setup Guide
, available on
the Extron website, for additional steps.
Remove two enclosure screws
(one on each side) from this position.
Then, mount the Retractors as shown
at left.
Move the cable release assembly upward until
the angular mounting hole is visible. Reinstall the
enclosure screws in this hole (both sides).


