PQ3450-EU-EN-V1.2-05/12
15
4.5.10 Set Clamp type
1.
In the Setup Mode, use the up and down arrow keys to scroll to the CLAMP TYPE field.
2.
Press SHIFT, the display "SHIFT1" will switch ON
3. Use
the
▲
or
▼
keys to select the full scale setting of the clamp used.
4.
Press SHIFT again to return to Setup Mode editing or press EXIT to leave the Setup mode.
4.5.11 Set Current Range
ATTENTION: Ensure that the ‘A’ range setting matches the attached clamp’s rating
1.
In the Setup Mode, use the up and down arrow keys to scroll to the “A RANGE” field.
2.
Press SHIFT, the display "SHIFT1" will switch ON.
3. Use
the
▲
or
▼
keys to select the current range.
4.
Press SHIFT again to return to Setup Mode editing or press EXIT to leave the Setup mode.
4.5.12 Set Voltage Range
1.
In the Setup Mode, use the up and down arrow keys to scroll to the “V RANGE” field.
2.
Press SHIFT, the display "SHIFT1" will switch ON
3. Use
the
▲
or
▼
keys to select the voltage (
Note
that unless the CLAMP TYPE is set to
“Other”, this value is fixed)
4.
Press SHIFT again to return to Setup Mode editing or press EXIT to leave the Setup mode.
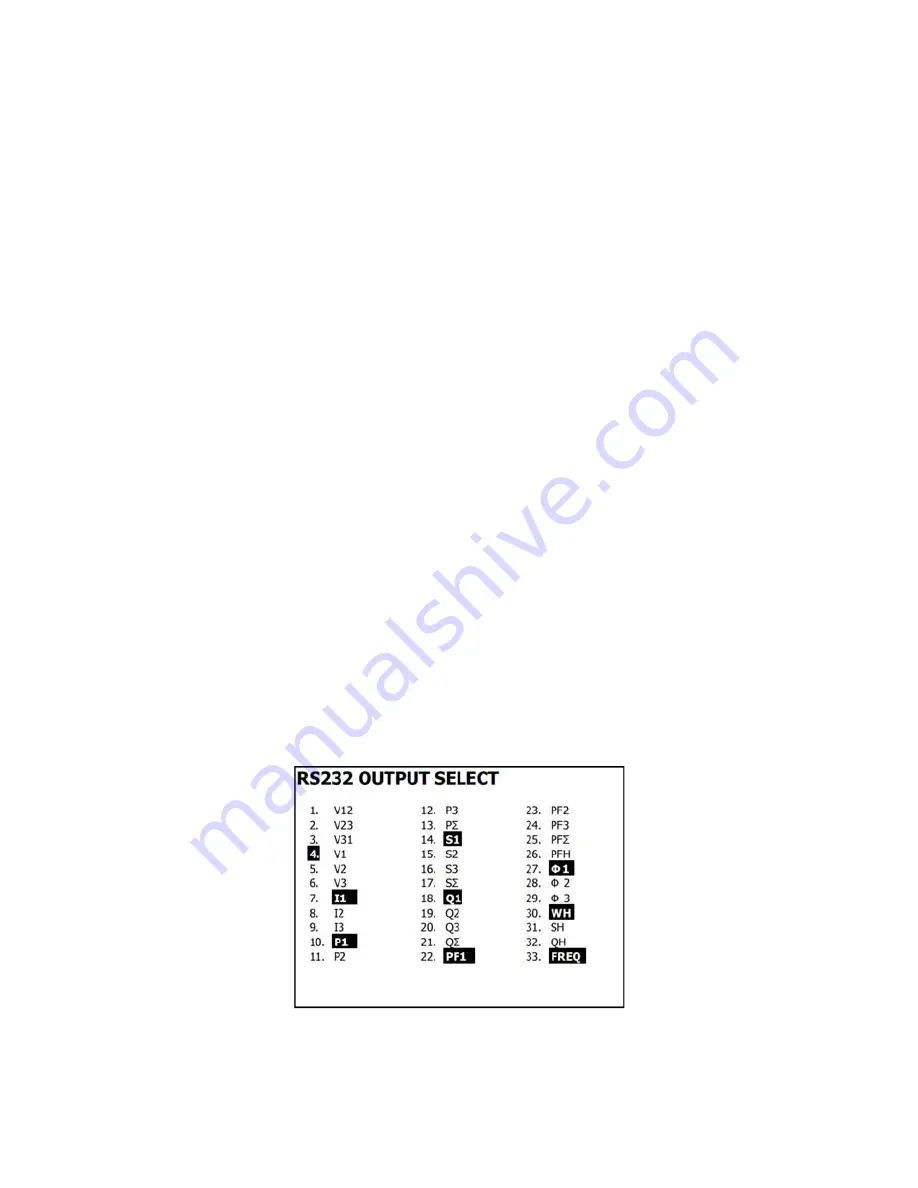
4.5.13 Set RS-232 Output Parameters
1.
In the Setup Mode, use the up/down arrow keys to scroll to the “RS232 OUT SEL” field.
2.
Press the SETUP/ENTER key to access the RS232 Output selection page. Nine output
selections maximum can be highlighted on this page.
3.
Use all four arrow buttons to navigate the output choices.
4.
To select an output type, press the SETUP key (the selection will highlight).
5.
To de-select a selected output type, press the SETUP key (the highlight will switch off).
6.
Press and hold the SHIFT key for > 2 seconds to clear all RS-232 output selections.
7.
Press the EXIT button to exit the RS232 output mode.
8.
If nine items are selected
the
display will show the indicator "full".
RS232 – Output Selections
Shop for Data Logging products online at:
www.
DataLoggerStore
.ca
1.877.766.5412


