Maintenance
Thread Locking Adhesives
Thread locking adhesives such as “Loctite 242”
or “Fel-Pro, Pro-Lock Nut Type” are used on the
following fasteners:
•
Pump sheave setscrews.
•
Sheave retaining bolt in end of engine crankshaft.
•
Caster wheel spacer nuts.
•
Platform spring pin.
Mobil HTS Grease (Or
Food-Grade Anti-seize)
Mobil HTS grease (or food-grade anti-seize) is used
in the following locations:
Between splines of the cutter housing spindle and
sheave.
Copper-Based Anti-seize
Copper-based anti-seize is used in the following
locations:
•
On threads of Blade Bolts. See
Check Mower
Blades
section.
•
Between engine crankshaft, pump drive sheave,
and clutch.
•
Between pump shafts and sheaves.
Dielectric Grease
Dielectric grease is used on all blade type electrical
connections to prevent corrosion and loss of contact.
Dielectric grease should not be applied to sealed
connectors.
Adjustments
Note:
Disengage PTO, shut off engine, wait for
all moving parts to stop, engage parking brake, and
remove key before servicing, cleaning, or making any
adjustments to the unit.
CAUTION
Raising the mower for service or maintenance
relying solely on mechanical or hydraulic
jacks could be dangerous. The mechanical or
hydraulic jacks may not be enough support or
may malfunction allowing the unit to fall, which
could cause injury.
Do Not rely solely on mechanical or hydraulic
jacks for support. Use adequate jack stands or
equivalent support.
Deck Leveling
Note:
Side to side deck leveling should be done by
an Authorized Service Dealer. Small adjustments can
be accomplished by increasing the tire pressure in the
tire on the low side.
1. Park the machine on a level surface and disengage
the blade control switch.
2. Stop engine, wait for all moving parts to stop, and
remove key. Engage parking brake.
3. Check the air pressure in the drive tires. If needed,
adjust to the recommended inflation; refer to
Checking the Tire Pressure
in Drive System
Maintenance section.
4. Set the height of cut lever to the 3 inch (7.6 cm)
position.
5. Raise the discharge deflector.
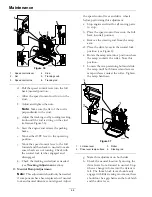
6. Carefully rotate the blades front to rear. Measure
from the tip of the front blade to the level surface
(Figure 19). The blades should measure 3 inches
(7.6 cm).
37
Содержание VANTAGE X Series
Страница 1: ...VANTAGE X SERIES For Serial Nos 315 000 000 Higher Part No 4502 224 Rev A ...
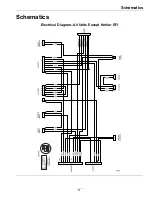
Страница 51: ...Schematics Schematics Electrical Diagram All Units Except Kohler EFI 51 ...
Страница 52: ...Schematics Electrical Diagram Kohler EFI 52 ...
Страница 53: ...Schematics Electrical Schematic All Units Except Kohler EFI 53 ...
Страница 54: ...Schematics Electrical Schematic Kohler EFI 54 ...
Страница 55: ...Schematics Hydraulic Diagram 55 ...
Страница 57: ...Service Record Date Description of Work Done Service Done By 57 ...
Страница 58: ...58 ...

