[64]
In alignment mode, one LED is lit at a time.
Alignment mode
Hold the
+
and
–
buttons for 3 s to enter alignment mode.
• There are six sub-modes within alignment mode.
You can cycle between them by hitting the
Z
button:
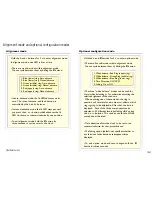
1. Blue (lower) ring: Auto advance
2. Blue (lower) ring: Manual advance
3. Green (middle) ring: Auto advance
4. Green (middle) ring: Manual advance
5. Red (upper) ring: Auto advance
6. Red (upper) ring: Manual advance
• In auto-advance mode, the lit LED advances on its
own. The rate of advance, and the direction, is
controlled by the
+
and
–
buttons.
• To exit alignment mode, hold the
Z
button for
three seconds or cycle power to the clock.
• In manual advance mode, the lit LED stays put until
you press the
+
or
–
button, which advances the lit
LED clockwise or counterclockwise by one position.
Optional configuration mode
Hold the
+
and
Z
buttons for 3 s to enter option mode.
• There are five sub-modes within alignment mode.
You can cycle between them by hitting the
Z
button:
1. White balance: Red Ring (upper ring)
2. White balance: Green Ring (middle ring)
3. White balance: Blue Ring (lower ring)
4. Time Direction: CW/CCW
5. Fading: On or Off
• The three “white balance” modes can be used for
literal white balancing or for otherwise adjusting the
relative brightness of the shadows.
When entering one of these modes, the ring in
question will circulate for a moment to indicate which
ring is going to be adjustable. After that, the time is
displayed. Each of the three components can be
adjusted to 32 different levels (including off) by using
the
+
or
–
buttons. This can be used to turn off the
second hand if desired.
• To exit option mode and save changes, hold the
Z
button for three seconds.
• Time direction allows the clock to be set to run
counterclockwise, for rear-projection use.
• The fading option (default: on) specifies whether or
not the clock fades between subsequent times
displayed.
Alignment mode and optional configuration modes
[Bulbdial Guide]


