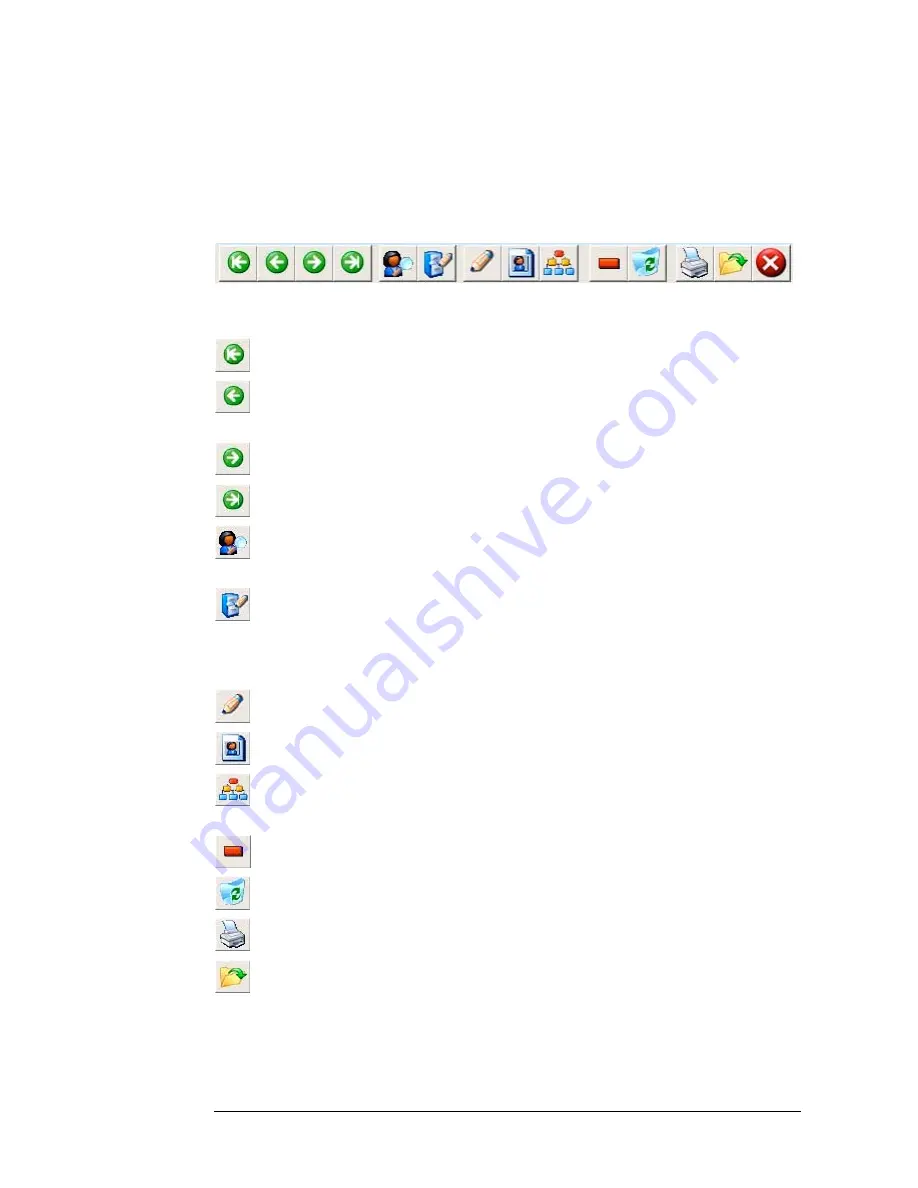
Card Management Toolbar
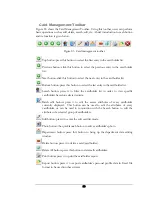
Figure 8.3 shows the Card Management Toolbar. Using this toolbar, users can perform
basic operations such as add, delete, search, edit, etc. A brief introduction to each button
and its function is given below.
Figure 8.3 Card management toolbar
Top button: press this button to select the first entry in the card holder list.
Previous button: click this button to select the previous entry in the card holder
list.
Next button: click this button to select the next entry in the card holder list.
Bottom button: press this button to select the last entry in the cardholder list.
Search button: press it to filter the cardholder list in order to view specific
cardholders based on selected criteria.
Batch edit button: press it to edit the access attributes of every cardholder
currently displayed. This button can be used to edit the attributes of every
cardholder, or can be used in conjunction with the Search button to edit the
attributes of a selected group of cardholders.
Edit button: press it to enter the edit card list mode.
Photo button: the quick launch button to edit a cardholder’s photo.
Department button: press this button to bring up the department data editing
window.
Delete button: press it to delete a card (cardholder).
Delete All button: press this button to delete all cardholders.
Print button: press it to print the cardholder report
Export button: press it to export cardholder’s personal profile data in Excel file
format to be used in other systems.
59
Содержание Flex1.0
Страница 14: ...Fig 2 4 Fig 2 5 Click Finish to complete the installation 7 ...
Страница 16: ...Fig 2 8 9 ...
Страница 42: ...1 Click the Close button on the top menu or 2 Click the small X box on the top right hand corner 35 ...
Страница 54: ...Fig 6 2 Fig 6 3 47 ...
Страница 85: ...Figure 8 27 Department data edit window 78 ...
Страница 98: ...Fig 10 9 Message of out of date records deleted 91 ...
Страница 110: ...Fig 11 15 Event warning message dialog 103 ...
Страница 122: ...Notes 115 ...

