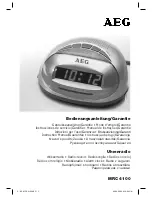
TABLE CLOCK, MIRROR GLASS EUS 90
OPERATING INSTRUCTIONS
Item no. 672627 / Version 01/12
INTENDED USE
The product displays the time of day; furthermore, an alarm function is integrated.
Always observe the safety instructions and all other information included in these
operating instructions.
This product complies with the applicable national and European regulations. All
names of companies and products are the trademarks of the respective owner. All
rights reserved.
PACKAGE CONTENTS
-
Table clock
-
Operating Instructions
SAFETY INSTRUCTIONS
Please read all of the operating instructions before using the product
for the fi rst time; they contain important information about the correct
operation. The warranty will be void in the event of damage caused by
failure to observe these safety instructions! We do not assume any li-
ability for any consequential damage!
Nor do we assume any liability for material and personal damage caused
by improper use or non-compliance with the safety instructions! In such
cases, the warranty will be null and void.
-
For safety reasons, any unauthorised conversion and/or modifi cation of the
product is not permitted. Never dismantle the product.
-
The product is intended exclusively for use in dry interiors; it must not get damp
or wet.
-
This product is not a toy and does not belong in the hands of children. Only use
the product out of the reach of children; the product contains parts that can be
swallowed as well as batteries.
-
Condensation may form when the product is brought from a cold room into a
warm one. Wait until it has reached room temperature before using it.
-
Do not leave the packaging materials unattended. They may become dangerous
playthings for children.
-
Handle the product with care; it can be damaged by impacts, blows, or accidental
drops, even from a low height.
INSTRUCTIONS FOR BATTERIES AND RECHARGE-
ABLE BATTERIES
-
Batteries/rechargeable batteries do not belong in the hands of children.
-
Do not leave batteries/rechargeable batteries lying around; there is a risk that
they could be swallowed by children or pets. If swallowed, consult a doctor im-
mediately.
-
Leaking or damaged batteries/rechargeable batteries in contact with the skin
can cause acid burns, therefore, use suitable protective gloves.
-
Batteries/rechargeable batteries must not be short-circuited, opened or thrown
into a fi re. There is a risk of explosion!
-
Do not recharge normal, non-rechargeable batteries, risk of explosion! Only
charge rechargeable batteries that are intended for this purpose; use suitable
rechargeable battery chargers.
-
Check that the polarity is correct when inserting the batteries/rechargeable bat-
teries (pay attention to plus/+ and minus/-).
CONTROLS AND PARTS
(1) SNOOZE/LIGHT button
(5) 12HR/24HR switch
(2) Function switch
(6) Button MIN
(3) Alarm switch
(7) RESET button
(4) Button HR
INSERTING/REPLACING BATTERIES/RECHARGEABLE
BATTERIES
-
Open the battery compartment on the back of the housing and insert three bat-
teries of type AA/Mignon, observing the correct polarity. The correct polarity is
indicated in the battery compartment.
-
Close the battery compartment again.
-
A change of battery for the clock is required when the display contrast fades or
the display no longer works.
If nothing is shown in the display after installing the battery, press the RE-
SET button (7) with a pointed object (e.g. with a bent paper clip). If nothing
is still displayed after that, the batteries are discharged. Please replace it as
described above.
The use of rechargeable batteries is possible. The lower operating voltage
(rechargeable battery = 1.2 V, battery 1.5 V) and lower capacity, however, will
reduce the operating time.


