7
INSTALLATION (CONTINUED)
3. Drill through the wall according to measurements and positions indicated.
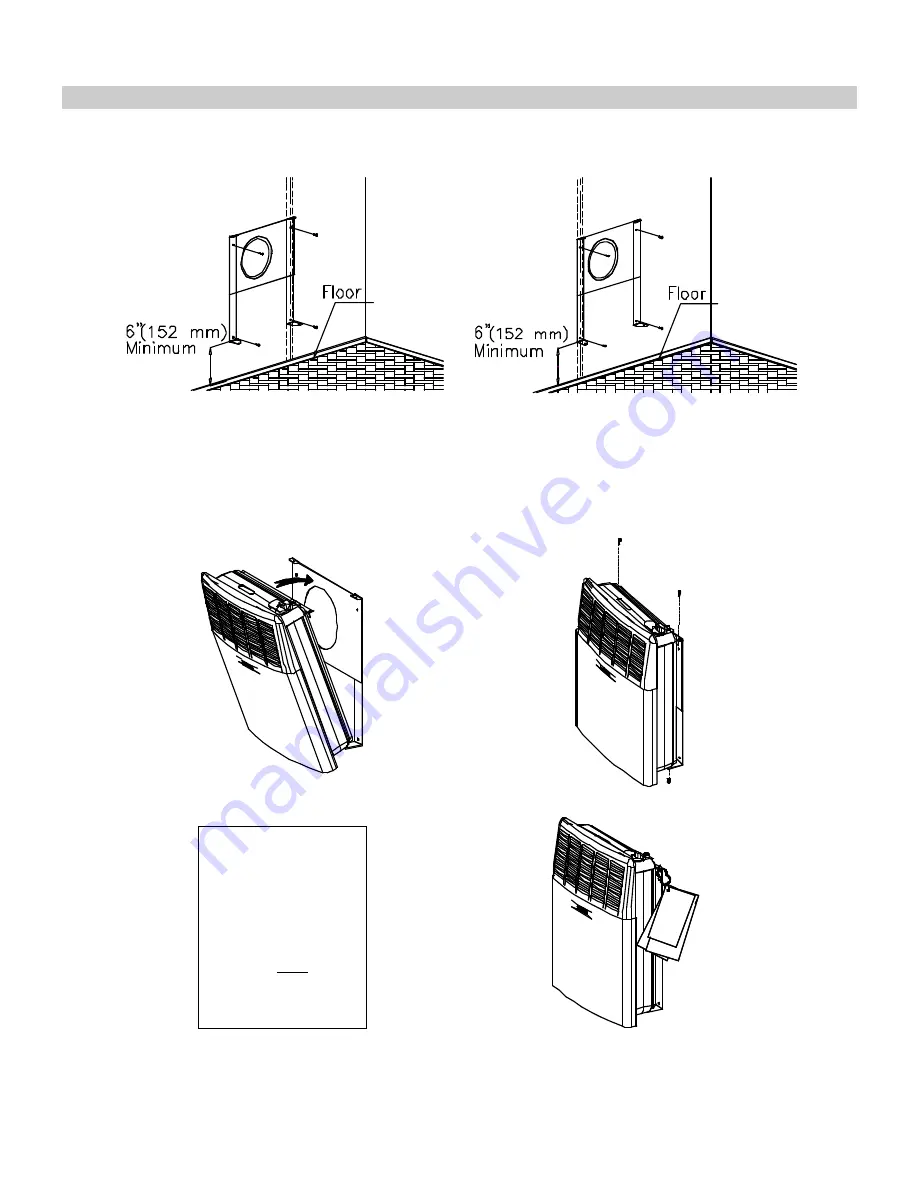
4. Place wall bracket over the hole. After leveling the hanging bracket, mark the four holes as shown in figures 9 and
10.
Figure 9 Figure 10
5. Remove the hanging bracket and drill the four holes.
6. Insert in each hole the anchors provided.
7. Place back the hanging bracket and fix it with four screws.
MOUNTING THE HEATER ON HANGING BRACKET
Place the heater on the hanging bracket and fix it with its screws. (See Figure 11 and 12).
Figure 11
Figure 12
ATTENTION:
THE ATTACHED SET
OF THREE MARKING
PLATES (RATING
PLATE, OPERATION
INSTRUCTIONS, AND
SAFETY PLATE)
MUST NOT BE
REMOVED FROM THE
APPLIANCE AT ANY
TIME.
Figure 13
Содержание DVEL 12
Страница 13: ...12 OPERATION CONTINUED Pilot Burner...
Страница 14: ...13 POUR COUPER L ADMISION DE GAZ DE L APPAREIL Veilleuse ALLUMAGE...
Страница 20: ...19 Model DVEL 8 19...
Страница 21: ...Model DVEL 12 20...
Страница 22: ...Model DVEL 20 21...


