4
Paper Insertion in Tray 1
It is important to insert the paper stock into the tray straight and consistently to
ensure consistent ballots. If the paper is placed in the tray at an angle, the ballot
images will be skewed. The printing drum in the printer is in a fixed location, so it
is important to place the paper in the tray consistently to minimize any image
adjustments that need to be made in the Ballot Image Manager when replacing
paper. Also, make sure to jog the stack of paper itself with even edges before
inserted it.
Main Paper Guides
The main paper guides should be set for 8.50” wide paper. When these guides lock
into position, the distance between the sides is 8.53” so they can accommodate
oversized paper. The excess space will allow paper movement of .030” side to
side. This will result in ballot images that vary .030” from stack to stack depending
on alignment of the edge of the side guides of the paper. Before inserting paper,
make sure to jog the stack with smooth edges. This will ensure consistency from
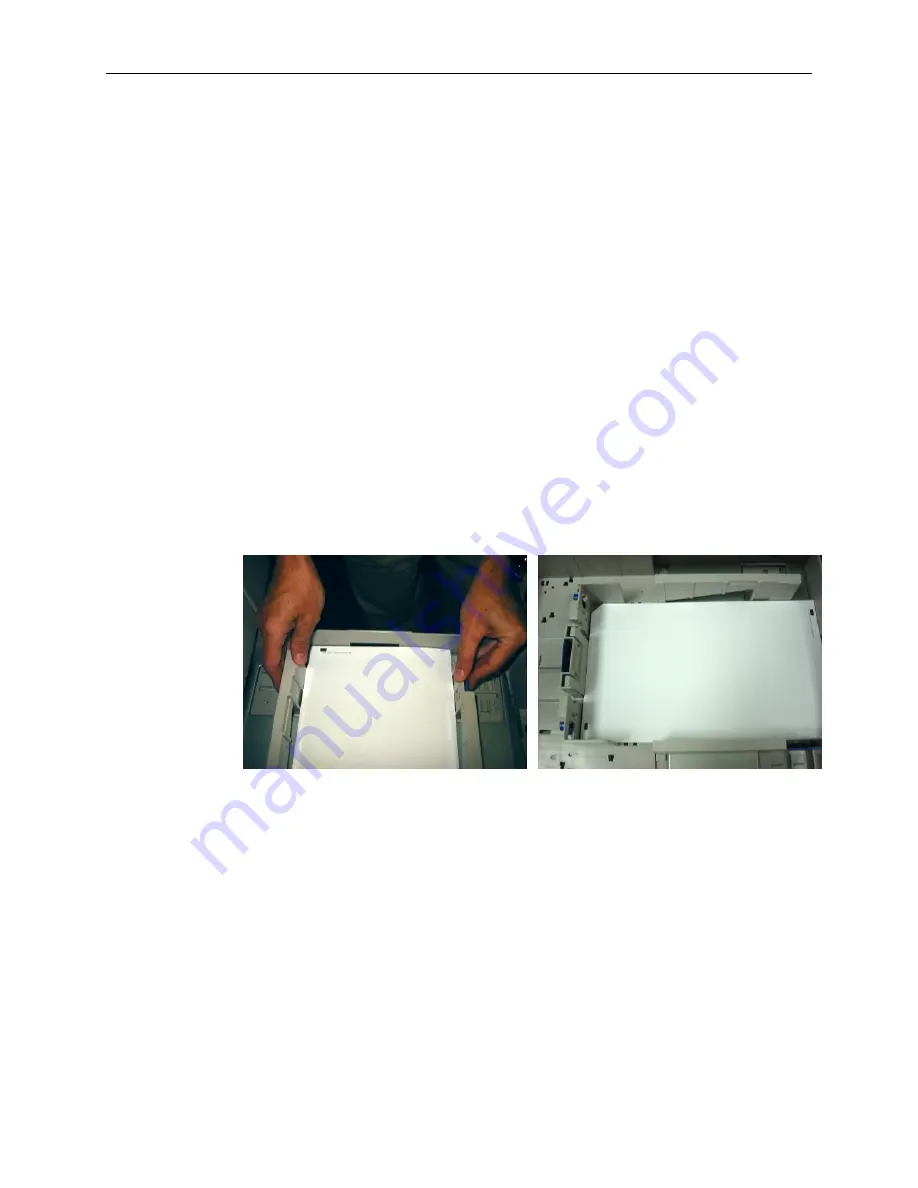
top to bottom of the stack. We also recommend centering the paper between the
two side guides. The easiest way to do this is to grab both sides of the guide and
press them against the edges of the paper as shown in the picture below on the left.
Press guides together to center stack. Cut corner in upper left side of tray.
When you release the side guides, they will move back into the normal position,
and the paper will be centered between the guides. If printing two-sided ballots in
duplex mode, the cut corner of the ballot stock should be in the upper left-hand
corner as shown in the second picture. If you are printing single sided ballots with
duplexing disabled, the cut corner should be in the upper right-hand corner.


