background image

14

1

2

3

4

5

7

6

8

10

11

12

9

13

Operators Manual ES-650PIA

Overview of Component

1.  Guide Spar

2.  Collection Bag

3.  Throttle Lever

4.  Hight adjustment 

suction Trunk

5.  Ejection Channel

6.  Turbine Housing

7.  Nozzle

8.  Rear Wheel

9.  Engine

10. Rolling Bag

11. Gear Lever

12. Lashing Points

13. Front Wheel

Engine controls

Be sure to read the enclosed operating instructions for 

the engine.

Choke

When the engine is cold, move the lever to the CLOSED 

position. After starting, slowly push the choke lever back 

to position RUN. If the engine is warm, leave the choke 

lever in position RUN and start the engine.

Fuel Tap

Before starting the engine, open the fuel tap on the en-

gine (ON position). Close again after switching off (OFF 

position).

Ignition Interruption Switch

The ignition interruption switch must be in position “An” 

to start the engine.

Set the switch to the “Aus” position to stop the engine. 

Operating Controls

Familiarize yourself with the operating elements of your leaf and waste suction machine.

Fuel Tap

ON

Choke Lever

Closed

Closed

ON

Direction of 

motion

Содержание ES-650PIA

Страница 1: ...72555 Metzingen Telefon 07123 96830 Telefax 07123 9683258 http www echo motorgeraete de email info echo motorgeraete de Original OPERATORS MANUAL Vacuum Collector ES 650PIA WARNING Read the instructi...

Страница 2: ...15 Gear Shift 15 Adjusting Spindle for Suction Trunk 15 Operating Instructions Start the machine 16 Shutting down the machine 16 In an emergency situation 16 Installing the collecting bag 16 Empty th...

Страница 3: ...manship top quality and a long service life We hope that the ERCO leaf and waste vacuum cleaner will give you a lot of pleasure and relief at work A suction hose is also available for this device whic...

Страница 4: ...instructions in this manual for safe handling of the leaf and waste suction unit A prerequisite for safe use of the device is compliance with all safety instructions The operator must have read and u...

Страница 5: ...rk switch off the engine and allow it to cool down danger of burning due to hot surfaces Before carrying out any work on the unit shut it down and remove the spark plug connector Do not refill petrol...

Страница 6: ...r can always work optimally 8 In very difficult dusty and wet operating conditions the bag should be cleaned at shorter intervals see operating instructions 9 Frequent motor maintenance is required un...

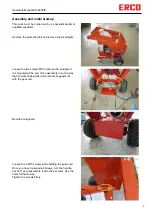
Страница 7: ...Loosen the two screws M8 to remove the mudguard it is mounted at the end of the assembly in such a way that it points downwards and prevents engagement with the gear unit Mounted mudguard Loosen the...

Страница 8: ...d The two grips are screwed to the handlebar with the M8 toggle screw here you can also adjust the inclina tion Repeat this on the right side The locking hook is mounted in the middle of the han dle b...

Страница 9: ...r The bell crank is mounted as shown Mounting the gear lever Do not tighten this fixing nut Check the smooth run ning of the gearshift Now mount the holder of the height adjustment spindle The two M6...

Страница 10: ...circuit cable along the left beam and check the correct position of the switch after the test run Lay the cables and Bowden cables properly in the frame Remove the rolling bag from its packaging The c...

Страница 11: ...them tight again The mounting and centering must be fitted as shown The bag is simply inserted into the rolling bag and held in place by the elastic band To mount the ejection nozzle the frame of the...

Страница 12: ...e frame is fixed from below Completely mounted ejecting elbow The plastic ejection sheet is placed over the ejector and fastened with 8 M8x20 screws First loosen the safety screw so that the adapter r...

Страница 13: ...unted optionally and improves the stopping of the V belt Now mount the intake nozzle align it parallel to the ground and tighten it hand tight with the toggle screws Attention In order for the ES 650P...

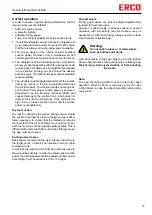
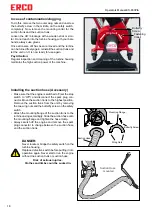
Страница 14: ...to the CLOSED position After starting slowly push the choke lever back to position RUN If the engine is warm leave the choke lever in position RUN and start the engine Fuel Tap Before starting the eng...

Страница 15: ...trunk height of 7 5 cm is generally con sidered ideal for dry suction material Place the suction trunk lower in the appropriate position with wet or even wet and rotten material The lowest setting is...

Страница 16: ...th the closed side first into the dust cover and pull the edge over the upper frame of the rolling bag with an elastic band Now you can push the Rolling Bag with collecting bag under the handle of the...

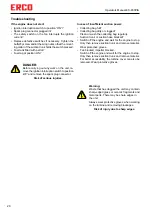
Страница 17: ...on power is unsatisfactory Dry leaf suction Dry leaf is crushed by the turbine during suction Adjust the suction trunk only as close to the ground as is abso lutely necessary to ensure that the implem...

Страница 18: ...turbine housing Replace defective switch before putting it into operation again Never start or run the engine without the suction trunk or suction hose Risk of serious injuries Clothes and limbs could...

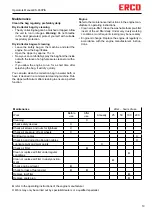
Страница 19: ...e Refer to the maintenance instructions in the engine man ufacturer s operating instructions Clean air pre filter Clean the washable foam pre filter insert of the air filter daily Under very dusty wor...

Страница 20: ...rotective gloves when working on the turbine and removing blockages Risk of injury due to sharp edges DANGER Before carrying out any work on the unit re move the ignition interruption switch to positi...

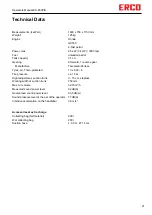
Страница 21: ...ss Tyres air Thorn protected 13 x 5 00 6 Tire pressure ca 1 bar Hight adjustment suction trunk 0 15 cm stepless Working width of suction trunk 750 mm Max Air volume 3 270 m h Measured sound power leve...

Страница 22: ...ing other EU directives have been applied EMC Directive 2004 108 EC EU Directive 2000 14 EC The following harmonised standards have been applied EN 349 1993 A1 2008 EN 953 1997 A1 2009 EN ISO 12100 20...

Страница 23: ...23 Operators Manual ES 650PIA...

Страница 24: ...tr 7 D 72555 Metzingen Tel 0049 7123 96830 Fax 0049 7123 9683258 info echo motorgeraete de www echo motorgeraete de All figures are approximate We reserve the right to change specification without pri...

Отзывы: