Placing Originals on the Product
Follow the instructions here to place your original documents or photos on the product.
Caution:
Do not place anything on top of your product or use its cover as a writing surface to avoid
damaging it.
Placing Originals on the Scanner Glass
Placing Originals in the Automatic Document Feeder
Placing Originals on the Scanner Glass
You can place originals up to this size on the scanner glass: Letter (8.5 × 11 inches [216 × 279 mm]) or
A4 (8.3 × 11.7 inches [210 × 297 mm]).
1.
Open the document cover.
2.
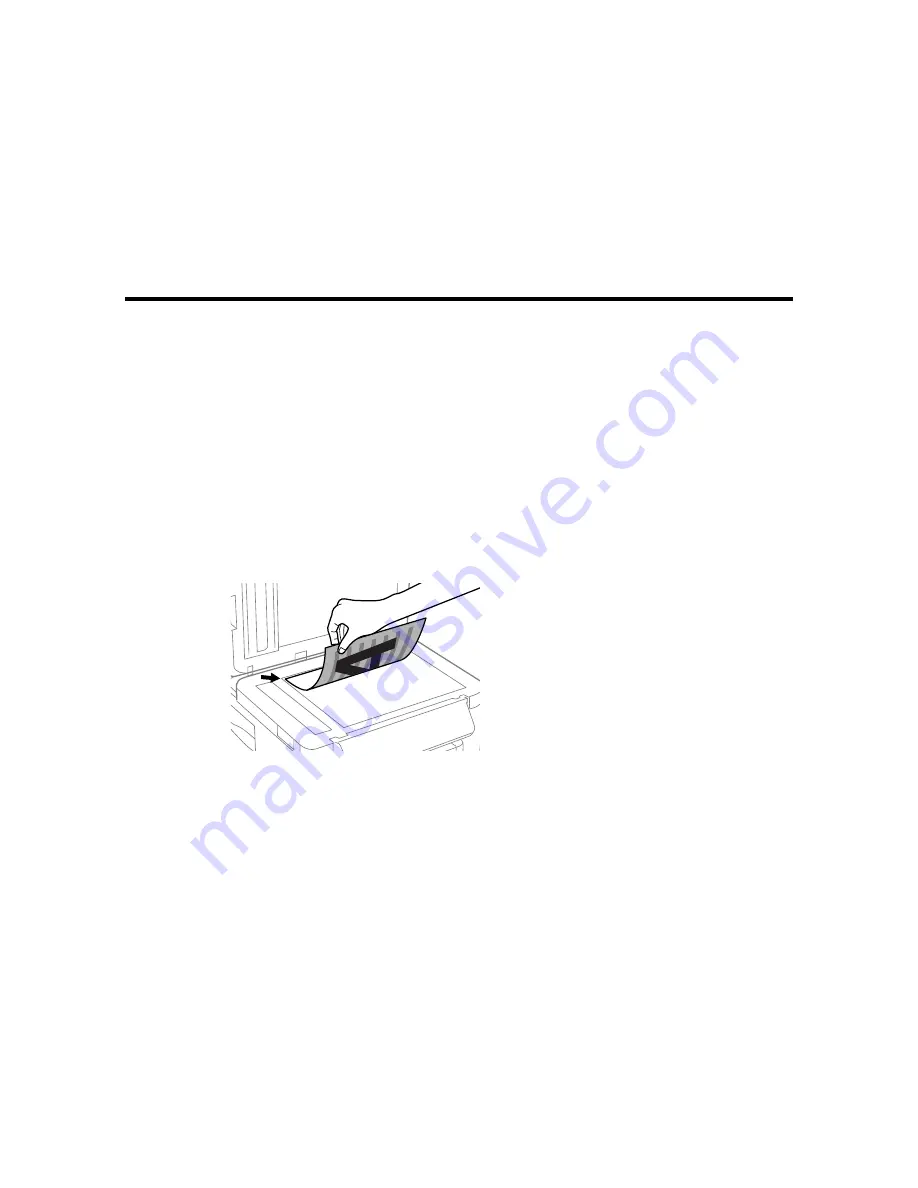
Place your original facedown on the scanner glass with the top facing as shown. Slide the original to
the edges of the indicated corner.
Note:
You can place multiple originals on the scanner glass. Just make sure they are at least 0.2
inch (5 mm) away from each other.
3.
Close the document cover gently to keep your original in place.
Parent topic:
Placing Originals on the Product
58
Содержание WorkForce WF-3540
Страница 1: ...WF 3540 User s Guide ...
Страница 2: ......
Страница 13: ...WF 3540 User s Guide Welcome to the WF 3540 User s Guide 13 ...
Страница 37: ...4 Slide the edge guide to your paper size 37 ...
Страница 41: ...1 Close the paper stopper and output tray if necessary 2 Pull out the paper cassette 41 ...
Страница 42: ...3 Slide the edge guides outward 4 Slide the edge guide to your paper size 42 ...
Страница 46: ...2 Pull out the paper cassette 3 Slide the edge guides outward 46 ...
Страница 70: ...Parent topic Copying 70 ...
Страница 111: ...Note Epson Scan may start in a different mode when you first access it Parent topic Starting a Scan 111 ...
Страница 123: ... Normal preview Click the Auto Locate icon to create a marquee dotted line on the preview image 123 ...
Страница 129: ...129 ...
Страница 156: ...1 Telephone wall jack 2 DSL filter 3 DSL modem ISDN connection one phone number 156 ...
Страница 157: ...1 ISDN wall jack 2 Terminal adapter or ISDN router ISDN connection two phone numbers 157 ...
Страница 158: ...1 ISDN wall jack 2 Terminal adapter or ISDN router 158 ...
Страница 176: ...3 Select Fax Settings for Printer Select your product if prompted You see this window 176 ...
Страница 185: ...3 Select Fax Settings for Printer Select your product if prompted You see this window 185 ...
Страница 285: ...3 Carefully remove any jammed paper 4 Remove any jammed paper from the duplexer 285 ...
Страница 286: ...5 Open the duplexer 286 ...
Страница 287: ...6 Carefully remove any jammed paper stuck inside 7 Reattach the duplexer 287 ...
Страница 290: ...6 Carefully remove any jammed pages in the direction shown 290 ...


