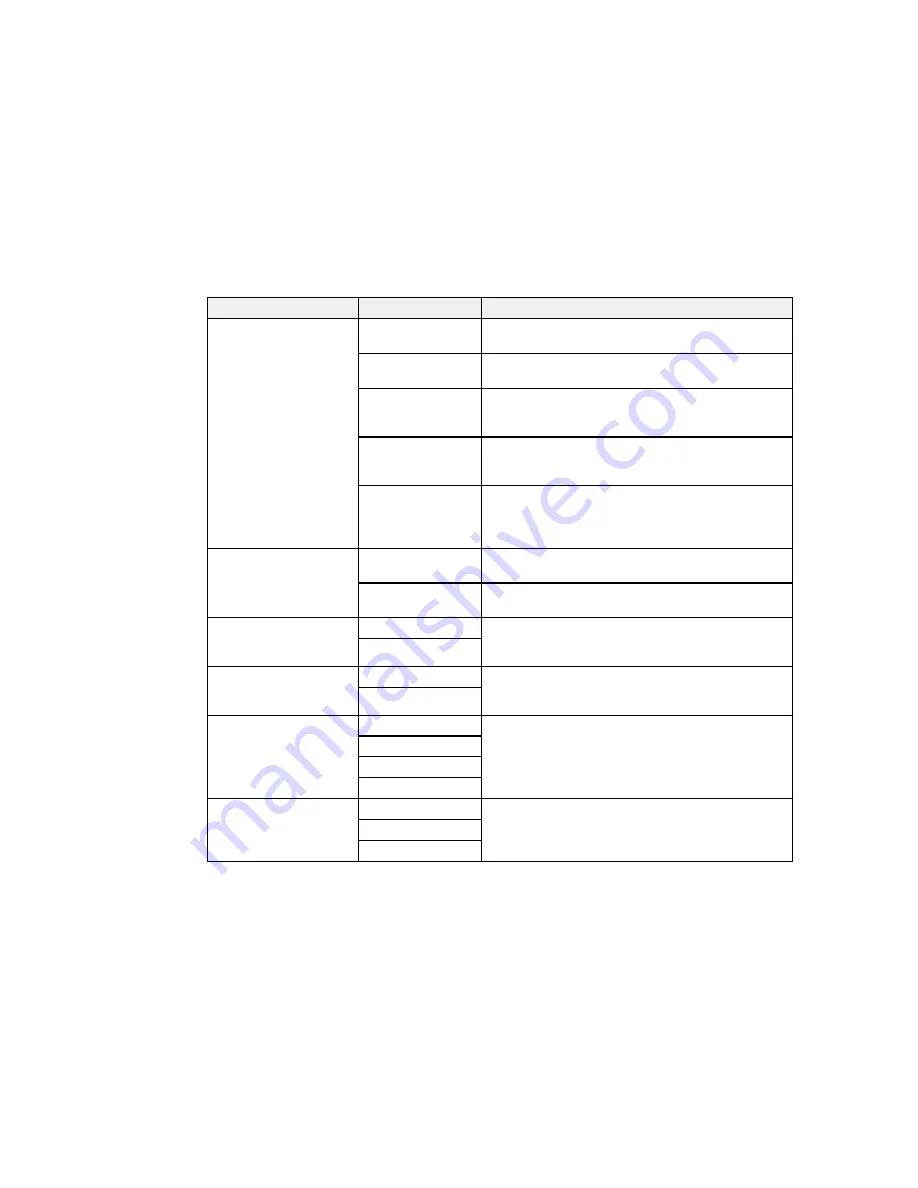
Setting
Options
Description
Fax Output
Other Settings
Lets you create a folder for saving faxes on a memory
device and select settings for forwarding faxes
Save to Inbox
Saves incoming faxes in the product's memory; you
can view the faxes on the LCD screen and print them.
Save to Computer
Select
Yes and Print
to have faxes saved to your
computer and printed automatically; requires Epson
FAX Utility
Save to Memory
Saves incoming faxes to a connected USB device;
Device
select
Yes and Print
to have faxes saved to the
device and printed automatically
Forward
Forwards incoming faxes to as many as 5 numbers in
your contact list; select
Yes and Print
to have faxes
forwarded and printed automatically (black-and-white
faxes only)
Auto Reduction
On
Select to reduce the size of large received faxes to fit
on the paper size in the selected paper source
Off
Select to print large incoming faxes at their original
size on multiple sheets, if necessary
Auto Rotation
On
If you have loaded A5-size paper, select
On
to rotate
landscape-oriented incoming faxes so that they print
Off
correctly on the paper.
Collation Stack
On
Select
On
to print incoming faxes so that the pages
are stacked in the correct page order; may not be
Off
available in low-memory conditions
Print Suspend Time
Off
Select
On
to set a time period to stop automatic
printing of faxes or reports and save received faxes in
On
the product’s memory; check available memory space
Time to Stop
before using
Restart Time
Forwarding Report
Print on Error
Selects whether or when to print a report after an
incoming fax is forwarded
Do Not Print
256
Содержание WF-6590 series
Страница 1: ...WF 6590 User s Guide ...
Страница 2: ......
Страница 15: ...WF 6590 User s Guide Welcome to the WF 6590 User s Guide For a printable PDF copy of this guide click here 15 ...
Страница 72: ...1 Flip the feeder guard forward and pull up the paper support and extension 2 Slide the edge guides outward 72 ...
Страница 97: ...Related tasks Enabling the Optional Paper Cassettes PostScript Printer Software OS X 97 ...
Страница 99: ...1 Open the document cover 99 ...
Страница 102: ...3 Insert the originals into the ADF faceup and top edge first The ADF icon on the control panel lights up 102 ...
Страница 211: ...You see this window 211 ...
Страница 237: ...DSL connection 1 Telephone wall jack 2 DSL filter 3 DSL modem 237 ...
Страница 238: ...ISDN connection 1 ISDN wall jack 2 Terminal adapter or ISDN router 238 ...
Страница 271: ...You see this window 4 Select Speed Dial Group Dial List 271 ...
Страница 335: ...6 Raise the lever and open the ADF cover F 335 ...
Страница 364: ...2 Open rear cover 1 D1 3 Carefully remove any jammed paper Caution Do not touch the paper feed mechanism 364 ...
Страница 368: ...4 Carefully remove any jammed pages 368 ...
Страница 369: ...5 Close the ADF cover then raise the document cover 369 ...
Страница 370: ...6 Carefully remove any jammed pages 7 Lower the document cover 370 ...


