background image

1.

Do one of the following to start Document Capture Pro or Document Capture:

Windows 10:

Click

and select

All apps

. Select

EPSON Software

, then select

Document

Capture Pro

.

Windows 8.x

: Navigate to the

Apps

screen and select

Document Capture Pro

.

Windows (other versions)

: Click

or

Start

, and select

All Programs

or

Programs

. Select

EPSON Software

, then select

Document Capture Pro

.

OS X

: Open the

Applications

folder, select the

Epson Software

folder, and select

Document

Capture

. Select your product and click

OK

, if necessary.

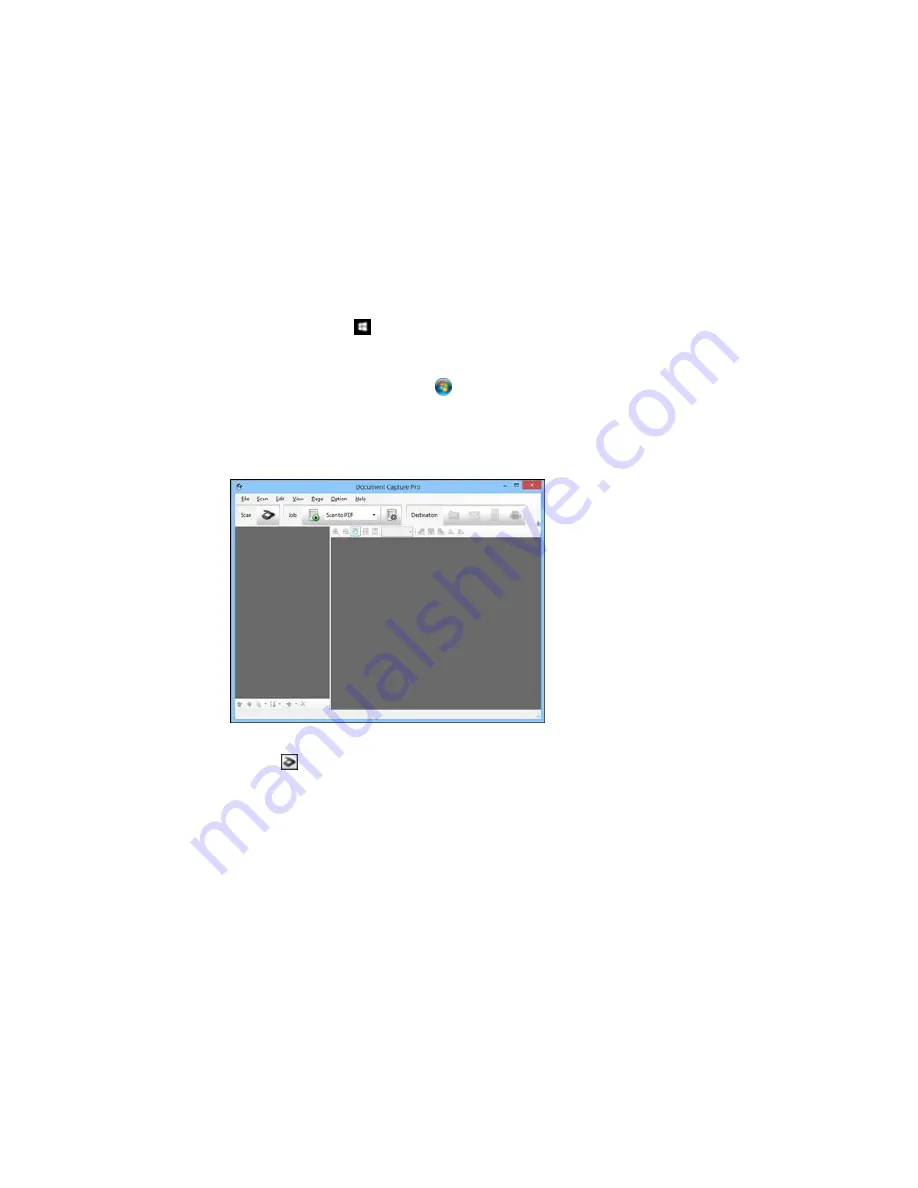
You see a window like this:

2.

Click the

Scan icon.

Содержание WF-6530

Страница 1: ...WF 6530 User s Guide ...

Страница 2: ...WF 6530 User s Guide Welcome to the WF 6530 User s Guide For a printable PDF copy of this guide click here ...

Страница 3: ...ud Print Printing and Scanning with NFC from Your Android Device Using the Control Panel See these sections to learn about the control panel and select control panel settings Control Panel Buttons and Lights Setting a Password and Locking the Control Panel Setting User Feature Restrictions Access Control Changing LCD Screen Language Adjusting Control Panel Sounds Adjusting the Screen Brightness Tu...

Страница 4: ...er button and light 2 The home button 3 The Interrupt button 4 The Reset button 5 The Stop button 6 The LCD screen 7 The back button 8 The Status button and lights 9 The numeric keypad 10 The C clear button 11 The B W button 12 The Color button ...

Страница 5: ...sumables One or more of the ink cartridges are expended or the maintenance box is full Press the Status button to open the Status Menu select Printer Information and check the status of the consumables Unread or unprinted fax data is stored in the product If you have set up the product to save received faxes on a computer or external storage device this icon may also indicate that received faxes h...

Страница 6: ... not know the login information Access to the product s functions are restricted to authorized users and a user is currently logged in Press the icon to log out Parent topic Control Panel Buttons and Lights Status Button Information Press the Status button on the control panel to view the current product and job status Function Description Printer Information Displays the status of consumables and...

Страница 7: ...nistrator password to lock the following settings and prevent them from being changed System Administration Setup settings Eco mode settings Presets Contacts Note For more information on administration settings see the Administrator s Guide 1 Press the home button if necessary 2 Select Setup You see a screen like this 3 Scroll down and select Admin Settings 4 Select Admin Password 5 Select Registe...

Страница 8: ... Setting and select On When the control panel is locked you must enter the password to access any of the locked settings Note If you forget your password contact Epson for assistance Entering Characters on the LCD Screen Using Copy Fax and Scan Presets Parent topic Using the Control Panel Related tasks Setting User Feature Restrictions Access Control ...

Страница 9: ...ct To change the keyboard layout select Parent topic Setting a Password and Locking the Control Panel Using Copy Fax and Scan Presets You can save frequently used copy fax and scan settings as presets This lets you easily reuse them whenever necessary Note Presets can be locked by an administrator If you cannot access or change presets contact your administrator for assistance 1 Press the home but...

Страница 10: ...creen like this 3 Select Add New 4 Select the function for which you want to set up a preset You see the main screen for that function such as the Copy screen 5 Select the settings you want to save and select Save ...

Страница 11: ...etting User Feature Restrictions Access Control Using Web Config Access Control Settings you can restrict product features for individual users to prevent misuse of the product Restricted features require the user to enter an ID and password on the product control panel After you set up feature restrictions in Web Config you must enable them using the product control panel as described here Note F...

Страница 12: ...he Control Panel Related tasks Entering a User ID and Password for Printing Entering a User ID and Password for Scanning Windows Setting a Password and Locking the Control Panel Changing LCD Screen Language You can change the language used on the LCD screen Note This setting can be locked by an administrator If you cannot access or change this setting contact your administrator for assistance 1 Pr...

Страница 13: ...anguage Parent topic Using the Control Panel Adjusting Control Panel Sounds You can adjust the sound level heard when you press buttons on the control panel Note This setting can be locked by an administrator If you cannot access or change this setting contact your administrator for assistance 1 Press the home button if necessary 2 Select Setup ...

Страница 14: ... Press 7 Press to decrease or to increase the sound 8 Select OK to exit Note You can also adjust the Sound Type and the sound level for various product functions Parent topic Using the Control Panel Adjusting the Screen Brightness You can adjust the brightness of the LCD screen 1 Press the home button if necessary 2 Select Setup ...

Страница 15: ...exit Parent topic Using the Control Panel Turning Off the Operation Time Out Setting The Operation Time Out setting causes the LCD screen to return to the Home screen after a few minutes of inactivity This feature is enabled by default but you can turn it off Note This setting can be locked by an administrator If you cannot access or change this setting contact your administrator for assistance 1 ...

Страница 16: ...ct Common Settings 5 Scroll down and select Operation Time Out 6 Select Off Parent topic Using the Control Panel Product Parts Locations See these sections to identify the parts on your product Product Parts Front Product Parts Inside Product Parts Back Parent topic Product Basics ...

Страница 17: ... and number code If you encounter any paper jams or errors use these codes to locate and correct the problem 1 ADF cover F 2 ADF edge guides 3 ADF input tray 4 ADF output tray 5 Front paper feed slot edge guides 6 Front paper feed slot B2 7 Paper cassette 1 C1 ...

Страница 18: ...1 Rear paper feed edge guides 2 Paper support and extension 3 Rear paper feed slot B1 4 Feeder guard 5 Output tray 6 Paper cassette edge guides 7 Paper cassette ...

Страница 19: ...beled with a letter and number code If you encounter any paper jams or errors use these codes to locate and correct the problem 1 Document cover 2 Scanner glass 3 Control panel 4 USB Type A port for external devices 5 Print head 6 Front cover A 7 NFC Near Field Communications tag ...

Страница 20: ... a letter and number code If you encounter any paper jams or errors use these codes to locate and correct the problem 1 Rear cover 2 D2 2 AC inlet 3 Rear cover 1 D1 4 Service USB port do not remove sticker 5 LINE port 6 EXT port 7 LAN port 8 USB port Parent topic Product Parts Locations ...

Страница 21: ...he Eco Mode Settings You can use the product s control panel to change the Eco Mode settings Note The Sleep Timer setting in Eco Mode overrides the Sleep Timer setting in the Common Settings menu If you turn on Eco Mode 2 sided copying is selected by default The Eco Mode setting can be locked by an administrator If you cannot access or change this setting contact your administrator for assistance ...

Страница 22: ... this setting contact your administrator for assistance The Sleep Timer setting in Eco Mode overrides this Sleep Timer setting 1 Press the home button if necessary 2 Select Setup 3 Scroll down and select System Administration Enter the administrator password if necessary 4 Select Common Settings 5 Select Sleep Timer You see a screen like this 6 Do one of the following Press the or icons to reduce ...

Страница 23: ...tting can be locked by an administrator If you cannot access or change this setting contact your administrator for assistance 1 Press the home button if necessary 2 Select Setup You see a screen like this 3 Scroll down and select System Administration Enter the administrator password if necessary 4 Select Common Settings 5 Select Power Off Timer 6 Select a time period between 30minutes and 12h 12 ...

Страница 24: ...uct for network printing See the link below 2 If you did not already set up Email Print when you installed your product software visit epson com connect to learn more about Email Print check compatibility and get detailed setup instructions 3 Send an email with attachments to your product s Email Print address Note Both the email and any attachments print by default You can change these printing o...

Страница 25: ...d the software 3 Download and install the Remote Print software 4 Obtain the email address and optional access key of the Epson product you want to use for printing and enter this address during Remote Print setup 5 Select the print command in your application and choose the Remote Print driver for your Epson product Parent topic Epson Connect Solutions for Smartphones Tablets and More Related top...

Страница 26: ...our product for wireless printing See the link below 3 Connect your Apple device to the same wireless network that your product is using 4 Print from your device to your product Note For details see the AirPrint page on the Apple website Parent topic Product Basics Related topics Wi Fi or Wired Networking Using Google Cloud Print With a Google Account you can print from your Apple or Android devic...

Страница 27: ...rd and click Sign in or if you don t have an account click Sign up for a new Google Account and follow the on screen instructions 10 Click Finish printer registration to complete setup and print a test page Your product is now linked to your Google Account and can be accessed from any Chromebook computer Apple or Android device with Internet access Visit Epson Support for more information on using...

Страница 28: ...Add Device 4 Click the Register button that appears next to your product 5 Click Register on the confirmation screen Your product s LCD screen displays a confirmation message 6 Select OK or press the OK button on your product to confirm the Google Cloud Print connection and print a test page Your product is now linked to your Google Account and can be accessed from any Chromebook iPhone or Android...

Страница 29: ...g If you are going to print make sure paper is loaded in the product If you are going to scan place your original on the product for scanning 4 Touch the NFC antenna of your mobile device to the NFC tag on your product Note If you do not see the NFC logo on your product your administrator may have disabled NFC The location of your mobile device s NFC antenna varies See your mobile device documenta...

Страница 30: ... printer and mobile device connect Note If the mobile device and product disconnect try to print or scan a document The mobile device and product should reconnect automatically 6 If you are going to print open the file you want to print in Epson iPrint 7 Touch the NFC antenna of your mobile device to the NFC tag on your product to start printing or scanning Parent topic Product Basics Related task...

Страница 31: ...etup WPS Printing a Network Status Sheet Configuring Email Server Settings Changing or Updating Network Connections Wi Fi Infrastructure Mode Setup You can set up your product to communicate with your computer using a wireless router or access point The wireless router or access point can be connected to your computer over a wireless or wired network 1 Epson product ...

Страница 32: ...l panel To install your product on a wireless network follow the instructions on the Start Here sheet and install the necessary software by downloading it from the Epson website The installer program guides you through network setup Note Breakdown or repair of this product may cause loss of fax and network data and settings Epson is not responsible for backing up or recovering data and settings du...

Страница 33: ... instead Then follow the instructions on changing to a wired network connection in this guide 6 Select the name of your wireless network or enter the name manually Note To enter the wireless network name manually select Other Networks and select the Network SSID field Use the displayed keypad to enter your network name 7 Select the Password field and enter your wireless password using the displaye...

Страница 34: ...select OK to save them Note If you need to change a setting press the back button 10 If you want to print a network setup report press one of the buttons Otherwise select Done 11 Press the home button to exit Your product should now be connected to the network Note If the Wi Fi connection symbol isn t lit or doesn t appear on the LCD screen you may have selected the wrong network name or entered t...

Страница 35: ...ting in this mode your product displays an AP connection symbol on the LCD screen Peer to peer mode The product communicates one to one with another Wi Fi Direct capable device When operating in this mode your product displays a Direct or D connection symbol on the LCD screen To disconnect a peer to peer mode connection release the connection to your product from your computer or other device To e...

Страница 36: ...puter or other devices without a wireless router or access point 1 Press the home button if necessary 2 Press 3 Select Setup You see a screen like this 4 Select Wi Fi Direct Setup 5 Select Connection Setup 6 To enable Wi Fi Direct using the default password select Proceed Note You can change the Wi Fi Direct password but you will no longer be able to use NFC to connect to the product ...

Страница 37: ...nnection symbol on the LCD screen and should be able to print directly to your product from your computer or device Note If the AP or Direct connection symbol is not displayed on the LCD screen Wi Fi Direct mode is not enabled Repeat these steps to try again Parent topic Wi Fi Direct Mode Setup Related references Status Icon Information Related tasks Entering Characters on the LCD Screen Changing ...

Страница 38: ...s or computers to your product via Wi Fi Direct they are disconnected when you change the password 1 Press the home button if necessary 2 Press 3 Select Setup You see a screen like this 4 Select Wi Fi Direct Setup 5 Select Connection Setup 6 To change the Wi Fi Direct password select Change Password and select Yes 7 Enter your new Wi Fi Direct password ...

Страница 39: ...eed You see a screen like this 9 Scroll down to view the Wi Fi network name SSID and password 10 Use your computer or wireless device to select the SSID displayed on the LCD screen then enter the password shown 11 Press the home button to exit You see either an AP or Direct connection symbol on the LCD screen and should be able to print directly to your product from your computer or device Note If...

Страница 40: ...PS enabled look for a button labeled WPS on your router or access point If there is no hardware button there may be a virtual WPS button in the software for the device Check your network product documentation for details Using WPS to Connect to a Network Parent topic Wi Fi or Wired Networking Using WPS to Connect to a Network If you have a WPS enabled wireless router or access point you can use Wi...

Страница 41: ...k connection is successful the Wi Fi icon in the upper right corner of the LCD screen is lit as shown Note If you do not see a lit Wi Fi icon repeat these steps Parent topic Wi Fi Protected Setup WPS Printing a Network Status Sheet You can print a network status sheet to help you determine the causes of any problems you may have using your product on a network ...

Страница 42: ...oblems you have Parent topic Wi Fi or Wired Networking Configuring Email Server Settings To use features such as scanning to email or forwarding faxes to email you need to configure the email server You can select settings for the email server using the control panel on the product Note These settings can be locked by an administrator If you cannot access these settings contact your administrator ...

Страница 43: ...s 5 Select one of the options shown above then select the settings you want to use Contact your internet service provider if necessary to confirm the authentication method for the email server 6 Select OK to save the settings and select Done to exit 7 Select Connection Check to verify the connection to the email server Parent topic Wi Fi or Wired Networking Related tasks Scanning to Email Forwardi...

Страница 44: ... is connected to the same network as your product Note For more information on the Web Config utility see the Administrator s Guide 1 Print a network status sheet 2 Locate the IP Address for your product that is listed on the network status sheet 3 On a computer or other device connected to the same network as your product open a web browser 4 Enter your product s IP address into the address bar Y...

Страница 45: ...ownload and install your product software from the Epson website 6 Follow the on screen instructions to install the software 7 When you see the Select Your Connection screen select Wired network connection 8 If you see a Select Setup Option screen select Set up printer for the first time 9 Continue following the rest of the on screen instructions Parent topic Changing or Updating Network Connectio...

Страница 46: ...re Windows Disabling Wi Fi Features You may need to disable your product s Wi Fi features if you change your network connection type or need to solve a problem with your network connection Note Before disabling Wi Fi features make a note of your product s SSID network name and password and any network settings selected for the Epson Connect services you may use 1 Press the home button if necessary...

Страница 47: ...6 Select Yes to disable Wi Fi Parent topic Changing or Updating Network Connections ...

Страница 48: ...Feed Slot Paper Loading Capacity Available Epson Papers Paper or Media Type Settings Printing Software Selecting the Paper Settings for Each Source Control Panel Selecting Default Paper Settings Administrator Loading Paper in the Cassette You can load paper up to this size in the paper cassette Legal 8 5 14 inches 216 356 mm 1 Make sure the product is not operating and pull out the paper cassette ...

Страница 49: ...2 Pinch and slide the front edge guide outward all the way then pinch and slide the side edge guides to the marker for the paper size you are using 1 Paper size marker ...

Страница 50: ...the paper fits beneath the arrow mark inside the edge guides 1 Paper size marker 4 Make sure the paper size label matches the size of the paper loaded in the paper cassette If necessary remove the label holder change the paper size indicated on the label and replace the label holder 5 Insert the paper cassette all the way into the product ...

Страница 51: ...down Load letterhead or pre printed paper top edge first Do not load paper above the arrow mark inside the edge guides Check the paper package for any additional loading instructions Parent topic Loading Paper Related references Paper Loading Capacity Related tasks Loading Paper and Envelopes in the Rear Paper Feed Slot Loading Paper in the Front Paper Feed Slot Loading Paper and Envelopes in the ...

Страница 52: ...1 Flip the feeder guard forward and pull up the paper support and extension 2 Slide the edge guides outward ...

Страница 53: ... paper with holes on one of the long edges as shown Do not select automatic 2 sided printing for this type of paper 4 Do one of the following Insert paper glossy or printable side up and short edge first in the center of the slot Caution To prevent paper feeding problems make sure you do not load paper above the arrow marks inside the edge guides ...

Страница 54: ...edge first with the flap facing down and the flap edge to the left in the center of the slot 5 Slide the edge guides against the paper or envelope but not too tightly 6 Extend the output tray and flip open the paper stopper ...

Страница 55: ...ad one envelope at a time If print quality declines when printing multiple envelopes try loading one envelope at a time Do not load envelopes that are curled folded or too thin Check the paper package for any additional loading instructions Parent topic Loading Paper Related references Paper Loading Capacity Related tasks Loading Paper in the Cassette Loading Paper in the Front Paper Feed Slot Loa...

Страница 56: ...1 Extend the output tray and flip open the paper stopper 2 Slide the edge guides to the paper size you are using ...

Страница 57: ...one sheet at a time Load paper short edge first no matter which way your document faces Load the printable side facedown Load letterhead or pre printed paper top edge first Check the paper package for any additional loading instructions Parent topic Loading Paper Related references Paper Loading Capacity Paper Specifications Related tasks Loading Paper and Envelopes in the Rear Paper Feed Slot Loa...

Страница 58: ...es 216 356 mm Plain paper User defined from 1 sheet 2 17 5 inches 55 127 mm to 4 13 5 83 inches 105 148 mm User defined from 4 13 80 sheets 5 83 inches 105 148 mm to 8 5 14 inches 215 9 355 6 mm 2 User defined from 8 5 1 sheet 14 inches 215 9 355 6 mm to 8 5 47 2 inches 215 9 1200 mm Epson Bright White Paper1 Letter 8 5 11 inches 400 sheets 50 sheets 216 279 mm A4 8 3 11 7 inches 210 297 mm ...

Страница 59: ...per cardstock up Letter 8 5 11 inches 10 sheets3 to 68 lb 256 g m2 216 279 mm A4 8 3 11 7 inches 210 297 mm Envelopes No 10 4 1 9 5 inches 10 envelopes 105 241 mm 1 You can print 2 sided print jobs automatically or manually using the paper cassette When you use the rear paper feed slot you can only print 2 sided print jobs manually Load up to 30 sheets for manual 2 sided print jobs 2 You can print...

Страница 60: ... paper at epson com ink3 U S sales or epson ca Canadian sales You can also purchase supplies from an Epson authorized reseller To find the nearest one call 800 GO EPSON 800 463 7766 Paper Type Size Part number Sheet count Epson Bright White Paper Letter 8 5 11 inches S041586 500 216 279 mm Epson Presentation Paper Matte Letter 8 5 11 inches S041062 100 216 279 mm Legal 8 5 14 inches S041067 100 21...

Страница 61: ...109 20 102 181 mm 5 7 inches 127 178 mm S041464 20 8 10 inches 203 254 mm S041465 20 Letter 8 5 11 inches S042183 25 216 279 mm S041667 50 Epson Ultra Premium Photo Paper 4 6 inches 102 152 mm S042181 60 Glossy S042174 100 5 7 inches 127 178 mm S041945 20 8 10 inches 203 254 mm S041946 20 Letter 8 5 11 inches S042182 25 216 279 mm S042175 50 Epson Premium Photo Paper 4 6 inches 102 152 mm S041982 ...

Страница 62: ...sy Epson Premium Photo Paper Semi gloss Premium Photo Paper Semi Gloss Epson Presentation Paper Matte Premium Presentation Paper Matte Epson Premium Presentation Paper Matte Epson Premium Presentation Paper Matte Double sided Thick paper cardstock up to 68 lb 256 g m2 Card Stock Note The settings listed here are available only when printing from your computer they do not apply to your product s co...

Страница 63: ... you want to change You see a screen like this 5 Select Paper Size 6 Select the paper size you loaded 7 Select Paper Type 8 Select the paper type you loaded 9 Select OK 10 Select another paper source to change or press home to return to exit Paper Type Settings Control Panel ...

Страница 64: ...y Epson Photo Paper Glossy Glossy Epson Premium Photo Paper Semi gloss Prem Semi Gloss Epson Presentation Paper Matte Prem Matte Epson Premium Presentation Paper Matte Epson Premium Presentation Paper Matte Double sided Thick paper cardstock up to 68 lb 256 g m2 Card Stock Parent topic Selecting the Paper Settings for Each Source Control Panel Selecting Default Paper Settings Administrator As an a...

Страница 65: ...an change default printer settings using the control panel on the product Note These settings can be locked by an administrator If you cannot access these settings contact your administrator for assistance 1 Press the home button if necessary 2 Select Setup You see a screen like this 3 Scroll down and select System Administration Enter the administrator password if necessary ...

Страница 66: ...op printing if an error occurs 7 When you are finished press the home button to exit Paper Source Settings Options Parent topic Selecting Default Paper Settings Administrator Paper Source Settings Options Select the paper source options you want to use for your printed jobs Paper Source Available settings Description Settings option Rear Paper Feed Normal Select Normal to give printing priority to...

Страница 67: ...type or size does not Paper Type Notice match the loaded paper Parent topic Selecting the Default Printer Settings Control Panel Setting the Universal Print Settings You can change the default universal print settings using the control panel on the product Note These settings can be locked by an administrator If you cannot access these settings contact your administrator for assistance 1 Press the...

Страница 68: ... setting options you want to use for your printed jobs Universal Print Available settings Description Settings option Top Offset Adjust the top or left margin Left Offset Top Offset in Adjust the top or left margin of the back page when Back performing double sided printing Left Offset in Back Check Paper On Select On to check the paper width before printing This Width prevents printing beyond the...

Страница 69: ...n Settings option Dry Time Standard Select the ink drying time you want to use when printing double sided Long Longer Skip Blank Page On Select On to skip printing of blank pages automatically Off Parent topic Setting the Universal Print Settings ...

Страница 70: ...on Do not place anything on top of your product or use its cover as a writing surface to avoid damaging it Placing Originals on the Scanner Glass Placing Originals in the Automatic Document Feeder Placing Originals on the Scanner Glass You can place originals up to this size on the scanner glass Legal 8 5 14 inches 216 356 mm ...

Страница 71: ......

Страница 72: ...e the document cover gently to keep your original in place Parent topic Placing Originals on the Product Related topics Scanning Copying Faxing Placing Originals in the Automatic Document Feeder You can place multi page original documents in the Automatic Document Feeder ADF You can also use the ADF to scan both sides of a 2 sided document Make sure the originals meet the Automatic Document Feeder...

Страница 73: ...1 Slide the ADF edge guide outward 2 Fan your stack of originals and tap them gently on a flat surface to even the edges ...

Страница 74: ...3 Insert the originals into the ADF faceup and top edge first The ADF icon on the control panel lights up ...

Страница 75: ...the ADF edge guide against the originals but not too tightly Parent topic Placing Originals on the Product Related references Automatic Document Feeder ADF Specifications Related topics Scanning Copying Faxing ...

Страница 76: ... types of paper including Epson special papers 1 Place your original document or photo on the scanner glass or place multi page documents in the ADF 2 Load the paper you want to print on 3 Press the home button if necessary 4 Select Copy You see a screen like this 5 To print more than one copy press a number key on the product s control panel or select copies and use the displayed keypad to enter ...

Страница 77: ...t your administrator for assistance 10 When you are ready to copy press one of the buttons Note To cancel copying press the Stop button or select Cancel Parent topic Copying Related references Copying Options Available Epson Papers Related tasks Using Copy Fax and Scan Presets Related topics Loading Paper Placing Originals on the Product Copying Options Select the copying options you want to use f...

Страница 78: ...ted for the paper sources Zoom Custom Size Automatically sizes the image by the percentage you select Actual Size Copies at 100 size Auto Fit Page Automatically sizes the image to fit the paper size you selected Letter 4x6in and Automatically converts from one size to another other conversions 2 Sided Off Select to make 2 sided copies When you select 1 2 Sided or 2 1 Sided also select Advanced and...

Страница 79: ...o erase the binding holes on a document Holes On Collate Copy Off Select On to print multiple copies of a multi page document both in order and sorted into sets On Dry Time Standard Select to adjust the drying time for 2 sided copies if smudges or marks appear on the front of the paper when Long you print on the second side Longer Advanced Various settings Select advanced settings such as Saturati...

Страница 80: ... Driver Windows Cancelling Printing Using a Product Button Printing with Windows You can print with your product using any Windows application as described in these sections Selecting Basic Print Settings Windows Selecting Double sided Printing Settings Windows Selecting Additional Layout and Print Options Windows Selecting a Printing Preset Windows Selecting Extended Settings Windows Printing You...

Страница 81: ... your product name as the printer you want to use Note You may also need to select Properties or Preferences to view your print settings You see the Main tab of your printer settings window 4 For the Paper Source setting select where you loaded the paper you want to print on 5 Select the size of the paper you loaded as the Document Size setting Note You can also select the User Defined setting to ...

Страница 82: ...int multiple pages on one sheet of paper or print one image on multiple sheets of paper select one of the settings in the Multi Page menu and select the printing options you want 12 To print multiple copies and arrange their print order select the Copies options 13 To preview your job before printing select Print Preview 14 To save your print job as a project that can be modified and combined with...

Страница 83: ...ilable Quality options to fine tune the quality of your print Some settings may be unavailable depending on the paper type and border setting you have chosen Draft For draft printing on plain paper Standard For everyday text and image printing Standard Vivid For text and graphics with good quality and print speed High For photos and graphics with high print quality More Settings Opens a window tha...

Страница 84: ... by selecting one of the 2 Sided Printing options on the Main tab Note Some options may be pre selected or unavailable depending on other settings you have chosen or if you are accessing the product over a network 1 Select one of the following options for 2 Sided Printing Auto Long edge binding to print your double sided print job by automatically flipping the paper on the long edge Auto Short edg...

Страница 85: ...You see this window 3 Select the double sided printing options you want to use 4 Click OK to return to the Main tab 5 Click the Print Density button ...

Страница 86: ...nt to test the selected settings 10 Follow any instructions displayed on the screen during printing Double sided Printing Options Windows Print Density Adjustments Windows Parent topic Printing with Windows Related tasks Selecting Basic Print Settings Windows Double sided Printing Options Windows You can select any of the available options on the 2 Sided Printing Settings window to set up your dou...

Страница 87: ...g Settings Windows Print Density Adjustments Windows You can select any of the available options on the Print Density Adjustment window to adjust the print quality of your double sided print job Print Density Sets the level of ink coverage for double sided printing Increase Ink Drying Time Sets the amount of time required for drying ink after printing on one side of the paper before printing the o...

Страница 88: ...to size your image to fit the paper you loaded Select the size of the your document or photo as the Document Size setting and the size of your paper as the Output Paper setting If you want to center your image on the paper select the Center option Select the Zoom to option to reduce or enlarge your document or photo by a specific percentage Select the percentage in the menu 2 Select one of the fol...

Страница 89: ...on to customize the watermark Header Footer adds information such as the date and time to the top or bottom of your printout Note Click the Settings button to customize the text and location of the header or footer 4 To add a password to your print job select the Confidential Job checkbox then enter a password Confidential jobs are stored in the product s memory without being printed To print the ...

Страница 90: ... tones Depending on the selected color mode you can also adjust the midtone density using the Gamma setting Fix Photo Improves the color contrast and sharpness of flawed photos Note Fix Photo uses a sophisticated face recognition technology to optimize photos that include faces For this to work both eyes and the nose must be visible in the subject s face If your photo includes a face with an inten...

Страница 91: ...increase readability Emphasize Thin Lines Adjusts the weight of printed lines to increase visibility Edge Smoothing Smooths jagged edges in low resolution images such as screen captures or images from the Web Fix Red Eye Reduces or removes red eye in photos Print Text in Black Prints colored text in black For Color Text Prints colored text on a background pattern or underlined For Color Graphs and...

Страница 92: ...rs or footers when you print The items are available to print at the top or bottom of your pages in either the left right or center of the page Note These settings are not saved with your document You can select to print the following information User Name Computer Name Date Date Time Collate Number copy number Note The user name computer name date and time come from the Windows Control Panel on y...

Страница 93: ...mmon groups of print settings you can select a printing preset on the Main or More Options tab Note You can create your own preset by clicking the Add Remove Presets button 1 Click the Main or More Options tab You see the available Printing Presets on the left ...

Страница 94: ...g presets 4 To choose a preset for printing select it 5 Click OK Parent topic Printing with Windows Selecting Extended Settings Windows You can select additional settings that apply to all the print jobs you send to your product 1 Access the Windows Desktop and right click the product icon in the Windows taskbar 2 Select Printer Settings 3 Click the Maintenance tab You see the maintenance options ...

Страница 95: ...inting with Windows Extended Settings Windows You can select from these settings on the Extended Settings window Enable EPSON Status Monitor 3 Enables product monitoring for ink and paper supplies and other issues Check Paper Width Before Printing Prevents printing beyond the edges of the paper if the paper size setting is incorrect may reduce print speed Thick Paper and Envelopes Prevents ink fro...

Страница 96: ...r product does not print pages that contain no text or images Change Standard Resolution Reduces the resolution of print data to correct printing problems Refine screening pattern Prints graphics with a finer screening pattern Allow Applications to Perform ICM Color Matching Allows applications to perform ICM color matching Always Use the Driver s Paper Source Setting Prints using the paper source...

Страница 97: ... some printer settings to prevent unauthorized changes 1 Do one of the following Windows 10 Right click and select Control Panel Hardware and Sound Devices and Printers Right click your product name and select Printer properties Windows 8 x Navigate to the Apps screen and select Control Panel Hardware and Sound Devices and Printers Right click your product and select Printer properties ...

Страница 98: ...elect Properties Windows XP Click Start and select Printers and Faxes Right click your product and select Properties 2 Click the Optional Settings tab Note You can prevent access to the Optional Settings tab by changing the user or group permissions in the Security tab 3 Click Driver Settings You see this window 4 Select the checkbox for the settings you want to lock To lock all print settings sel...

Страница 99: ...ark Various text Lets you select the text for the watermark or prohibit watermarks watermarks Add Delete Lets you add or delete a customized text or image based watermark Settings Lets you select the size position color and other watermark settings Header Footer Off Prohibits headers or footers On Allows headers and footers Settings Lets you select the text and position for printing headers and fo...

Страница 100: ...sword in the printer driver to be able to print Note If you do not know the user ID or password contact your administrator for assistance 1 Access the Windows Desktop right click the product in the Windows taskbar and select Printer Settings 2 Click the Maintenance tab 3 Click the Printer and Option Information button 4 Select the Save Access Control Settings checkbox ...

Страница 101: ...your print settings in a program the changes apply only while you are printing in that program session If you want to change the print settings you use in all your Windows programs you can select new default print settings 1 Access the Windows Desktop and right click the product icon in the Windows taskbar 2 Select Printer Settings You see the printer settings window ...

Страница 102: ...ny program session Changing the Language of the Printer Software Screens Parent topic Printing with Windows Changing the Language of the Printer Software Screens You can change the language used on the Windows printer software screens 1 Access the Windows Desktop and right click the product icon in the Windows taskbar 2 Select Printer Settings You see the printer settings window 3 Click the Mainte...

Страница 103: ...the next time you access them Parent topic Selecting Default Print Settings Windows Changing Automatic Update Options Your printer software for Windows automatically checks for updates to the product software You can change how often the software checks for updates or disable this feature 1 Access the Windows Desktop and right click the product icon in the Windows taskbar 2 Select Software Update ...

Страница 104: ... feature you can check for updates manually Parent topic Printing with Windows Related tasks Checking for Software Updates Printing with OS X You can print with your product using any OS X printing program as described in these sections Note If you have an Internet connection it is a good idea to check for updates to your product software on Epson s support website Selecting Basic Print Settings O...

Страница 105: ...r the document or photo you want to print 1 Open a photo or document for printing 2 Select the print command in your application Note You may need to select a print icon on your screen the Print option in the File menu or another command See your application s help utility for details 3 Select your product as the Printer setting 4 If necessary click the arrow next to the Printer setting or the Sho...

Страница 106: ...te The print window may look different depending on the version of OS X and the application you are using 5 Select the Copies and Pages settings as necessary Note If you do not see these settings in the print window check for them in your application before printing ...

Страница 107: ...int window check for them in your application before printing They may be accessible by selecting Page Setup from the File menu 7 Select any application specific settings that appear on the screen such as those shown in the image above for the Preview application 8 Select Print Settings from the pop up menu ...

Страница 108: ... Check the paper type settings list for details 11 Select the Print Quality setting you want to use 12 Select any of the available print options Paper Source Options OS X Print Quality Options OS X Print Options OS X Parent topic Printing with OS X Related references Paper or Media Type Settings Printing Software Related tasks Selecting Page Setup Settings OS X Printing Your Document or Photo OS X...

Страница 109: ...ny of the available Print Quality options to fine tune the quality of your print Some settings may be unavailable depending on the paper type setting you have chosen Draft For draft printing on plain paper Normal For everyday text and image printing Normal Vivid For everyday text and image printing with good quality and print speed Fine For text and graphics with good quality and print speed Quali...

Страница 110: ...do not see these settings in the print window check for them in your application before printing They may be accessible by selecting Page Setup from the File menu 1 Select the size of the paper you loaded as the Paper Size setting 2 Select the orientation of your document or photo as shown in the print window Note If you are printing an envelope select the icon Note You can reduce or enlarge the s...

Страница 111: ...u To arrange the print order of the pages select a Layout Direction setting To print borders around each page on the sheet select a line setting from the Border pop up menu To invert or flip the printed image select the Reverse page orientation or Flip horizontally settings Parent topic Printing with OS X Selecting Double sided Printing Settings OS X You can print on both sides of the paper by sel...

Страница 112: ...tions 2 Select the type of document you are printing as the Document Type setting The software automatically sets the Adjustments options for that document type 3 If necessary customize the Adjustments settings as instructed on the screen 4 Print a test copy of your double sided document to test the selected settings 5 Follow any instructions displayed on the screen during printing Double sided Pr...

Страница 113: ...e of the paper Adjustments Print Density Sets the level of ink coverage for double sided printing Increased Ink Drying Time Sets the amount of time required for drying ink after printing on one side of the paper before printing the other side in double sided printing Parent topic Selecting Double sided Printing Settings OS X Managing Color OS X You can adjust the Color Matching and Color Options s...

Страница 114: ...g with OS X Color Matching and Color Options OS X You can select from these settings on the Color Matching and Color Options menus Color Matching Settings EPSON Color Controls Lets you manage color using controls in your printer software or turn off color management ColorSync Prints using standard color profiles for your product and paper to help match image colors You can customize the conversion...

Страница 115: ...phisticated face recognition technology to optimize photos that include faces For this to work both eyes and the nose must be visible in the subject s face If your photo includes a face with an intentional color cast such as a statue you may want to turn off Fix Photo to retain the special color effects Off No Color Adjustment Turns off color management in your printer software so you can manage c...

Страница 116: ... settings on the Options or Driver tab Thick Paper and Envelopes Prevents ink from smearing when you print on envelopes or other thick paper Skip Blank Page Ensures that your product does not print pages that contain no text or images Quiet Mode Lessens noise during printing but may decrease print speed Permit temporary black printing Allows you to print using black ink when color ink is expended ...

Страница 117: ...default setting unless you experience issues when using a shared printing pool Lower Cassette This setting is not applicable to this product Parent topic Selecting Printing Preferences OS X Printing Your Document or Photo OS X Once you have selected your print settings you are ready to print Click Print at the bottom of the print window Checking Print Status OS X Parent topic Printing with OS X Ch...

Страница 118: ...nt topic Printing Your Document or Photo OS X Printing with the Epson Universal Print Driver Windows You can print with the Epson Universal Print Driver using any Windows printing program as described in these sections Installing the Epson Universal Print Driver Windows Synchronizing Printer Settings Epson Universal Print Driver Windows Selecting Basic Print Settings Epson Universal Print Driver W...

Страница 119: ... be installed on a Windows computer Note Make sure your product is turned on and connected to the same network as your computer before installing the printer software Depending on your model not all printer languages may be supported 1 Download the EPSON Universal Print Driver from epson com support wf6530 2 Double click the downloaded package 3 Follow the on screen instructions until you see this...

Страница 120: ...ing If you are installing one product make sure Add EPSON Universal Print Driver is selected and continue with the next step If you are installing more than one product select Add found printers and go to step 9 Note You can customize and filter your product search results by clicking Display Settings ...

Страница 121: ...cally 7 Select the product you want to install from the Found Printers list Note Deselect the Set as default printer checkbox if you do not want the product to be set as your default printer 8 Click OK then skip the remaining steps 9 If you are installing more than one product select the products from the Found Printers list and click Add to Printer Folder ...

Страница 122: ... Control Panel Hardware and Sound Devices and Printers Right click EPSON Universal Print Driver and select Printer properties Windows 8 x Navigate to the Apps screen and select Control Panel Hardware and Sound Devices and Printers Right click EPSON Universal Print Driver and select Printer properties Windows 7 Click and select Devices and Printers Right click EPSON Universal Print Driver and selec...

Страница 123: ...pson Universal Print Driver Windows Selecting Basic Print Settings Epson Universal Print Driver Windows Select the basic settings for the document or photo you want to print 1 Open a photo or document for printing 2 Select the print command in your application Note You may need to select a print icon on your screen the Print option in the File menu or another command See your application s help ut...

Страница 124: ...s window Note For more information about a setting right click it and select Help 4 For the Paper Source setting select where you loaded the paper you want to print on 5 Select the size of the paper you loaded as the Document Size setting Note You can also select the User Defined setting to create a custom paper size 6 Select the orientation of your document Note If you are printing an envelope se...

Страница 125: ...g settings 11 To print multiple pages on one sheet of paper or print one image on multiple sheets of paper select one of the settings in the Multi Page menu and select the printing options you want 12 To print multiple copies and arrange their print order select the Copies options 13 To preview your job before printing select Print Preview 14 To save your print job as a project that can be modifie...

Страница 126: ...ed document or photo select the Reduce Enlarge Document checkbox and select one of these sizing options Select the Fit to Page option to size your image to fit the paper you loaded Select the size of the your document or photo as the Document Size setting and the size of your paper as the Output Paper setting If you want to center your image on the paper select the Center option Select the Zoom to...

Страница 127: ...the watermark Header Footer adds information such as the date and time to the top or bottom of your printout Note Click the Settings button to customize the text and location of the header or footer 4 To add a password to your print job select the Confidential Job checkbox then enter a password Confidential jobs are stored in the product s memory without being printed To print the job enter the pa...

Страница 128: ...a nozzle check pattern to check for clogged nozzles Head Cleaning lets you clean the print head Network printer search lets you search for and connect to a product on the network Job Arranger Lite lets you save your print job as a project that can be modified and combined with other print jobs Extended Settings lets you change a variety of print settings Print Queue displays all the print jobs in ...

Страница 129: ... Always Spool RAW Datatype Increases print speed and may solve other printing problems Print as Bitmap Increases print speed when printing is extremely slow or the print head stops during printing and other settings do not help Refine screening pattern Prints graphics with a finer screening pattern Always Use the Driver s Paper Source Setting Prints using the paper source setting in the printer dr...

Страница 130: ...ng Windows 10 Right click and select Control Panel Hardware and Sound Devices and Printers Right click EPSON Universal Print Driver and select Print Preferences Windows 8 x Navigate to the Apps screen and select Control Panel Hardware and Sound Devices and Printers Right click EPSON Universal Print Driver and select Print Preferences Windows 7 Click and select Devices and Printers Right click EPSO...

Страница 131: ...rams 3 Click OK These settings are now the defaults selected for printing You can still change them as needed for printing in any program session Parent topic Printing with the Epson Universal Print Driver Windows Locking Printer Settings Epson Universal Print Driver Windows Administrators can lock some printer settings to prevent unauthorized changes The following settings can be locked ...

Страница 132: ...ersal Print Driver and select Printer properties Windows 7 Click and select Devices and Printers Right click EPSON Universal Print Driver and select Printer properties Windows Vista Click and select Control Panel Click Printer under Hardware and Sound then right click EPSON Universal Print Driver and select Properties Windows XP Click Start and select Printers and Faxes Right click EPSON Universal...

Страница 133: ...ermarks watermarks Add Delete Lets you add or delete a customized text or image based watermark Settings Lets you select the size position color and other watermark settings Header Footer Off Prohibits headers or footers On Allows headers and footers Settings Lets you select the text and position for printing headers and footers Color Color Allows color printing Grayscale Allows printing in black ...

Страница 134: ...reen and select Control Panel Hardware and Sound Devices and Printers Right click EPSON Universal Print Driver and select Printer properties Windows 7 Click and select Devices and Printers Right click EPSON Universal Print Driver and select Printer properties Windows Vista Click and select Control Panel Click Printer under Hardware and Sound then right click EPSON Universal Print Driver and select...

Страница 135: ...You see this window 3 Click Network printer search 4 When you see the search results select Add found printers ...

Страница 136: ... 6 Click Add to Printer Folder The selected printer or printers appear in the lower section of the screen 7 Select the checkbox next to the product you want to make your default printer if necessary 8 Click OK Parent topic Printing with the Epson Universal Print Driver Windows ...

Страница 137: ...Cancelling Printing Using a Product Button If you need to cancel printing press the Stop button on your product Parent topic Printing from a Computer ...

Страница 138: ...tarting a Scan from a Scanning Program Starting a Scan from a Smart Device Parent topic Scanning Related topics Placing Originals on the Product Starting a Scan Using the Product Control Panel You can scan an image to a variety of devices and applications using your product s control panel 1 Make sure you installed the product software and connected the product to your computer or network Note Res...

Страница 139: ...rk using your saved job settings in Document Capture Pro or Document Capture Note You cannot use this option to scan an image to Document Capture or Document Capture Pro when your product is connected to your computer s USB port Computer WSD lets you manage network scanning in Windows 10 Windows 8 x Windows 7 or Windows Vista English only To use this feature you must first set up WSD Web Services ...

Страница 140: ...ers on the LCD Screen Related topics Placing Originals on the Product Scanning to Email You can scan an image and email the scanned file using your product s control panel You must configure an email server before you can scan to email Make sure the date and time are set correctly on your product s control panel so the time stamps on your emails are accurate Note You can also use the Scan to Docum...

Страница 141: ...an email address from your contacts list Select Enter Email Address use the keyboard to enter the email address and press 6 Select Format to choose the file format for your scan 7 Select Menu Email Settings Change the Subject and Filename Prefix settings if necessary then press the back button to return to the Email screen ...

Страница 142: ...s on the LCD Screen Selecting the Date and Time Configuring Email Server Settings Related topics Placing Originals on the Product Scanning to a Network Folder or FTP Server You can scan an image and save it to a network folder using your product s control panel Note Make sure the date and time are set correctly on your product s control panel before using this feature 1 Place your original on the ...

Страница 143: ...saved location in your contact list Select Enter Location then select the Communication Mode Location and other settings Note Enter the folder path name for the Location setting in one of the following formats depending on the Communication Mode setting you selected SMB host name folder FTP ftp host name folder name 6 Select Format to choose the file format for your scan ...

Страница 144: ...s it in the selected location Parent topic Starting a Scan Using the Product Control Panel Related tasks Entering Characters on the LCD Screen Selecting the Date and Time Creating Contacts for Scanning Related topics Placing Originals on the Product Control Panel Scanning Options Select the options you want to use for scanning Note Not all options or settings may be available depending on the sele...

Страница 145: ...number Format JPEG Select for photos PDF Select for documents TIFF Single Page Select for scanned files that you can print from a device multi page TIFF documents are scanned TIFF Multi Page in black and white Resolution 200dpi Select for documents 300dpi Select for photos 600dpi Select for highest quality printing Scan Area Letter Select the page size for documents A4 Legal Half Letter Executive ...

Страница 146: ...ord for printing or editing Password the document using the on screen keyboard Attached File Max Size Various sizes Lets you select the maximum file size that can be attached to an email Parent topic Starting a Scan Using the Product Control Panel Creating Contacts for Scanning You can create a list of contacts to use for scanning to email or to locations on a network folder or FTP site Note Conta...

Страница 147: ...o one of the following To create a contact for scanning to email select Email To create a location for scanning to a network folder or FTP site select Network Folder FTP 6 Select the number you want to use for the contact you are adding 7 Select the Name field use the displayed keyboard to enter the contact name up to 30 characters and press ...

Страница 148: ...ntering Characters on the LCD Screen Editing or Deleting a Contact Related topics Setting Up Contacts Using the Product Control Panel Adding and Assigning Scan Jobs You can view change or add available default scan settings when you scan using the Document Capture Pro option on the product control panel You do this by accessing the scan jobs in the Document Capture Pro Windows or Document Capture ...

Страница 149: ...s You can now use the added scan jobs when you scan from the product control panel 6 Click OK then click OK again Parent topic Starting a Scan Using the Product Control Panel Starting a Scan with Document Capture Pro or Document Capture When you scan with Document Capture Pro Windows or Document Capture OS X the program automatically saves your scanned file on your computer in the folder you speci...

Страница 150: ...x Navigate to the Apps screen and select Document Capture Pro Windows other versions Click or Start and select All Programs or Programs Select EPSON Software then select Document Capture Pro OS X Open the Applications folder select the Epson Software folder and select Document Capture Select your product and click OK if necessary You see a window like this 2 Click the Scan icon ...

Страница 151: ...o use a scan job that you created instead select it from the Job list in the Document Capture Pro or Document Capture window click the Start Job button and skip the rest of these steps 4 Select any displayed scan settings you want to use Note See the Help information in Document Capture Pro or Document Capture for details 5 If you want to select detailed scan settings do one of the following Windo...

Страница 152: ...anned file Parent topic Starting a Scan Related topics Placing Originals on the Product Starting a Scan Using the Epson Scan Icon You can start the Epson Scan program to select scan settings scan and save the scanned image to a file Windows 10 Click and select All apps Select EPSON Software then select EPSON Scan Windows 8 x Navigate to the Apps screen and select EPSON Scan under EPSON or EPSON So...

Страница 153: ...scanning software To download Epson Scan visit Epson s driver download site U S downloads or Canadian downloads You see an Epson Scan window like this Parent topic Starting a Scan ...

Страница 154: ...Epson Scan provides additional image adjustment and photo correction features for enhancing scanned images and provides an interface for TWAIN compliant OCR scanning software To download Epson Scan visit Epson s driver download site U S downloads or Canadian downloads 1 Open your scanning program and select its scanning option See your scanning program help for instructions 2 Select your product N...

Страница 155: ...You see an Epson Scan window like this Note Epson Scan may start in a different mode when you first access it Parent topic Starting a Scan ...

Страница 156: ...from Epson s website 2 Place your original on the scanner 3 Open the Epson iPrint app and select your product 4 Select the scan settings and scan your original 5 Save your scanned image to a file or cloud location Parent topic Starting a Scan Selecting Epson Scan Settings After starting Epson Scan you can select settings in various modes to customize your scan Scan Modes Selecting the Scan Mode Sc...

Страница 157: ...ng the Scan Mode Select the Epson Scan mode you want to use from the Mode box in the upper right corner of the Epson Scan window Parent topic Selecting Epson Scan Settings Scanning in Office Mode When you scan in Office Mode Epson Scan automatically saves your scanned file in PDF format in your operating system s Documents or My Documents folder or opens it in your scanning program You can select ...

Страница 158: ...dow 2 Select the Document Source setting indicating where you placed your original To scan a 2 sided document in the ADF select ADF Double sided Note If you are using the ADF remove any documents from the scanner glass ...

Страница 159: ...ired select the area in your preview image that you want to scan scan area Note You cannot select a scan area if you chose ADF Double sided as the Document Source setting 12 Click the Image Adjustment tab and select any of the image adjustment settings you want to use Before making adjustments click the image or scan area in the Preview window 13 Click Scan You see the File Save Settings window 14...

Страница 160: ...Selects the Automatic Document Feeder as the location where the originals are placed on your product for double sided scanning Auto Detect Automatically detects where the originals are placed on your product for scanning Parent topic Scanning in Office Mode Selecting a Scan Area Office Mode You can select a specific area in your preview image to include in your scanned image You can select the ent...

Страница 161: ...reate a marquee dotted line on the preview image 2 Do the following as necessary to work with the selected scan area If the marquee is correct continue with the next step To move the marquee click inside the scan area and drag the marquee where you want it ...

Страница 162: ...age Note If you draw multiple marquees make sure you select the All button in the Preview window before you scan Otherwise only the area inside the currently selected marquee will be scanned To delete a marquee click the marquee then click the Delete Marquee icon To rotate your original in your scan click one of the Rotate icons 3 Click inside each scan area and make any necessary settings in the ...

Страница 163: ... Image Type setting Unsharp Mask Makes the edges of certain image areas clearer Turn off this option to leave softer edges Descreening Removes the ripple pattern that might appear in subtly shaded image areas such as skin tones This option improves results when scanning magazines or newspapers The results of descreening do not appear in the preview image only in your scanned image Text Enhancement...

Страница 164: ...rk areas of the overall scanned image Threshold Adjusts the level at which black areas in text and line art are delineated improving text recognition in OCR Optical Character Recognition programs Parent topic Scanning in Office Mode Scanning in Professional Mode When you scan in Professional Mode Epson Scan automatically saves your scanned file in PDF format in your operating system s Documents or...

Страница 165: ...You see this window ...

Страница 166: ...DF 9 If desired select the area in your preview image that you want to scan scan area Note You cannot select a scan area if you chose ADF Double sided as the Document Source setting 10 Select any of the image adjustment settings you want to use Before making adjustments click the image or scan area in the Preview window 11 If you want to reduce or enlarge your image as you scan select the Target S...

Страница 167: ... are placed on your product for scanning ADF Single sided Selects the Automatic Document Feeder as the location where the originals are placed on your product for single sided scanning ADF Double sided Selects the Automatic Document Feeder as the location where the originals are placed on your product for double sided scanning Parent topic Scanning in Professional Mode Available Image Types Profes...

Страница 168: ...t You can even select multiple scan areas to create multiple scanned images of different areas Normal Preview mode only You can also use the scan area to select specific image Adjustments settings for a scanned image Just be sure to click inside the scan area before selecting the settings Note In Professional Mode the default Preview mode is Normal Preview mode To use Thumbnail Preview mode instea...

Страница 169: ...1 Do one of the following to select your scan area in the Preview image Normal preview Click the Auto Locate icon to create a marquee dotted line on the preview image ...

Страница 170: ...ed scan area then click and drag the cursor to the opposite corner to create a marquee dotted line on the preview image 2 Do the following as necessary to work with the selected scan area If the marquee is correct continue with the next step To move the marquee click inside the scan area and drag the marquee where you want it ...

Страница 171: ...the preview style click one of the Size icons Note If you draw multiple marquees make sure you select the All button in the Preview window before you scan Otherwise only the area inside the currently selected marquee will be scanned 3 Click inside the scan area and make any necessary settings in the Epson Scan window Parent topic Scanning in Professional Mode Available Image Adjustments Profession...

Страница 172: ...r blue shades in the scanned image Edge Fill Corrects shadowing around the edges of the image by filling the shadows with the color you select Auto Exposure Automatically adjusts the image exposure settings when you click the Auto Exposure icon To automatically adjust image exposure settings continuously click the Configuration button click the Color tab and select Continuous auto exposure You can...

Страница 173: ...on in OCR Optical Character Recognition programs Parent topic Scanning in Professional Mode Selecting a Scan Size Professional Mode You can reduce or enlarge the size of your image as you scan You can also select a specific scan size such as a common photo size like 4 6 inches 102 152 mm This places a scan area of that size on the preview image so you can use it to help crop the image in the corre...

Страница 174: ...ve the marquee click inside the scan area and drag the marquee where you want it To resize the scan area place your cursor over the edge or corner of the marquee then click and drag the edge where you want it Note Manually adjusting the marquee will not change the target size of the scanned file The marquee only indicates the area of the image that will be scanned ...

Страница 175: ...lable in the Target Size list click the Customize option You see this window 5 Name the custom size enter the size click Save and click OK Then adjust the marquee on the preview image The marquee is automatically proportioned for your custom scan size ...

Страница 176: ... mode and selected settings Thumbnail preview A thumbnail preview displays your previewed images as thumbnails with the scanned image area and exposure automatically selected Normal preview A normal preview displays your previewed images in their entirety so you can select the scanned image area and other settings manually Parent topic Selecting Epson Scan Settings Scan Resolution Guidelines If yo...

Страница 177: ...h image quality For example if the resolution is 300 dpi dots per inch and you will double the image size later change the Resolution setting to 600 dpi You will scan the image at 100 or smaller size Select Epson Scan s Resolution setting based on how you will use the scanned image Email view on a computer screen post on the web 96 to 150 dpi Print convert to editable text OCR 300 dpi Fax 200 dpi ...

Страница 178: ...control how Epson Scan behaves when you scan and save files The File Save Settings window may appear after you click Scan on the Epson Scan window You may also be able to access the window by clicking the icon on the Epson Scan window 1 Do one of the following to select the folder in which you want to save your scanned image Click the button for one of the displayed folders ...

Страница 179: ...tton to select them 5 Choose any of the optional settings you want to use by selecting their checkboxes 6 Click OK If you selected PDF or Multi TIFF as the Type setting you see this window after Epson Scan scans your document 7 Choose one of the following options If you are scanning only one page click Save File If you need to scan additional pages in a document click Add page Place additional pag...

Страница 180: ...File Formats Bitmap bmp A standard image file format for most Windows programs JPEG jpg An image format that lets you highly compress image data However the higher the compression the lower the image quality The TIFF format is recommended when you need to modify or retouch your scanned image Multi TIFF tif A TIFF file format when multiple pages are saved to the same file allowing you to edit the i...

Страница 181: ...h your product using an image editing application such as Image Capture Note With OS X in addition to scanning with Image Capture you can download and install Epson Scan scanning software Epson Scan provides additional image adjustment and photo correction features for enhancing scanned images and provides an interface for TWAIN compliant OCR scanning software To download Epson Scan visit Epson s ...

Страница 182: ...4 Select the Scan Mode setting indicating where you placed your original if available Select any other available scan settings as necessary ...

Страница 183: ...le Image Correction Provides a graphical interface for adjusting brightness tint temperature and saturation Unsharp Mask Makes the edges of certain image areas clearer Turn off this option to leave softer edges Descreening Removes the ripple pattern that might appear in subtly shaded image areas such as skin tones This option improves results when scanning magazines or newspapers The results of de...

Страница 184: ...scanned images to a SharePoint server or a cloud service 1 Do one of the following to start Document Capture Pro Windows 10 Click and select All apps Select EPSON Software then select Document Capture Pro Windows 8 x Navigate to the Apps screen and select Document Capture Pro Windows other versions Click or Start and select All Programs or Programs Select EPSON Software then select Document Captur...

Страница 185: ...information in Document Capture Pro or Document Capture for details 4 Click Scan You see a preview of your scan in the Document Capture Pro or Document Capture window 5 Click one of the cloud service Destination icons to choose where to save your scanned file Web Folder WebDAV Evernote Windows only Google Drive SugarSync ...

Страница 186: ...o or Document Capture or when you scan using the Document Capture Pro option on the product control panel Parent topic Scanning Special Projects Scanning Multi Page Originals as Separate Files You can use Document Capture Pro Windows only to scan multi page originals as separate scanned files You indicate where you want the new scanned files to start by inserting a blank page or barcode between th...

Страница 187: ...settings you want to use Note See the Help information in Document Capture Pro for details 5 Click Scan You see a preview of your scan in the Document Capture Pro window 6 Open the File menu and select Batch Save 7 Click File Name Settings 8 Select Apply Job Separation and click Separation Settings 9 Select the method you used to separate the originals select a folder name specification and click ...

Страница 188: ...cts Entering a User ID and Password for Scanning Windows If Access Control is enabled on the product a user ID and password may be required to scan You can enter the user ID and password in Epson Scan Settings Note If you do not know the user ID or password contact your administrator for assistance 1 Do one of the following to access Epson Scan Settings Windows 10 Click and select All apps Select ...

Страница 189: ...e standard Epson printer software To download the standard Epson printer software go to epson com support wf6530 Connecting a Telephone or Answering Machine Setting Up Fax Features Setting Up Contacts and Contact Groups Sending Faxes Receiving Faxes Checking Fax Status Printing Fax Reports Connecting a Telephone or Answering Machine You must connect your product to a telephone wall jack to send or...

Страница 190: ...r product Note If you have a DSL or ISDN connection you must connect the appropriate DSL filter or ISDN terminal adapter or router to the wall jack to be able to use the line for faxing or voice calls using your product Contact your DSL or ISDN provider for the necessary equipment ...

Страница 191: ...DSL connection 1 Telephone wall jack 2 DSL filter 3 DSL modem ...

Страница 192: ...ISDN connection 1 ISDN wall jack 2 Terminal adapter or ISDN router ...

Страница 193: ...2 If you are connecting a telephone or answering machine to your product using a second phone cable remove the cap from the EXT port on your product ...

Страница 194: ...ct answers a call to a number that is higher than your answering machine s setting for the number of rings Any phone or answering machine must be connected to the EXT port for your product to detect an incoming fax call when the phone is picked up Epson cannot guarantee compatibility with VoIP cable phone systems or fiberoptic digital services such as FIOS Parent topic Faxing Related tasks Receivi...

Страница 195: ... these sections to select the basic settings you need to use the product s fax features Selecting Your Country or Region Selecting the Date and Time Using the Fax Setup Wizard Selecting the Line Type Setting the Number of Rings to Answer Parent topic Setting Up Fax Features Selecting Your Country or Region Before faxing select the country or region in which you are using your product Note If you c...

Страница 196: ...s 5 Scroll down and select Country Region 6 Scroll up or down if necessary and select your country or region You see a confirmation screen 7 If the setting is correct select Yes If not select No and retry Note Changing the country or region restores the fax settings to the default settings Parent topic Setting Up Basic Fax Features ...

Страница 197: ...e your preferred date and time format Note This setting can be locked by an administrator If you cannot access or change this setting contact your administrator for assistance 1 Press the home button if necessary 2 Select Setup 3 Scroll down and select System Administration Enter the administrator password if necessary ...

Страница 198: ...oes not use Daylight Saving Time DST Summer it is spring or summer and your region uses Daylight Saving Time DST Note If your region uses Daylight Saving Time DST you must change this setting to match the season When you change from Winter to Summer your product automatically sets its clock ahead one hour When you change from Summer to Winter it sets its clock back one hour 8 Select Date Time ...

Страница 199: ... Setup Wizard You can setup the product s basic fax settings using the Fax Setting Wizard This wizard is automatically displayed when the product is turned on for the first time You can also change these settings individually from the Fax Settings menu Note These settings can be locked by an administrator If you cannot access or change these setting contact your administrator for assistance 1 Pres...

Страница 200: ...fax header identifies the source of the faxes you send 9 On the Distinctive Ring Setting screen do one of the following If you have subscribed to a distinctive ring service from your telephone company select Proceed Select the ring pattern to be used for incoming faxes or select On Go to step 12 If you do not have a distinctive ring service select Skip and go to the next step Note Distinctive ring...

Страница 201: ... Fax Connection screen select Start and follow the on screen instructions to check the fax connection and print a report of the check result If there are any errors reported try the solutions on the report and run the check again Note If the Select Line Type screen appears select the correct line type If the Select Dial Tone Detection screen appears select Disable However disabling the dial tone d...

Страница 202: ...utton if necessary 2 Select Setup 3 Scroll down and select System Administration Enter the administrator password if necessary 4 Scroll down and select Fax Settings 5 Select Basic Settings 6 Select Line Type 7 Select PBX ...

Страница 203: ...you connect an external answering machine and select to receive faxes automatically make sure the Rings to Answer setting is correct The number of rings should be higher than the number of rings your answering machine is set to for answering a call Note This setting can be locked by an administrator If you cannot access or change this setting contact your administrator for assistance 1 Press the h...

Страница 204: ...2 Select Setup 3 Scroll down and select System Administration Enter the administrator password if necessary 4 Scroll down and select Fax Settings 5 Select Receive Settings ...

Страница 205: ... can detect fax tones and start receiving faxes If you answer the phone and hear a fax tone check that the product has started receiving the fax then hang up the phone Parent topic Setting Up Basic Fax Features Selecting Advanced Fax Settings You can select a variety of advanced fax settings Note These settings can be locked by an administrator If you cannot access or change these setting contact ...

Страница 206: ...2 Select Setup 3 Scroll down and select System Administration Enter the administrator password if necessary 4 Scroll down and select Fax Settings You see a screen like this ...

Страница 207: ...rd Adjusts the scan resolution and print quality of outgoing faxes Fine Super Fine Ultra Fine Photo Density Auto Automatically adjusts the darkness of outgoing faxes Select this option when sending black and white text documents Manual Lets you select from various density levels Document Size Glass Half Letter Sets the size for a document placed on the scanner glass A5 Letter Legal A4 ADF 2 Sided ...

Страница 208: ...t topic Selecting Advanced Fax Settings Send Settings Fax Set the send options you want to use for outgoing faxes Setting Options Description Batch Send Off Sorts outgoing faxes by recipient in the product s memory and sends them as a batch On Save Failure Data Off Saves faxes that failed to be sent in the product s memory you can resend them from the product s On Status Menu Parent topic Selectin...

Страница 209: ...e sure this setting is set higher than the number of rings your answering machine is set to answer a call Remote Receive Off Lets you start receiving faxes using your phone instead of operating the product if the Receive Mode On is set to Auto When you select On you must also Start Code set a Start Code If you are using a cordless handset with its base connected to the product you can start receiv...

Страница 210: ...ack and white faxes only Auto Reduction On Select to reduce the size of large received faxes to fit on the paper size in the selected paper source Off Select to print large incoming faxes at their original size on multiple sheets if necessary Auto Rotation On If you have loaded A5 size paper select On to rotate landscape oriented incoming faxes so that they print Off correctly on the paper Collati...

Страница 211: ...ng Advanced Fax Settings Basic Settings Fax Set the basic options you want to use for incoming and outgoing faxes Setting Options Description Fax Speed Fast 33 600bps Sets the speed at which you send and receive faxes Medium 14 400bps Slow 9 600bps ECM On Turns on Error Correction Mode ECM to automatically correct errors in sent or received fax data Off Turns off Error Correction Mode ECM color fa...

Страница 212: ...escription Direct Dialing Off Does not restrict dialed fax numbers Restrictions On Allows faxing only to numbers stored in the contacts list or history Enter Twice Requires you to enter fax numbers twice to prevent errors Confirm Address List Off Selects whether or not to display a recipient confirmation screen before a fax is sent On Inbox Password Register Select to set a password for viewing in...

Страница 213: ...ility for Windows 1 Do one of the following Windows 10 Click and select All apps then select EPSON Software Windows 8 x Navigate to the Apps screen Windows other versions Click or Start Programs or All Programs EPSON Software 2 Select FAX Utility You see this window 3 Select Fax Settings for Printer Select your product if prompted ...

Страница 214: ... Parent topic Setting Up Fax Features Setting Up Fax Features Using the Fax Utility OS X You can set up your fax header and select your fax settings using the FAX Utility for OS X 1 In the Apple menu or the Dock select System Preferences Select Print Fax Print Scan or Printers Scanners select your product and select Options Supplies Select Utility and select Open Printer Utility 2 Double click FAX...

Страница 215: ...tact Groups You can set up a list of contacts and their fax numbers so you can quickly select them for faxing You can also set up contact groups to send a fax message to multiple contacts Setting Up Contacts Using the Product Control Panel Setting Up Speed Group Dial Lists Using the Fax Utility Windows Setting Up Speed Group Dial Lists Using the Fax Utility OS X Parent topic Faxing Setting Up Cont...

Страница 216: ... Contacts and Contact Groups Related tasks Setting Up Speed Group Dial Lists Using the Fax Utility Windows Setting Up Speed Group Dial Lists Using the Fax Utility OS X Creating a Contact You can create a list of contacts to save frequently used fax numbers Note You can create up to 200 contacts and contact groups combined 1 Press the home button if necessary 2 Select Fax You see a screen like this...

Страница 217: ...a screen like this 4 Select Menu You see a screen like this Note You can print your list of contacts and groups if necessary 5 Select Add Entry 6 Select the number you want to use for the contact you are adding ...

Страница 218: ... on the LCD screen or the buttons on the product to enter the fax number You can enter up to 64 characters Note If necessary enter an outside line access code such as 9 at the beginning of the fax number If the access code has been set up in the Line Type setting enter the pound sign instead of the code 10 Set the Fax Speed if necessary 11 Select Save Parent topic Setting Up Contacts Using the Pro...

Страница 219: ...You see a screen like this 3 Select Contacts Enter the administrator password if necessary You see a screen like this 4 Select the icon for the contact you want to edit or delete ...

Страница 220: ...r the correct information and select When you are finished editing select Save Parent topic Setting Up Contacts Using the Product Control Panel Creating a Contact Group You can create a group of contacts so that you can easily send faxes to multiple recipients Note You can create up to 200 contacts and contact groups combined 1 Press the home button if necessary 2 Select Fax You see a screen like ...

Страница 221: ...Select Add Group 6 Select the number you want to use for the group you are adding You see a screen like this 7 Select the Name field use the displayed keyboard to enter the group name up to 30 characters and press 8 Select the Index Word field use the displayed keyboard to enter a word to use when searching for a group up to 30 characters and press This field is optional ...

Страница 222: ...act 11 Select Save Parent topic Setting Up Contacts Using the Product Control Panel Editing or Deleting a Contact Group You can edit an existing contact group to add or delete entries You can also delete the entire contact group 1 Press the home button if necessary 2 Select Fax You see a screen like this 3 Select Contacts Enter the administrator password if necessary ...

Страница 223: ...ect the number next to the contact you want to add or delete When you finish select Save Parent topic Setting Up Contacts Using the Product Control Panel Setting Up Speed Group Dial Lists Using the Fax Utility Windows You can set up your speed dial and group dial lists using the FAX Utility for Windows The utility also lets you import fax numbers from the Windows Address Book and back up fax numbe...

Страница 224: ...e following Windows 10 Click and select All apps EPSON Software Windows 8 x Navigate to the Apps screen Windows other versions Click or Start Programs or All Programs EPSON Software 2 Select FAX Utility You see this window 3 Select Fax Settings for Printer Select your product if prompted ...

Страница 225: ...You see this window 4 Select Speed Dial Group Dial List ...

Страница 226: ...l enter a name and fax number and click OK To create a group dial entry select Group enter a name select your desired fax numbers and click OK 7 Repeat the previous steps as necessary to add all your speed dial or group dial entries 8 When you are finished click the icon to save the entries to your product s memory Parent topic Setting Up Contacts and Contact Groups Related topics Setting Up Conta...

Страница 227: ...ur product s memory Note You can create up to 60 speed dial and group dial entries combined 1 In the Apple menu or the Dock select System Preferences Select Print Fax Print Scan or Printers Scanners select your product and select Options Supplies Select Utility and select Open Printer Utility 2 Double click FAX Utility if necessary You see this window 3 Select your FAX product in the Printer list ...

Страница 228: ...nd fax number and click OK To create a group dial entry select Group Dial enter a name select your desired fax numbers and click OK 7 Repeat the previous steps as necessary to add all your speed dial or group dial entries 8 To import entries from your MacAddress book click the icon 9 When you are finished click the icon to save the entries to your product s memory Parent topic Setting Up Contacts ...

Страница 229: ... from a Connected Telephone Parent topic Sending Faxes Sending a Fax Using the Keypad Contact List or History You can send a fax from your product control panel by entering the fax number or selecting the number from either the contact list or fax history Note You can send a black and white fax to up to 200 recipients at a time or send a color fax to one recipient at a time If your recipient s fax...

Страница 230: ...g of the fax number If the access code has been set up in the Line Type setting enter the pound sign instead of the code Select from the contact list Select Contacts to display the contact list screen Select the checkbox next to one or more contact select the checkbox again to deselect it You can also select the Search field to search for recipients by name index name or entry number Select Procee...

Страница 231: ...e buttons Note To cancel faxing press the Stop button You can also cancel the job or check the job status from the Status Menu Your product scans your original and prompts you to place additional pages if necessary After scanning your originals your product dials the number and sends the fax Note Your product does not save sent color faxes to its memory If the Save Failure Data option is enabled f...

Страница 232: ... the ADF disables the Direct Send option and color faxing On Direct Send Off Select On to send black and white faxes to a single recipient without saving the scanned image to On memory setting is disabled when sending a color fax or sending a fax to multiple recipients Priority Send Off Select On to send the current fax before other faxes waiting to be sent On Continuous Scan from Off Select On to...

Страница 233: ...lect Fax Note To fax a double sided document place your document in the ADF and turn on the ADF 2 Sided setting 4 Enter a fax number or select Contacts or History and select a number 5 Select Menu 6 Select Send Fax Later 7 Select On 8 Select Time use the displayed keypad on the LCD screen to enter your desired time and select OK 9 Press one of the buttons Note To cancel faxing press the Stop butto...

Страница 234: ...emand You can store one scanned original up to 100 black and white pages and have it faxed automatically when another fax machine requests it Other fax users can receive the fax by calling your fax number and using the polling receive function on their fax machines 1 Place your original on the product for faxing 2 Press the home button if necessary 3 Select Fax 4 Select Menu 5 Select Polling Send ...

Страница 235: ... Originals on the Product Sending a Stored Fax You can store one scanned original up to 100 black and white pages and fax it whenever necessary 1 Place your original on the product for faxing 2 Press the home button if necessary 3 Select Fax 4 Select Menu 5 Select Store Fax Data and select On 6 If you need to change any fax settings select Menu select Fax Send Settings and select your settings 7 P...

Страница 236: ...opic Sending Faxes from the Product Control Panel Related references Fax Sending Options Related topics Placing Originals on the Product Sending a Fax from a Connected Telephone If you have connected a telephone to the EXT port on your product you can send a fax by dialing the fax number from the connected telephone If the recipient s phone number and fax number are the same you can speak to the r...

Страница 237: ...press one of the buttons to start sending the fax Note If your recipient s fax machine does not print in color your fax is automatically sent in black and white 7 Hang up the telephone Parent topic Sending Faxes from the Product Control Panel Related references Fax Sending Options Related tasks Connecting a Telephone or Answering Machine Related topics Placing Originals on the Product Sending Faxe...

Страница 238: ...r Character Density settings click the Preferences or Properties button Note If you see a Setup Printer or Options button click it Then click Preferences or Properties on the next screen For more information about selecting fax print settings click Help 4 Select the Page Range as necessary Leave the Number of copies set to 1 5 Click Print or OK ...

Страница 239: ...If you re faxing for the first time you see a window like this one 6 Enter your sender information so that recipients can identify the origin of the fax Then click OK to save the sender information ...

Страница 240: ...the Epson FAX Utility click Help 8 Select a cover sheet and enter a subject and message then click Next 9 Click Send to transmit your fax Parent topic Sending Faxes Sending Faxes Using the Fax Utility OS X You can send a fax from a OS X printing program using the FAX Utility You can fax up to 100 pages at a time including a cover sheet 1 Open the file you want to fax ...

Страница 241: ...ur application s help utility for details 3 Select your product FAX option as the Printer setting 4 If necessary click the arrow next to the Printer setting or the Show Details button to expand the print window 5 Select the number of pages you are faxing as the Pages setting Note Leave the Copies setting set to 1 6 Select Recipient Settings from the pop up menu ...

Страница 242: ...llowing to choose your recipient Select a name or group from the Recipient List Enter a name company and fax number and click the button Click the icon and select a recipient from your address book 8 Select Fax Settings from the pop up menu ...

Страница 243: ...eceiving Faxes See these sections to receive faxes with your product Fax Reception Receiving Faxes Automatically Receiving Faxes Manually Forwarding Received Faxes Receiving a Fax by Polling Viewing a Saved Fax Parent topic Faxing Fax Reception Your product will automatically receive and print faxes when you set the Receive Mode to Auto ...

Страница 244: ...ation Fax Settings Receive Settings Receive Mode If an answering machine is connected make sure the product s Rings to Answer setting is set higher than the number of rings your answering machine is set to answer a call For example if the answering machine is set to pick up on the fourth ring set the product to pick up on the fifth ring or later Parent topic Receiving Faxes Related references Rece...

Страница 245: ...xes into PDF documents and forward them to a shared folder on the network or to an email address Note You cannot forward color faxes to another fax machine Forwarded faxes are deleted from the product s memory Before using this feature make sure the date and time are set correctly the forwarding destination is set up in the contact list and the email server settings are configured 1 Press the home...

Страница 246: ...layed destinations are correct and select Close 10 Select Options When Forwarding Failed 11 Select the option to use if received faxes cannot be forwarded print the faxes or save them in the printer s inbox 12 If you are forwarding to an email address select Email Subject to Forward to enter an email subject Note If you are forwarding faxes to a shared folder on the network or an email address you...

Страница 247: ... information service Note You cannot use polling to receive a fax from a fax information service that uses audio guidance Select On Hook and follow the displayed instructions to listen to the audio guidance 1 Press the home button if necessary 2 Select Fax You see a screen like this 3 Select Menu 4 Select Polling Receive and select On 5 Enter the fax number you expect to receive the fax from 6 Pre...

Страница 248: ...unread or unprinted faxes in the product s memory 3 Select Fax 4 Select Open Inbox Enter the administrator password if necessary 5 Select the fax you want to view You see the fax displayed on the screen 6 Select Menu 7 Select one of the printing deleting options and follow the on screen instructions Note Delete faxes after you print or view them to prevent the product s memory from filling up When...

Страница 249: ...ory select Receive Job or Send Job and select the fax you want to check To check received faxes that have been saved in the product s memory select Job Storage and select Inbox Parent topic Faxing Printing Fax Reports You can select from several fax reports to print whenever necessary Note You can also have the fax log printed automatically by turning on Fax Log Auto Print in the Output Settings m...

Страница 250: ...s List Print a list of the current fax communication settings Fax Log View or print a report on recent fax transmissions Last Transmission Print a report on the previous fax that was sent or received through polling Stored Fax Documents Print a list of the fax jobs currently stored in the product s memory Protocol Trace Print a detailed report for the previous sent or received fax Parent topic Pri...

Страница 251: ...m a USB thumb drive or other external storage device such as an external hard drive Before you connect your thumb drive or device make sure the product is turned on but not printing Note Epson cannot guarantee the compatibility of your device Make sure the files on the device are compatible with the product 1 Remove any memory cards from the product 2 Insert your USB thumb drive or the USB cable t...

Страница 252: ... 999 Parent topic Connecting and Using a USB Flash Drive or External Device Disconnecting a USB Device After you finish working with a USB device follow these steps to remove it 1 If your product is connected to your computer using a USB cable do one of the following Windows Open the My Computer Computer This PC or Windows Explorer utility Then right click the name of your USB device listed as a r...

Страница 253: ...on if necessary 2 Select Memory Device 3 Select JPEG You see a screen like this Note If you have more than 999 JPEG images on your device the images are divided into groups and you must first select the group you want to display 4 Do one of the following to select your photos To select individual photos select the thumbnail image of the photo you want to print then use the numeric keypad on the co...

Страница 254: ...CD Screen Related references Photo Adjustment Options Device Mode Print Setting Options Device Mode Printing TIFF and PDF Files You can select and print TIFF or PDF files from a USB flash drive 1 Press the home button if necessary 2 Select Memory Device 3 Select TIFF or PDF You see a list of the available files 4 Select the file you want to print You see information about the file 5 Select Proceed...

Страница 255: ...he photo based on the Advanced Scene Detection setting that is selected Off Turns off automatic adjustments see Note below P I M Uses your camera s PRINT Image Matching or Exif Print adjustments Fix Red Eye Off This Image Automatically fixes the red eye effect in photos On This Image Off All Image On All Image Note Fix Photo uses a sophisticated face recognition technology to optimize photos that ...

Страница 256: ...ically crops the photo to fit into the selected photo layout Off Turns off automatic cropping Bidirectional On Prints at normal speed Off Slows down printing to improve print quality 2 Sided On Select On to print PDF files double sided You can also select the Binding Margin and Dry Time if necessary Off Print Order Last Page on Top Select the order for printing multi page TIFF or PDF files First P...

Страница 257: ...ed by an administrator If you cannot access these settings contact your administrator for assistance 1 Press the home button if necessary 2 Select Setup 3 Scroll down and select System Administration Enter the administrator password if necessary 4 Select Printer Settings 5 Select Memory Device Interface You see a screen like this 6 Make sure Memory Device is set to Enable 7 Select File Sharing 8 S...

Страница 258: ... with a USB connection Look for the removable disk icon on your desktop then select it OS X with a network connection Select the hard drive icon on your desktop or select Computer from the Go menu select your product in the SHARED section of the sidebar you may need to widen the sidebar to see the name and select the USBSTORAGE icon 4 Select the folder that contains your files 5 Drag the files you...

Страница 259: ...aintenance Box Removing and Installing Ink Cartridges Printing with Black Ink and Expended Color Cartridges Conserving Low Black Ink with Windows Replacing the Maintenance Box Check Cartridge and Maintenance Box Status Your product and its software will let you know when an ink cartridge is low or expended or when the maintenance box needs to be replaced Checking Cartridge and Maintenance Box Stat...

Страница 260: ...Cartridge and Maintenance Box Status Related tasks Removing and Installing Ink Cartridges Replacing the Maintenance Box Checking Cartridge and Maintenance Box Status with Windows A low ink reminder appears if you try to print when ink is low and you can check your cartridge or maintenance box status at any time using a utility on your Windows computer 1 To check your status access the Windows Desk...

Страница 261: ... Note If any of the cartridges installed in the product is broken incompatible with the product model or improperly installed Epson Status Monitor will not display an accurate cartridge status 3 To disable the low ink reminder right click the product icon in the Windows taskbar and select Monitoring Preferences ...

Страница 262: ... Reminder alerts checkbox at the bottom of the screen 5 To disable promotional offers deselect the Display Epson Offers checkbox 6 Click OK Parent topic Check Cartridge and Maintenance Box Status Related tasks Removing and Installing Ink Cartridges ...

Страница 263: ...ur ink cartridges and maintenance box using a utility on your Mac 1 In the Apple menu or the Dock select System Preferences Select Print Fax Print Scan or Printers Scanners select your product and select Options Supplies Select Utility and select Open Printer Utility 2 Select EPSON Status Monitor You see this window ...

Страница 264: ...ized reseller Note This product uses only genuine Epson brand cartridges Other brands of ink cartridges and ink supplies are not compatible and even if described as compatible may not function properly The cartridges included with the printer are designed for printer setup and not for resale After some ink is used for charging the rest is available for printing Yields vary considerably based on im...

Страница 265: ...l new cartridges immediately after removing the old ones Caution Leave your old cartridges in the printer until you are ready to replace them to prevent the print head nozzles from drying out Do not open ink cartridge packages until you are ready to install the ink Cartridges are vacuum packed to maintain reliability 1 Turn on your product 2 If an ink cartridge is low or expended a message appears...

Страница 266: ...pose of used cartridges carefully Do not take the used cartridge apart or try to refill it Warning If ink gets on your skin wash it thoroughly with soap and water If ink gets into your eyes flush them immediately with water If ink gets into your mouth spit it out and see a doctor right away Keep ink cartridges out of the reach of children ...

Страница 267: ...o not touch the green chip on the cartridge Install the new cartridge immediately after removing the old one if you do not the print head may dry out and be unable to print 7 Gently shake the ink cartridge horizontally for about five seconds as shown ...

Страница 268: ...he product starts charging the ink and returns to its previous state when finished Note Do not turn off the printer during ink replacement Caution If you remove an ink cartridge for later use protect the ink supply area from dirt and dust and store it in the same environment as the printer The valve in the ink supply port is designed to contain any excess ink but do not touch the ink supply port o...

Страница 269: ...ack ink with an expended color cartridge you can cancel your print job and select settings to print on plain paper or on an envelope Note To use this feature Epson Status Monitor must be enabled 1 Click Cancel or Cancel Print to cancel your print job Note If the message screen appears on another computer on a network you may need to cancel the print job using the product control panel 2 Load plain...

Страница 270: ...elete or button to cancel your print job If you see an error message click OK Note If the message screen appears on another computer on a network you may need to cancel the print job using the product control panel 3 In the Apple menu or the Dock select System Preferences 4 Select Print Fax Print Scan or Printers Scanners select your product and select Options Supplies 5 Select Driver or Options Y...

Страница 271: ...ars when black ink runs low and there is more color ink Note The window appears only when you have selected Plain Paper Bright White Paper as the paper type setting and depends on other selected print settings To use this feature Epson Status Monitor must be enabled Click Yes to use a mixture of color inks to create black or No to continue using the remaining black ink for the document you are pri...

Страница 272: ...as been removed and left uninstalled for more than a week Keep the maintenance box away from direct sunlight 1 Make sure the product is not printing 2 Remove the new maintenance box from its package Caution Do not touch the green chip on the maintenance box Do not remove the film on the box or ink may leak 3 Open the rear cover 1 D1 ...

Страница 273: ...horoughly with soap and water If ink gets into your eyes flush them immediately with water If ink gets into your mouth spit it out and see a doctor right away Keep the maintenance box out of the reach of children and do not drink the ink 5 Place the used maintenance box in the plastic bag that came with the new maintenance box Seal the bag and dispose of it carefully ...

Страница 274: ...ew maintenance box into the holder and push it all the way in 7 Close the rear cover 1 D1 Parent topic Replacing Ink Cartridges and Maintenance Boxes Related concepts Purchase Epson Ink Cartridges and Maintenance Box ...

Страница 275: ...hem unnecessarily Note You cannot clean the print head if an ink cartridge is expended and may not be able to clean it when a cartridge is low You must replace the cartridge first Print Head Nozzle Check Print Head Cleaning Parent topic Adjusting Print Quality Related topics Replacing Ink Cartridges and Maintenance Boxes Print Head Nozzle Check You can print a nozzle check pattern to check for clo...

Страница 276: ...ess the home button if necessary 4 Select Setup 5 Select Maintenance You see a screen like this 6 Select Print Head Nozzle Check You see a screen like this 7 Press the Color button The nozzle pattern prints ...

Страница 277: ...s and repeat the process as necessary Caution Never turn off the product or open the front cover during a cleaning cycle or you may not be able to print If you don t see any improvement after cleaning the print head up to 4 times turn off the product if possible and wait at least 6 hours Then try cleaning the print head again If quality still does not improve one of the ink cartridges may be old o...

Страница 278: ...in paper in the product 3 Do one of the following Windows Access the Windows Desktop and right click the product icon in the Windows taskbar OS X In the Apple menu or the Dock select System Preferences Select Print Fax Print Scan or Printers Scanners select your product and select Options Supplies Select Utility and select Open Printer Utility 4 Select Nozzle Check You see a window like this 5 Cli...

Страница 279: ...d Cleaning Related topics Loading Paper Print Head Cleaning If print quality has declined and the nozzle check pattern indicates clogged nozzles you can clean the print head Note You cannot clean the print head if an ink cartridge is expended and may not be able to clean it when a cartridge is low You must replace the cartridge first Cleaning the Print Head Using the Product Control Panel Cleaning...

Страница 280: ... clean the print head using the control panel on your product 1 Make sure there are no errors on the LCD screen 2 Load a few sheets of plain paper in the product 3 Press the home button if necessary 4 Select Setup 5 Select Maintenance You see a screen like this 6 Select Print Head Cleaning You see a screen like this ...

Страница 281: ...nk cartridges may be old or damaged and needs to be replaced Parent topic Print Head Cleaning Related tasks Cleaning the Print Head Using a Computer Utility Related topics Loading Paper Cleaning the Print Head Using a Computer Utility You can clean the print head using a utility on your Windows or Mac computer 1 Make sure there are no errors on the LCD screen 2 Load a few sheets of plain paper in ...

Страница 282: ...uct or open the front cover during a cleaning cycle or you may not be able to print 6 When the cleaning cycle is finished you can check to see if the nozzles are clean click Print Nozzle Check Pattern and click Print 7 Check the printed pattern to see if there are gaps in the lines Print head is clean ...

Страница 283: ... Print Head Cleaning Related tasks Cleaning the Print Head Using the Product Control Panel Related topics Loading Paper Print Head Alignment If your printouts become grainy or blurry you notice misalignment of vertical lines or you see dark or light horizontal bands you may need to align the print head Note Banding may also occur if your print head nozzles need cleaning Aligning the Print Head Usi...

Страница 284: ...al Alignment If you see horizontal bands at regular intervals select Horizontal Alignment 8 Follow the on screen instructions to print an alignment sheet Note Do not cancel printing while you are printing head alignment patterns 9 Check the printed patterns on the alignment sheet and do one of the following If you printed a ruled line alignment sheet select the number of the pattern with the least...

Страница 285: ... on the back of a printout you can clean the paper guide rollers to remove any excess ink If paper does not feed correctly from the rear paper feed slot you can use a cleaning sheet to clean the rollers 1 Do one of the following If printouts are smeared or scuffed load plain paper in the paper source that you want to clean in this size Letter 8 5 11 inches 216 279 mm If paper does not feed correct...

Страница 286: ... clean 7 Press the Color button 8 Do one of the following If you loaded plain paper repeat as necessary until the paper comes out clean If you loaded a cleaning sheet repeat these steps up to 3 times Note If the paper is not clean after cleaning several times try cleaning the paper guide rollers for the other paper sources Parent topic Adjusting Print Quality ...

Страница 287: ...keep your product working at its best you should clean it several times a year Caution Do not use a hard brush alcohol or paint thinner to clean the product or you may damage it Do not use oil or other lubricants inside the product or let water get inside it 1 Turn off the product 2 Unplug the power cord 3 Disconnect any connected cables 4 Remove all the paper from the product ...

Страница 288: ...cloth microfiber is recommended moistened with a little glass cleaner Caution Do not spray glass cleaner directly on the glass and do not press the glass surface with any force Note If lines appear on the printout or in scanned images carefully clean the scanner glass on the left ...

Страница 289: ...6 Raise the lever and open the ADF cover F ...

Страница 290: ...l with a soft dry cloth Do not use liquid or chemical cleansers Parent topic Cleaning and Transporting Your Product Transporting Your Product If you need to store your product or transport it prepare it for transportation as described here Caution During transportation and storage follow these guidelines Use two or more people to lift the product ...

Страница 291: ...eak Leave the ink cartridges installed Removing the cartridges can dry out the print head and may prevent the product from printing Note Before storing your product for a long period replace low expended or expired ink to help prevent the print head from drying out Store your product in a cool dry place 1 Turn off the product 2 Unplug the power cord 3 Disconnect any connected cables 4 Remove all t...

Страница 292: ...Make sure the box adequately protects the product control panel Keep the product level during transportation If print quality has declined when you print again clean and align the print head Parent topic Cleaning and Transporting Your Product Related concepts Print Head Cleaning Related tasks Aligning the Print Head Using the Product Control Panel Removing and Installing Ink Cartridges ...

Страница 293: ...lems Uninstall Your Product Software Where to Get Help Checking for Software Updates Periodically it s a good idea to check Epson s support website for free updates to your product software Visit the driver download site at U S downloads or Canadian downloads Windows Your printer software automatically checks for updates You can also manually update the software by selecting Software Update here A...

Страница 294: ... product If the error is still displayed contact Epson for support Printer error The product may be damaged Contact Epson or an authorized Epson service provider Non printing features such as scanning may be available Cannot print because XX is out of Turn the product off and then back on again Reinsert the order You can print from another indicated paper cassette paper source Maintenance rollers ...

Страница 295: ...occurred press the Status button and select Printer Information to view details of the error To check whether received faxes have been saved press the Status button select Job Monitor and then select Communication Job To save received faxes connect a computer or memory device to the product Combination of IP address and There is a problem with the network connection to your product subnet mask is ...

Страница 296: ...rol settings Contact your product administrator 107 User authentication failed and the job has been canceled Contact your product administrator 108 Confidential job data was deleted when the product was turned off 109 The received fax was already deleted 110 The job was printed 1 sided because the loaded paper does not support 2 sided printing 111 Available memory is running low Reduce the size of...

Страница 297: ... device is write protected Disable write protection 402 303 No folder is available for saving the scanned file Create a folder or use a different memory device 304 The external memory device has been removed Reinsert the device 404 305 An error occurred while saving data to an external memory device Reinsert the memory device or use a different device 405 306 The product s memory is full Wait unti...

Страница 298: ...as wrong or the destination does not exist Check the Location settings 331 A communication error occurred while acquiring the destination list Make sure the product is connected to the network correctly 332 There is not enough space available for saving the scanned files in the specified folder Delete unnecessary files from the specified folder 333 The destination could not be found because the de...

Страница 299: ... the storage space in the destination folder 428 The destination was wrong or the destination does not exist Make sure the settings are correct for the folder selected in the Where to Forward setting in the Setup menu Parent topic Solving Problems Related tasks Selecting the Line Type Connecting a Telephone or Answering Machine Related topics Wi Fi or Wired Networking Running a Product Check Runni...

Страница 300: ...omplete the product is operating properly Any operation problem you may have could be caused by your computer cable software or selected settings Check the other solutions in this book or try uninstalling and reinstalling your printer software If the page prints but the nozzle check pattern has gaps clean or align the print head If the page does not print the product may have a problem Check the o...

Страница 301: ...2 Select Setup 3 Scroll down and select System Administration Enter the administrator password if necessary 4 Scroll down and select Restore Default Settings You see a screen like this 5 Select one of these options Network Settings Resets all network settings Copy Settings Resets all settings for copying Scan Settings Resets all settings for scanning Fax Settings Resets all settings for faxing Cle...

Страница 302: ... your product after installing ink check the following The first time you install the ink cartridges the product must charge its print head Wait until charging finishes before you turn off the product or it may charge improperly and use excess ink the next time you turn it on If the product s print head stops moving or making noise and the charging process has not finished after approximately 5 mi...

Страница 303: ...r print out your fax and network data and settings Product Cannot Connect to a Wireless Router or Access Point Network Software Cannot Find Product on a Network Product Does Not Appear in OS X Printer Window Cannot Print Over a Network Cannot Scan Over a Network Parent topic Solving Problems Product Cannot Connect to a Wireless Router or Access Point If your product has trouble finding or connecti...

Страница 304: ...els and change to a usable channel if necessary If you are using a Wi Fi Direct connection that suddenly disconnects the Wi Fi direct password on your device may have been changed If necessary delete the existing DIRECT xxxxxxxx connection settings from your device and enter a new password See your device documentation for instructions If you connected your product to a Windows computer using Wi F...

Страница 305: ...via Wi Fi Protected Setup WPS and the Wi Fi icon on your product s LCD screen is not lit make sure you select one of the WPS options from the product control panel within 2 minutes of pressing the WPS button on your router If you are connecting the product wirelessly via EpsonNet Setup and you do not see the Wi Fi antenna icon with connection bars on your LCD screen make sure your product software...

Страница 306: ... function If you are connecting the product via Wi Fi Protected Setup WPS and the Wi Fi icon on your product s LCD is not lit make sure you select one of the WPS options from the product control panel within 2 minutes of pressing the WPS button on your router Check your wired LAN router or access point to see if the LED for the port to which your product is connected is on or flashing If the link ...

Страница 307: ... to Network then click the Test button Windows other versions Click or Start All Programs or Programs EPSON EPSON Scan EPSON Scan Settings Make sure the Connection setting is set to Network then click the Test button OS X Open the Applications folder click Epson Software and click EPSON Scan Settings Make sure the Connection setting is set to Network then click the Test button If the user restrict...

Страница 308: ...oftware is installed correctly Make sure your product is level not tilted Parent topic Solving Copying Problems Product Makes Noise When It Sits for a While Your product is performing routine maintenance This is normal Parent topic Solving Copying Problems Originals Do Not Feed From the Automatic Document Feeder If your originals do not feed when placed in the ADF try these solutions Make sure the...

Страница 309: ...assette all the way into your product If multiple pages feed at once remove the paper fan the edges to separate the sheets and reload it If multiple pages continue to feed at once turn on the Paper Feed Assist Mode setting in the Setup System Administration Printer Settings menu Do not load more than the recommended number of sheets Make sure your paper meets the specifications for your product If...

Страница 310: ...ammed in the front cover follow the steps here to clear the jam 1 Cancel the print job if necessary 2 Open the front cover 3 Remove any paper inside including torn pieces Caution Be careful to not touch any parts inside the product to prevent damage to it ...

Страница 311: ... Remove Paper after clearing the paper jam error Parent topic Solving Paper Problems Paper Jam Problems in the Rear Paper Feed Slot B1 If paper has jammed in the rear paper feed slot carefully remove the paper Parent topic Solving Paper Problems Paper Jam Problems in the Front Paper Feed Slot B2 If paper has jammed in the front paper feed slot follow the steps here to clear the jam 1 Cancel the pr...

Страница 312: ...3 Remove the output tray and pull out the paper cassette 4 Pull the lever to lower the cover ...

Страница 313: ...tte 8 Follow the prompts on the LCD screen to clear any error messages If you still see a paper jam message check the other paper jam solutions Parent topic Solving Paper Problems Paper Jam Problems in the Cassette C1 If paper has jammed in the cassette follow the steps here to clear the jam 1 Cancel the print job if necessary ...

Страница 314: ...2 Pull out the paper cassette 3 Carefully remove any paper jammed inside the product ...

Страница 315: ...pts on the LCD screen to clear any error messages If you still see a paper jam message check the other paper jam solutions Parent topic Solving Paper Problems Paper Jam Problems in the Rear Cover 1 D1 If paper has jammed in the rear cover 1 follow the steps here to clear the jam 1 Cancel the print job if necessary 2 Open rear cover 1 D1 ...

Страница 316: ...3 Carefully remove any jammed paper Caution Do not touch the paper feed mechanism 4 Pull out rear cover 2 D2 ...

Страница 317: ...essages If you still see a paper jam message check the other paper jam solutions Parent topic Solving Paper Problems Document Jams in the Automatic Document Feeder F If you have problems with document jams in the automatic document feeder ADF follow the steps here to clear the jam 1 Cancel the print job if necessary 2 Remove your originals from the ADF ...

Страница 318: ...3 Raise the lever and open the ADF cover ...

Страница 319: ...4 Carefully remove any jammed pages ...

Страница 320: ...5 Close the ADF cover then raise the document cover ...

Страница 321: ...6 Carefully remove any jammed pages ...

Страница 322: ...ot load the ADF beyond its capacity for your paper size Also make sure your originals are not bent folded or curled and do not have tape staples or other materials that could obstruct the feeder 11 Follow the prompts on the LCD screen to clear any error messages If you still see a paper jam message check the other paper jam solutions Parent topic Solving Paper Problems ...

Страница 323: ...oduct Icon Does Not Appear in Windows Taskbar Printing is Slow Parent topic Solving Problems Nothing Prints If you have sent a print job and nothing prints try these solutions Make sure your product is turned on Make sure any interface cables are connected securely at both ends If you connected your product to a USB hub make sure it is a first tier hub If it still does not print connect your produ...

Страница 324: ...ng Problems Printing from a Computer Product Icon Does Not Appear in Windows Taskbar If you do not see your product icon in the Windows taskbar first try restarting your computer If that does not work try this solution 1 Do one of the following Windows 10 Right click and select Control Panel Hardware and Sound Devices and Printers Windows 8 x Navigate to the Apps screen and select Control Panel Ha...

Страница 325: ...re not using when you print If your product is connected to a USB hub connect it directly to your computer instead If printing becomes slower after printing continuously for a long time the product may have automatically slowed down to protect the print mechanism from overheating or becoming damaged Let the product rest with the power on for 30 minutes then try printing again For the fastest print...

Страница 326: ...or or inversion settings in your printing application Turn off the Mirror Image Flip horizontally or Reverse page orientation settings in your printer software This option has different names depending on your operating system version Note Leave these options turned on when you print on Epson Iron on Cool Peel Transfer paper if available for your product Parent topic Solving Page Layout and Conten...

Страница 327: ...yout and Content Problems Incorrect Characters Print If incorrect characters appear in your prints try these solutions before reprinting Make sure any cables are securely connected at both ends In Windows delete all jobs from the Windows Spooler Click Print Queue on the Maintenance tab in the printer settings window and cancel any stalled print jobs If your product is connected to a USB hub connec...

Страница 328: ...ted or at an angle Parent topic Solving Page Layout and Content Problems Solving Print Quality Problems Check these sections if your printouts have problems with print quality but your image looks fine on your computer screen Note When printing using AirPrint the available print settings are different from those covered in this manual See the Apple website for details White or Dark Lines in Printo...

Страница 329: ... printing on thick paper or envelopes turn on the Thick Paper setting from the control panel or select Thick Paper and Envelopes in the Extended Settings of the printer software Turning this setting on will decrease print speed In Windows if the paper is still smeared after selecting the Thick Paper and Envelopes setting select the Short Grain Paper setting in the Extended Settings of the printer ...

Страница 330: ...duct Align the print head Clean the paper path Parent topic Solving Print Quality Problems Grainy Printout If your printouts are grainy try these solutions Make sure you loaded the printable side of the paper correctly for your product Select a higher print quality setting and turn off any high speed settings in your product software Run a nozzle check to see if any of the print head nozzles are c...

Страница 331: ...ing in the printer software try selecting Standard Windows or Normal OS X instead Run a nozzle check to see if any of the print head nozzles are clogged Then clean the print head if necessary The ink cartridges may be old or low on ink and you may need to replace them After you print the colors in your printout need time to set as the ink dries During this time the colors may look different than y...

Страница 332: ...nnot Start Epson Scan If you cannot start Epson Scan try these solutions Make sure your product is turned on and any interface cables are securely connected at both ends Make sure Epson Scan is selected in your scanning program Make sure your computer is not running in a power saving mode such as sleep or standby If so wake your system and restart Epson Scan Check the connection setting and test t...

Страница 333: ... download site U S downloads or Canadian downloads Parent topic Solving Scanning Problems Solving Scanned Image Quality Problems Check these sections if a scanned image on your computer screen has a quality problem Image Consists of a Few Dots Only Line of Dots Appears in All Scanned Images Straight Lines in an Image Appear Crooked Image is Distorted or Blurry Image Colors are Patchy at the Edges ...

Страница 334: ...ge is Distorted or Blurry If a scanned image appears distorted or blurry try these solutions Make sure your original is not wrinkled or warped This may prevent the original from laying flat on the scanner glass Do not move your original or your product during scanning Your product will not operate properly while tilted at an angle Place your product on a flat stable surface that extends beyond its...

Страница 335: ...your original s halftone screen To reduce this effect adjust these Epson Scan settings if available and try scanning again Select the Descreening setting Select a lower Resolution setting Parent topic Solving Scanned Image Quality Problems Scanned Image Colors Do Not Match Original Colors Printed colors can never exactly match the colors on your computer monitor because printers and monitors use d...

Страница 336: ...edges of the scanner glass slightly Parent topic Solving Scanned Image Quality Problems Solving Faxing Problems Check these solutions if you have problems faxing with your product Cannot Send or Receive Faxes Cannot Receive Faxes with a Telephone Connected to Your Product Fax Memory Full Error Appears Sent Fax Quality is Poor Sent Fax is Received in an Incorrect Size Received Fax Quality is Poor R...

Страница 337: ...f the dial tone setting may cause the product to drop the first digit of a fax number If you connected your product to a DSL phone line you must connect a DSL filter to the phone jack to enable faxing over the line Contact your DSL provider for the necessary filter If your telephone line has static turn off your product s error correction mode fax communication setting and try faxing again Try low...

Страница 338: ...Error Appears If you see an error message telling you that the product s fax memory is full try these solutions If you set the product to save received faxes in the product s memory or inbox delete any faxes you have already read If you set the product to save received faxes on a computer turn on the selected computer Once the faxes are saved on the computer they are deleted from the product s mem...

Страница 339: ...n mode ECM setting Parent topic Solving Faxing Problems Sent Fax is Received in an Incorrect Size If your recipient receives a fax in an incorrect size try these solutions If you are sending a fax using the scanner glass make sure your original is placed correctly on the scanner glass and that the correct paper size is selected on the control panel Clean the scanner glass and document cover Parent...

Страница 340: ...ve Files on a USB Device Cannot Transfer Files To or From a USB Device Parent topic Solving Problems Cannot View or Print from a USB Device If you cannot view or print photos or documents from a USB device inserted in your product try these solutions Make sure memory devices are enabled on the product Make sure your device is compatible with the product Make sure the files on your device are in th...

Страница 341: ...operating system Uninstalling Product Software Windows Uninstalling Product Software OS X Parent topic Solving Problems Uninstalling Product Software Windows You can uninstall and then re install your product software to solve certain problems 1 Turn off the product 2 Disconnect any interface cables 3 Do one of the following Windows 10 Right click and select Control Panel Programs Programs and Fea...

Страница 342: ...am Select Epson Event Manager and click Uninstall Change Windows XP Open the Windows Control Panel utility Double click Add or Remove Programs Select Epson Event Manager and click Change Remove 5 Do one of the following to uninstall Epson Scan then follow any on screen instructions Windows 10 Select EPSON Scan and click Uninstall Windows 8 x Windows 7 Windows Vista Select EPSON Scan and click Unin...

Страница 343: ... Here sheet for instructions Note If you uninstall the printer driver and your product name remains in the Print Fax Print Scan or Printers Scanners window select your product name and click the remove icon to remove it Parent topic Uninstall Your Product Software Where to Get Help If you need to contact Epson for technical support services use the following support options Speak to a Support Repr...

Страница 344: ...er ADF Specifications Fax Specifications Paper Specifications Printable Area Specifications Ink Cartridge Specifications Dimension Specifications Electrical Specifications Environmental Specifications Interface Specifications External USB Device Specifications Network Interface Specifications Safety and Approvals Specifications Windows System Requirements To use your product and its software your ...

Страница 345: ...Requirements To use your product and its software your Mac should use one of these operating systems OS X 10 10 x OS X 10 9 x OS X 10 8 x OS X 10 7 x OS X 10 6 8 Parent topic Technical Specifications Scanning Specifications Scanner type Flatbed Photoelectric device CIS Effective pixels 10200 16800 pixels at 1200 dpi Document size Maximum 8 5 14 inches 215 9 355 6 mm legal size ...

Страница 346: ...al Specifications Automatic Document Feeder ADF Specifications Paper size Minimum size A6 4 1 5 8 inches 105 148 mm landscape Maximum size Legal 8 5 14 inches 216 356 mm Paper type Plain paper Paper weight 14 lb 52 g m2 to 28 lb 105 g m2 Sheet feeding capacity Total thickness 0 12 inch 3 mm Approximately 50 sheets Parent topic Technical Specifications Fax Specifications Fax type Walk up black and ...

Страница 347: ... set connection Parent topic Technical Specifications Paper Specifications Note Since the quality of any particular brand or type of paper may be changed by the manufacturer at any time Epson cannot guarantee the quality of any non Epson brand or type of paper Always test a sample of paper stock before purchasing large quantities or printing large jobs Single sheets Paper types Plain paper and pap...

Страница 348: ...tions Printable Area Specifications Note Print quality may decline in the shaded areas shown here Single sheets 1 Top bottom sides 0 12 inch 3 mm minimum 2 Reduced print quality area top 1 81 inch 46 mm minimum 3 Reduced print quality area bottom 2 01 inches 51 mm minimum ...

Страница 349: ...t your print quality and could result in printer damage The cartridges included with the printer are designed for printer setup and not for resale After some ink is used for charging the rest is available for printing Yields vary considerably based on images printed print settings paper type frequency of use and temperature For print quality a variable amount of ink remains in the cartridge after ...

Страница 350: ...cal Specifications Dimension Specifications Height Stored 20 2 inches 514 mm Printing 21 3 inches 540 mm Width Stored 20 3 inches 516 mm Printing 20 3 inches 516 mm Depth Stored 20 6 inches 522 mm Printing 29 8 inches 756 mm Weight Approximately 68 3 lb 31 kg without ink cartridges or power cord Parent topic Technical Specifications Electrical Specifications Power supply rating 100 to 240 V Rated ...

Страница 351: ...h at 104 F 40 C Humidity Operating 20 to 80 RH without condensation Storage 5 to 85 RH Parent topic Technical Specifications Interface Specifications Interface type Hi Speed USB for computer Hi Speed USB for external USB device Note Epson cannot guarantee the operation of externally connected devices Parent topic Technical Specifications External USB Device Specifications Do not use devices with t...

Страница 352: ...nical Specifications Network Interface Specifications Wi Fi Standard IEEE 802 11 b g n complies with either IEEE 802 11 b g or IEEE 802 11 b g n depending on purchase location Security WEP 64 128 bit WPA2 PSK AES complies with WPA2 with support for WPA WPA2 Personal WPA2 Enterprise Frequency range 2 4 GHz Coordination modes Infrastructure mode Ad hoc mode no supported by IEEE 802 11 n Wi Fi Direct...

Страница 353: ...wisted pair cable to prevent risk of radio interference Security Protocol IEEE802 1X connected device must be IEEE802 1X compliant IPsec IP Filtering SSL TLS HTTPS Server Client or IPPS STARTTLS SMTPS SNMPv3 Parent topic Technical Specifications Safety and Approvals Specifications United States Safety UL60950 1 EMC FCC part 15 Subpart B class B Canada Safety CAN CSA C22 2 No 60950 1 EMC CAN CSA CE...

Страница 354: ...General Product Safety Instructions Be sure to follow all warnings and instructions marked on the product Use only the type of power source indicated on the product s label Use only the power cord that comes with the product Use of another cord may cause fires or shock Do not use the cord with any other equipment Place the product near a wall outlet where the plug can be easily unplugged Avoid plu...

Страница 355: ...not place the product near excessive heat sources or in direct sunlight Leave enough room around the product for sufficient ventilation Do not block or cover openings in the case or insert objects through the slots Keep the product away from potential sources of electromagnetic interference such as loudspeakers or the base units of cordless telephones When connecting the product to a computer or o...

Страница 356: ...your eyes flush them immediately with water Do not put your hand inside the product or touch any cartridges during printing Install a new ink cartridge immediately after removing an expended one Leaving cartridges uninstalled can dry out the print head and may prevent the product from printing Do not remove or tear the label on the cartridge this can cause leakage Do not remove the transparent sea...

Страница 357: ...ty precautions to reduce the risk of fire electric shock and personal injury including the following Do not use the Epson product near water Avoid using a telephone during an electrical storm There may be a remote risk of electric shock from lightning Do not use a telephone to report a gas leak in the vicinity of the leak Caution To reduce the risk of fire use only a No 26 AWG or larger telecommun...

Страница 358: ...he devices not ringing in response to an incoming call In most but not all areas the sum of RENs should not exceed five 5 0 To be certain of the number of devices that may be connected to a line as determined by the total RENs contact the local telephone company For products approved after July 23 2001 the REN for this product is part of the product identifier that has the format US AAAEQ TXXXX Th...

Страница 359: ...r in the AC outlet to which this equipment is connected Telephone companies report that electrical surges typically lightning transients are very destructive to customer terminal equipment connected to AC power sources and that this is a major nationwide problem This equipment has been tested and found to comply with the limits for a Class B digital device pursuant to Part 15 of the FCC Rules Thes...

Страница 360: ...s à une interface téléphonique La terminaison d une interface peut consister en une combinaison quelconque de dispositifs à la seule condition que la somme d indices d équivalence de la sonnerie de tous les dispositifs n excède pas 5 CAN ICES 3 B NMB 3 B Parent topic Notices Trademarks EPSON is a registered trademark EPSON Exceed Your Vision is a registered logomark and Epson ConnectTM is a tradem...

Страница 361: ...oration shall not be liable for any damages or problems arising from the use of any options or any consumable products other than those designated as Original Epson Products or Epson Approved Products by Seiko Epson Corporation Seiko Epson Corporation shall not be held liable for any damage resulting from electromagnetic interference that occurs from the use of any interface cables other than thos...

Страница 362: ...eriod of nonuse This is to ensure that the product meets Energy Star standards of energy efficiency More energy savings can be achieved by setting the time to sleep to a shorter interval Parent topic Copyright Notice Copyright Attribution 2015 Epson America Inc 9 15 CPD 42744 Parent topic Copyright Notice ...

Отзывы: