231
Parent topic:
Product Status Messages
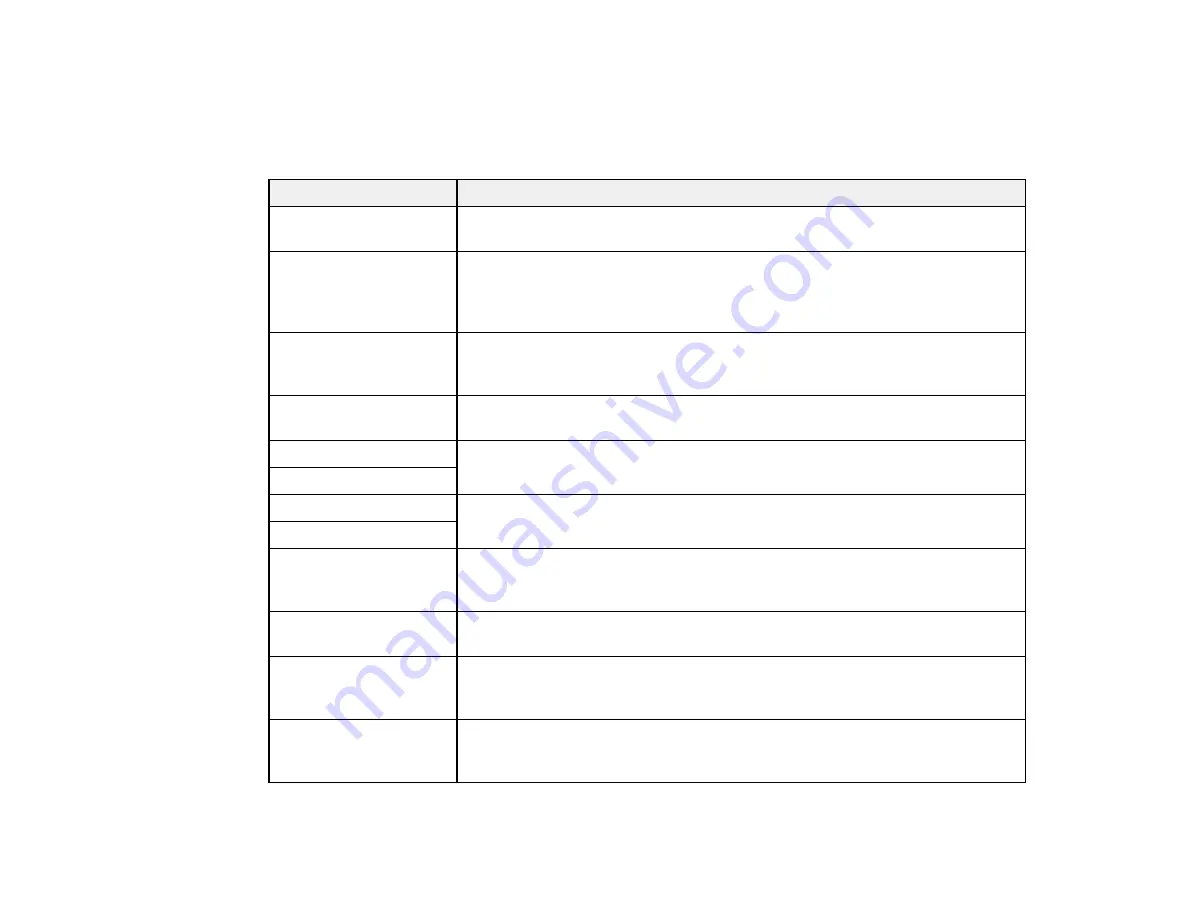
You can often diagnose problems with your product by checking the messages on its LCD screen.
LCD screen message
Condition/solution
Paper jam
Paper is jammed in the product. Remove the jammed paper and press the
OK
button to clear the error.
Paper jam in the ADF
Paper is jammed in the ADF or an object is blocking the hole in the front left
corner of the product next to the scanner glass. Remove the object or
jammed paper and follow the prompts on the LCD screen to clear any error
messages.
You need to replace the
following ink
cartridge(s).
Replace the indicated ink cartridge.
Communication error
Make sure the computer is connected to your product and your software is
installed correctly.
Printer error
Turn the product off. Make sure no paper is jammed in the product, then turn
the product back on again. If the error continues, contact Epson for support.
ADF error
Scanner error
Turn the product off and then back on again. If the error continues, contact
Epson for support.
A fax error has occurred
A printer's ink pad is
nearing the end of its
service life.
The ink pad is near the end of its service life. Contact Epson for support. (To
continue printing, press the
OK
button.)
A printer's ink pad is at
the end of its service life.
The ink pad is at the end of its service life. Turn off the product and contact
Epson for support.
No dial tone
Make sure the phone cable is connected correctly and the phone line works.
If you connected the product to a PBX (Private Branch Exchange) phone line
or Terminal Adapter, turn off the
Dial Tone Detection
setting.
Recovery mode
An error has occurred during firmware updating. Connect your product using
a USB cable and try updating the firmware again. If you still receive this error
message, contact Epson for support.
Содержание WF-2750
Страница 1: ...WF 2750 User s Guide ...
Страница 2: ......
Страница 12: ......
Страница 13: ...13 WF 2750 User s Guide Welcome to the WF 2750 User s Guide For a printable PDF copy of this guide click here ...
Страница 21: ...21 1 Document cover 2 Scanner glass 3 Control panel Parent topic Product Parts Locations ...
Страница 23: ...23 Product Parts Inside 1 Scanner unit 2 Cartridge holder do not remove Parent topic Product Parts Locations ...
Страница 35: ...35 Related topics Wi Fi Networking ...
Страница 48: ...48 2 Pull out the paper cassette 3 Slide the edge guides outward ...
Страница 54: ...54 2 Pull out the paper cassette 3 Slide the edge guides outward ...
Страница 130: ...130 You see this window ...
Страница 151: ...151 DSL connection 1 Telephone wall jack 2 DSL filter 3 DSL modem ...
Страница 152: ...152 ISDN connection 1 ISDN wall jack 2 Terminal adapter or ISDN router ...
Страница 177: ...177 You see this window 3 Select Fax Settings for Printer Select your product if prompted ...
Страница 178: ...178 You see this window 4 Select Speed Dial Group Dial List ...
Страница 214: ...214 You see a window like this 4 Click Print ...
Страница 229: ...229 Related concepts Print Head Cleaning Print Head Alignment ...
Страница 245: ...245 2 Pull out the paper cassette 3 Carefully remove any paper jammed inside the product ...
Страница 247: ...247 3 Carefully remove any jammed paper Note Do not touch the paper rollers 4 Remove any jammed paper from the duplexer ...
Страница 248: ...248 5 Open the duplexer cover and carefully remove any jammed paper stuck inside 6 Reattach the duplexer ...
Страница 250: ...250 4 Carefully remove any jammed paper 5 Close the ADF cover ...
Страница 251: ...251 6 Open the document cover ...
Страница 252: ...252 7 Carefully remove any jammed paper in the direction shown 8 Close the document cover ...


