Confidential
Disassembly/Reassembly
Overview
11
Epson Stylus Photo R3000
Revision A
1.1.4 Preparation before Returning the Unit to the User
When returning the printer to the user, make sure to secure the specified points with tapes to avoid damaging the
printer during transport.
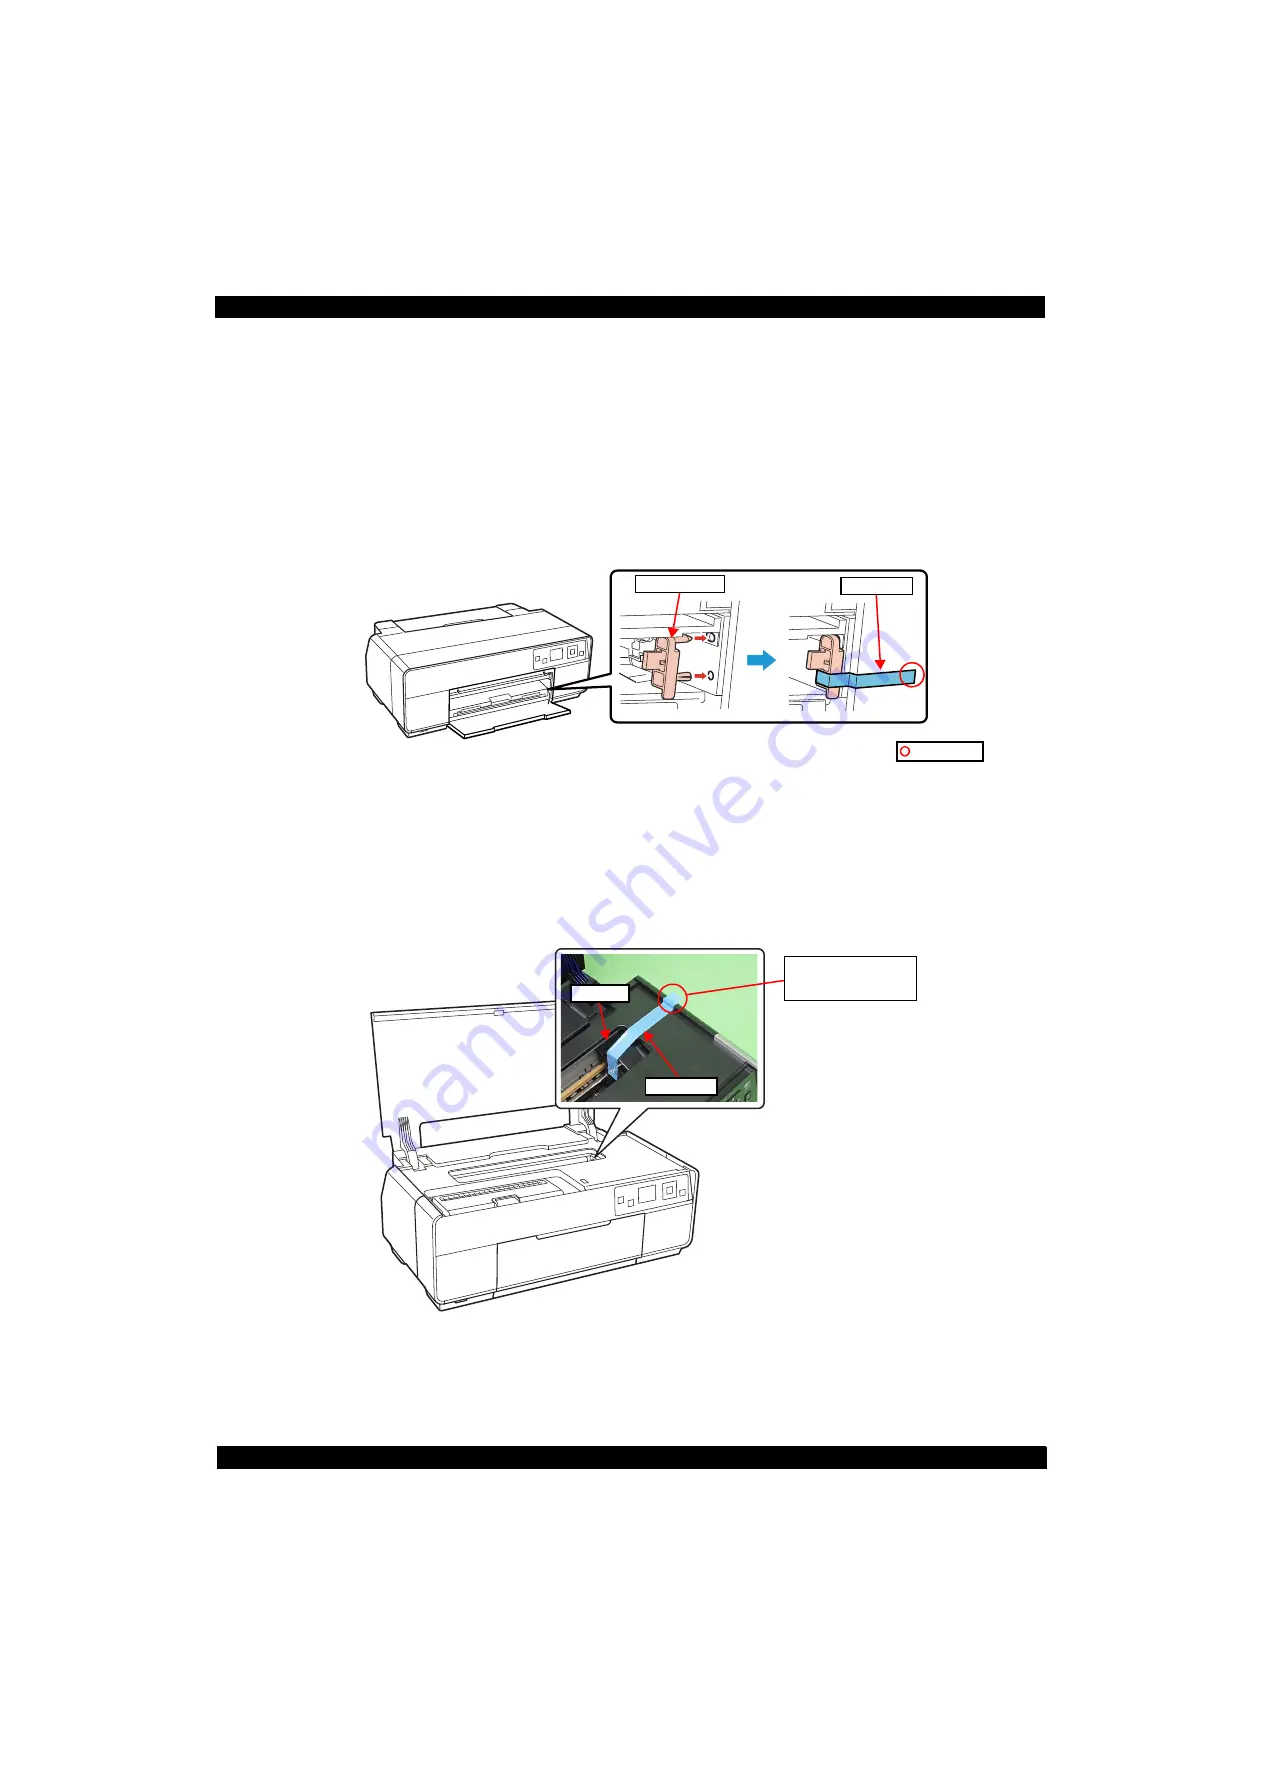
Attaching the front tray lock (tape length: 90
2 mm, tape width: 18 mm, fold one end by 5 mm)
Attach the front tray lock and secure it with strong tape as follows.
1. Attach the front tray lock on the position shown in
2. Attach the unfolded end of strong tape on the front tray lock as shown in
, and pull the tape and
apply it along the shapes of the Upper Housing Support Assy to secure the front tray lock.
Figure 1-2. Attaching and Securing the Front Tray Lock
Securing the CR Unit (tape length: 220
2 mm, tape width: 18 mm, fold one end by 5 mm)
Secure the CR Unit with strong tape as follows.
1. Open the printer cover and move the CR Unit to its home position.
2. Attach the unfolded end of strong tape on the CR Unit, and pull the tape and apply it along the shapes of
the Upper Housing Assy to the right side of the printer to secure the CR Unit.
Figure 1-3. Securing the CR Unit
Front tray lock
Strong tape
Folded end
CR Unit
Strong tape
Attach strong tape with
its unfolded end sticking
out of the printer.
Содержание Stylus Photo R3000 Series
Страница 1: ...SERVICE MANUAL CONFIDENTIAL Color Inkjet Printer EpsonStylusPhotoR3000 SEMF10 002 ...
Страница 6: ...Confidential Revision Status Revision Date of Issue Description A December 24 2010 First Release ...
Страница 8: ...Confidential CHAPTER 1 DISASSEMBLY REASSEMBLY ...
Страница 32: ...Confidential CHAPTER 2 ADJUSTMENT ...
Страница 64: ...Confidential CHAPTER 3 MAINTENANCE ...
Страница 69: ...Confidential CHAPTER 4 APPENDIX ...


