237
•
OS X
: You can manually update the software by opening the
Applications
>
Epson Software
folder
and selecting
EPSON Software Updater
.
•
macOS 10.12.x or later
: You can manually update the software by opening the
App Store
, selecting
Updates
, searching for a software update option for Epson Software, and selecting
Update
.
Parent topic:
Product Status Messages
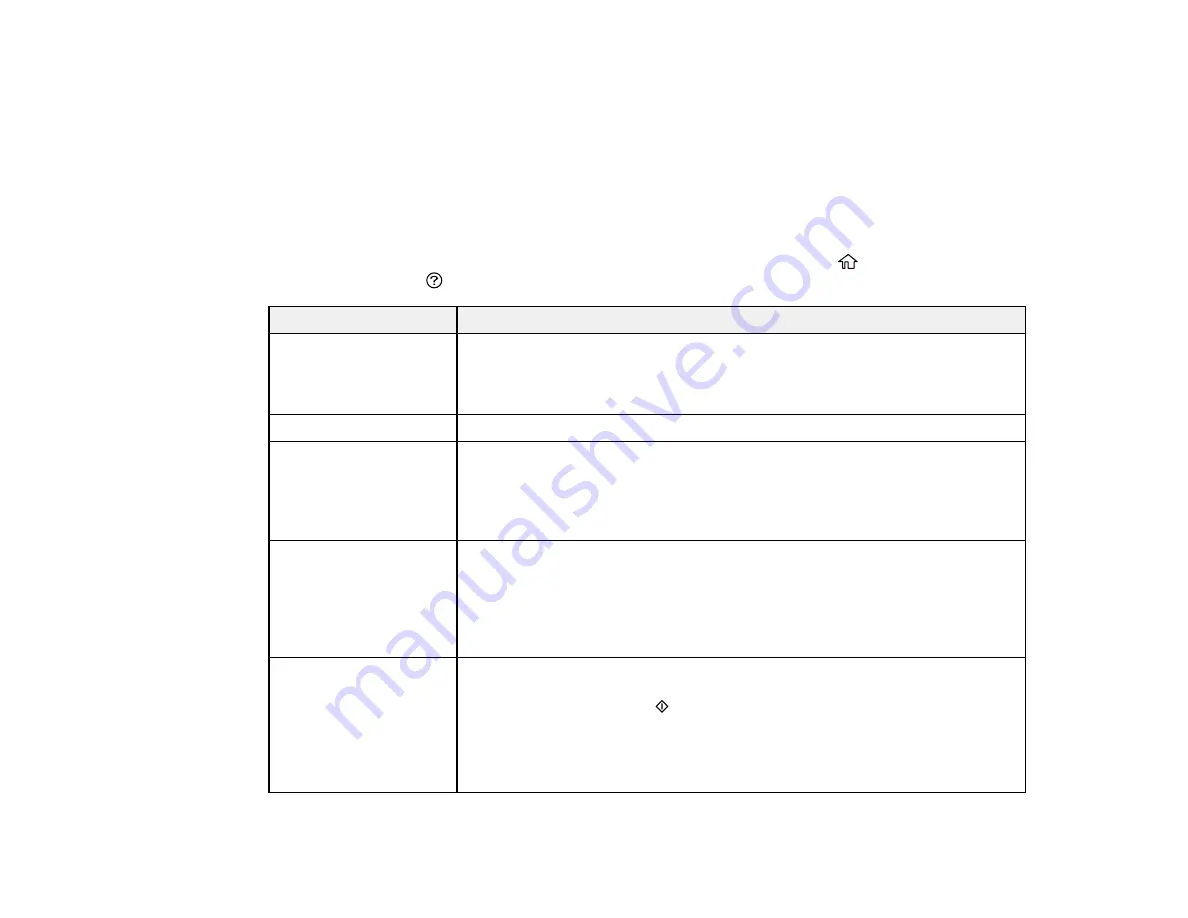
You can often diagnose problems with your product by checking the messages on its LCD screen. You
can also see help information and how-to instructions on the screen. Press the
home button, if
necessary, select the
help button.
LCD screen message
Condition/solution
Printer error. Turn on the
printer again. See your
documentation for
details.
A fatal error has occurred. Turn the product off and then back on again. If the
error continues, check for a paper jam. If there is no paper jam, contact
Epson for support.
Paper out in XX.
Load paper in the specified cassette.
Paper Setup Auto
Display is set to Off.
Some features may not
be available. For details,
see your documentation.
The
Paper Setup Auto Display
setting must be turned on to use AirPrint.
No dial tone is detected. Make sure the phone cable is connected correctly and the phone line works.
If you connected the product to a PBX (Private Branch Exchange) phone line
or Terminal Adapter, change the
Line Type
setting to
PBX
. If you still cannot
send a fax, turn off the
Dial Tone Detection
setting. (Turning off the Dial
Tone Detection setting may cause the product to drop the first digit of a fax
number.)
The printer's borderless
printing ink pad is
nearing the end of its
service life. It is not a
user-replaceable part.
Please contact Epson
support.
The ink pad is near the end of its service life and the message will be
displayed until the ink pad is replaced. Contact Epson for support. (To
resume printing, press the
start button.)
Содержание L6191
Страница 1: ...L6191 User s Guide ...
Страница 2: ......
Страница 12: ......
Страница 13: ...13 L6191 User s Guide Welcome to the L6191 User s Guide For a printable PDF copy of this guide click here ...
Страница 18: ...18 3 Select General Settings 4 Select Basic Settings 5 Select Date Time Settings ...
Страница 26: ...26 Product Parts Inside 1 Document cover 2 Scanner glass 3 Control panel ...
Страница 60: ...60 2 Pull out the paper cassette until it stops 3 Slide the edge guides outward ...
Страница 202: ...202 3 Open the ink tank cover then open the cap for the ink tank you are going to fill ...
Страница 230: ...230 4 Slide out the paper cassette and remove the paper 5 Make sure the ink tank caps are securely closed ...
Страница 234: ...234 7 Make sure the ink tank caps are securely closed and close the ink tank cover 8 Lower the scanner unit ...


