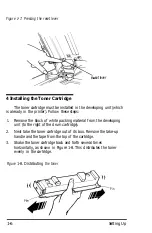
6. Attach the seal take-up handle to the small plastic shaft at the
front of the toner cartridge. (See Figure 1-11.) Move the lever back
and forth (in the direction of the arrows in Figure 1-11) until it
won’t move any further with moderate pressure. (You will see red
markings on the seal when you reach the end of it.) This step,
which may take up to 40 back and forth movements of the handle,
peels back the toner seal and releases the toner into the developer.
Figure 1-11. Removing the toner seal
Caution
Once the toner cartridge has been installed, do not remove it until you
are prompted to do so by the TONER OUT light on the control panel.
Otherwise toner will spill into the printer.
7. Remove and discard the take-up lever.
8.
Tap each of the corners of the toner cartridge to prevent toner from
remaining in the comers of the cartridge.
9. Make sure that the developer unit is properly locked into place by
pressing on the two places marked by blue dots. They are to the
right of the toner cartridge.
Now that you have installed the internal components, close the
printer and gently press down on the top of the case until the latch
clicks shut.
1-8
Setting Up
Содержание GQ-3500
Страница 2: ...EPSON G Q 3 5 0 0 User s Manual ...
Страница 36: ......
Страница 160: ...EPSON G Q 3 5 0 0 Quick Reference ...


