


Maintenance 8. Arm #4
178
G10 / G20 Rev.20
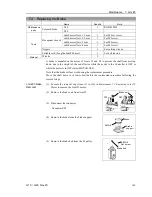
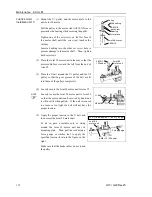
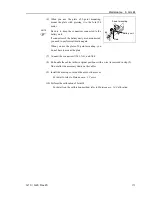
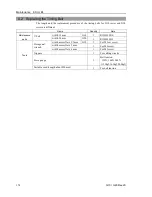
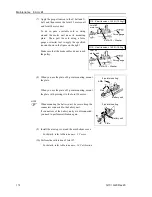
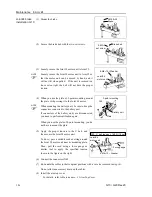
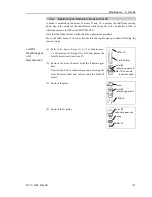
(7) Apply the proper tension to the Z belt and U
belt, and then secure the Joint #3 motor unit
and Joint #4 motor unit.
To do so, pass a suitable cord or string
around the motor unit near its mounting
plate. Then, pull the cord using a force
gauge or similar tool to apply the specified
tension shown in the figure on the right.
Make sure that the brake cables do not touch
the pulley.
4-M4
×
15
+
Washer
G10 : Z belt tension = 130 N (13.3 kgf)
Force gauge
Joint #3
motor unit
4-M4
×
15
+
Washer
G10 : U belt tension = 160 N (16.3 kgf)
Force gauge
Joint #4
motor unit
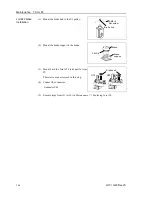
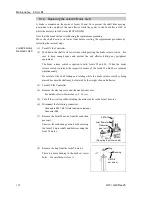
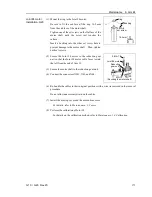
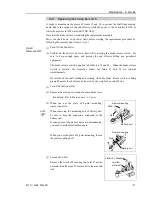
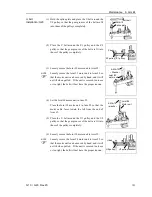
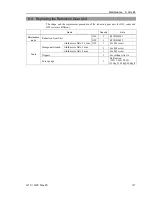
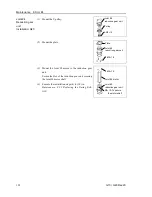
(8) When you use the plate of 4-point mounting, mount
the plate.
When you use the plate of 3-point mounting, mount
the plate with pressing it to the Joint #4 motor.
When mounting the battery unit, be sure to keep the
connectors connected to the battery unit.
If connectors of the battery unity are disconnected,
you need to perform calibration again.
4-point mounting
4-M4
×
10
Plate
Battery unit
3-point mounting
Plate
Battery unit
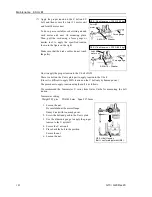
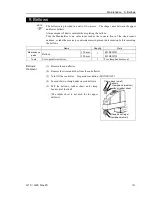
(9) Install the arm top cover and the arm bottom cover.
For details, refer to
Maintenance: 3. Covers
.
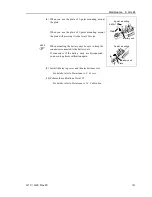
(10) Perform the calibration of Joint #3.
For details, refer to
Maintenance: 14. Calibration
.
NOTE
Содержание G10 Series
Страница 1: ...Rev 20 EM183R3619F SCARA ROBOT G10 G20 series MANIPULATOR MANUAL ...
Страница 2: ...MANIPULATOR MANUAL G10 G20 series Rev 20 ...
Страница 8: ...vi G10 G20 Rev 20 ...
Страница 14: ......
Страница 102: ...Setup Operation 5 Motion Range 90 G10 G20 Rev 20 ...
Страница 103: ...Maintenance This volume contains maintenance procedures with safety precautions for G10 G20 series Manipulators ...
Страница 104: ......