


Maintenance 8. Arm #4
G10 / G20 Rev.20
177
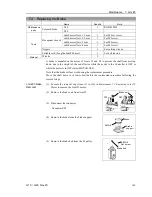
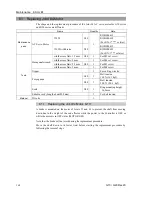
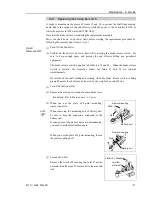
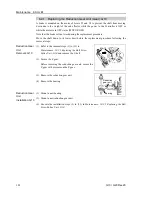
U belt
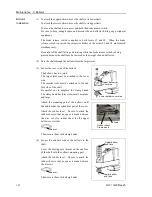
Installation: G10
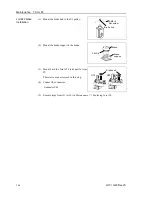
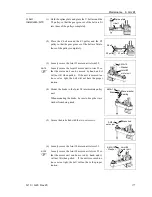
(1) Hold the spline plate and place the U belt around the
U2 pulley so that the gear grooves of the belt are fit
into those of the pulleys completely.
U belt
Spline plate
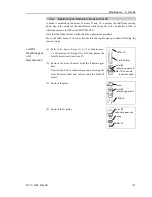
(2) Place the Z belt around the Z1 pulley and the Z2
pulley so that the gear grooves of the belt are fit into
those of the pulleys completely.
Z belt
Z2 pulley
Z1 pulley
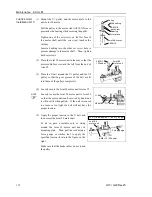
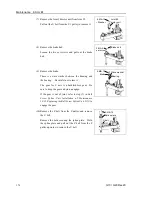
(3) Loosely secure the Joint #3 motor unit to Arm #2.
Loosely secure the Joint #3 motor unit to Arm #2 so
that the motor unit can be moved by hand, and it
will not tilt when pulled. If the unit is secured too
loose or too tight, the belt will not have the proper
tension.
4-M4
×
15
+
Washer
Joint #3
motor unit
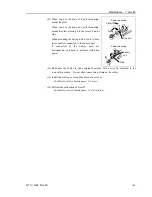
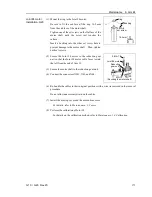
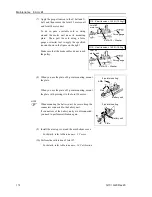
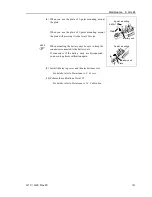
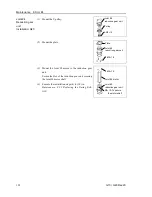
(4) Mount the brake to the Joint #4 intermediate pulley
unit.
When mounting the brake, be sure to keep the wave
washer from being stuck.
4-M4
×
12
Brake
Wave washer
Bearing
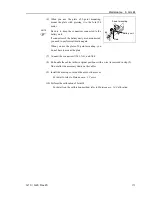
(5) Secure the brake hub with the two set screws.
2-M3
×
4
set screw
Brake hub
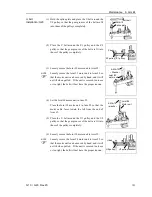
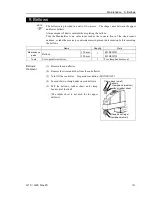
(6) Loosely secure the Joint #4 motor unit to Arm #2.
Loosely secure the Joint #4 motor unit to Arm #2 so
that the motor unit can be moved by hand, and it
will not tilt when pulled. If the unit is secured too
loose or too tight, the belt will not have the proper
tension.
4-M4
×
15
+
Washer
Joint #4
motor unit
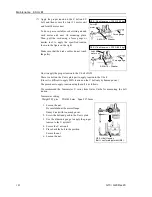
NOTE
NOTE
Содержание G10 Series
Страница 1: ...Rev 20 EM183R3619F SCARA ROBOT G10 G20 series MANIPULATOR MANUAL ...
Страница 2: ...MANIPULATOR MANUAL G10 G20 series Rev 20 ...
Страница 8: ...vi G10 G20 Rev 20 ...
Страница 14: ......
Страница 102: ...Setup Operation 5 Motion Range 90 G10 G20 Rev 20 ...
Страница 103: ...Maintenance This volume contains maintenance procedures with safety precautions for G10 G20 series Manipulators ...
Страница 104: ......