199
4.
Select the number of rows and columns you are setting up as the
Row
and
Column
settings. Then
select
Set
and press
Enter
.
5.
Repeat the previous steps with each projector you are setting up before continuing with the next
step.
6.
Select
Location Setup
and press
Enter
.
7.
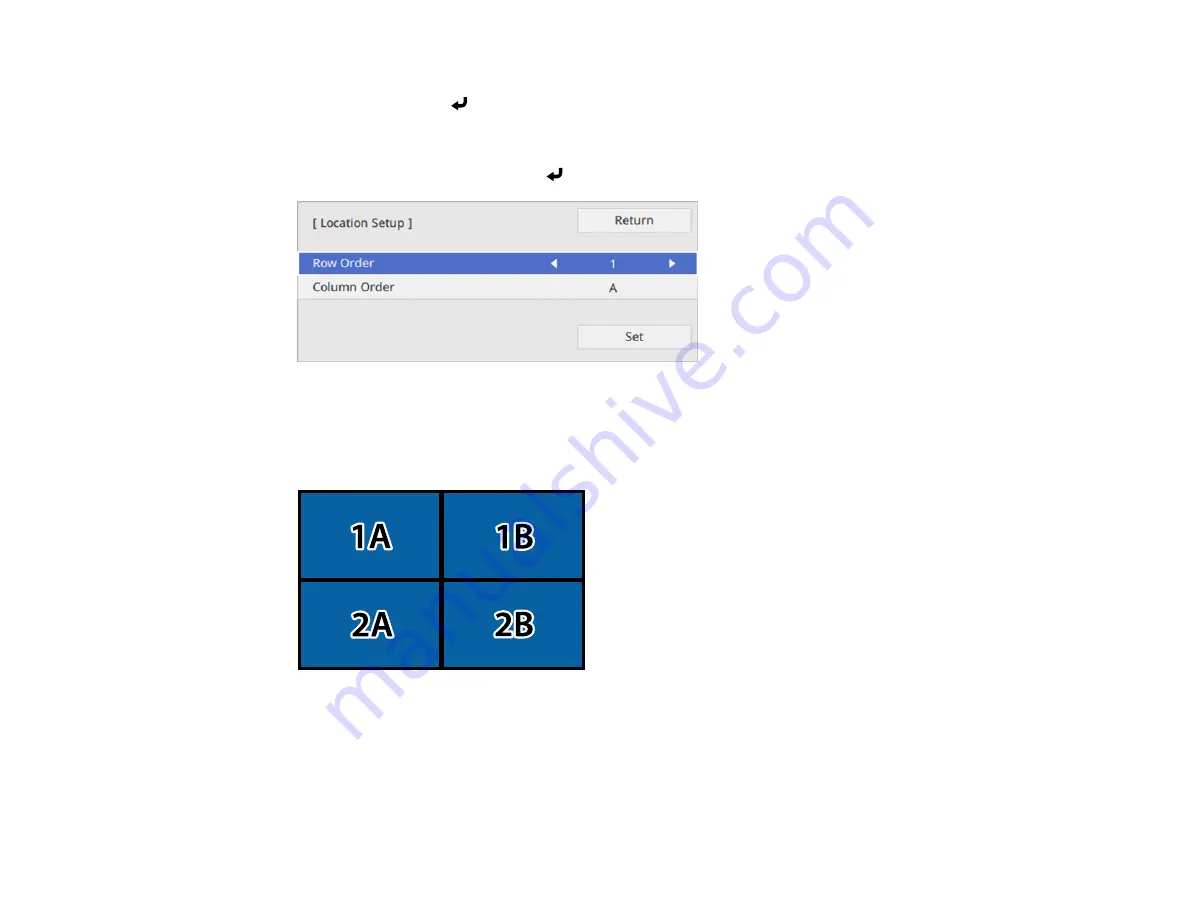
Select the position of each projected image as follows:
•
Row Order
to layout the screens from top to bottom in sequential order, starting with
1
at the top
•
Column Order
to layout the screens from left to right, starting with
A
on the left
8.
Repeat the previous step with each projector you are setting up before continuing with the next step.
9.
Select the input signal to display an image.
After performing the steps here, adjust the images for any gaps and differences in color.
Parent topic:
Содержание EB-L520U
Страница 1: ...PowerLite EB L520U EB L530U EB L630U EB L630SU EB L635SU EB L730U EB L735U User s Guide ...
Страница 2: ......
Страница 26: ...26 Projector Parts Remote Control 1 Power button 2 HDMI button cycles through connected HDMI sources ...
Страница 29: ...29 Front Rear Front ceiling ...
Страница 82: ...82 2 Select the Management menu and press Enter 3 Set the Wireless LAN Power setting to On ...
Страница 262: ...262 Parent topic Adjusting the Menu Settings Related concepts Updating the Firmware ...
Страница 266: ...266 4 Loosen the screws and remove the air filter cover 5 Pull the air filter out of the projector ...


