


Section 1: Getting Started
6
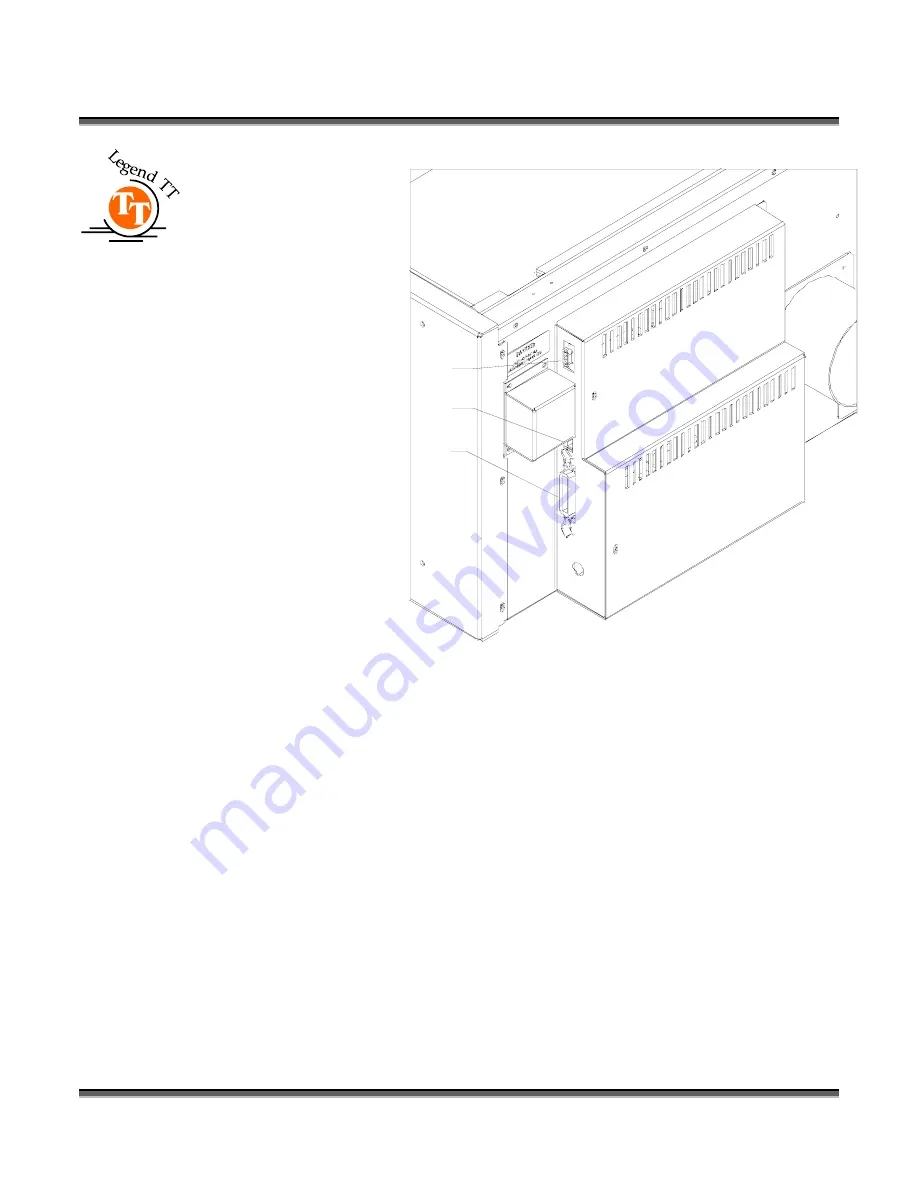
Ethernet Network
Port: The Legend
uses a 10BaseT
style connection
and a network
crossover cable is
included in the
accessories kit that
came with your
laser. The port is
located on the
right side of the
machine, near the
rear. The network
parameters can be
set at the Legend,
and details for
doing so are in
Section 4,
“Configuring
Your Computer –
Print Driver
Installation”.
Parallel Port: The connection point on the Legend is on the right side of the
machine, near the rear. The connector is recessed in a small rectangular cutout. Mate
the larger end of the printer cable to the Legend. The connector can be connected
only one way. Close the wire retainer clips around the ends of the cable.
Connecting the Exhaust
It is mandatory that an exhaust blower is hooked up and operating whenever your
laser system is running a job. The exhaust blower removes the dust, debris and smell
from the engraving cavity and exhausts it to the outside. You should never operate
your laser system without a properly working exhaust. Prior to the arrival of the
Epilog installation technician, a contractor should install the exhaust system. The
blower should be mounted outside your building for noise considerations. The
blower should not be more than twenty feet from the Legend. You should provide a
rigid, smooth duct from the blower to the vicinity of the Legend. The Legend systems
require 400 CFM at 6” of static pressure. Remember to put the blower switch for the
Legend EX lasers in an obvious and accessible place so it can be routinely switched
Serial Port
Network Port
Parallel Port
Содержание LEGEND 24EX 6000
Страница 2: ...ii THIS PAGE WAS INTENTIONALLY LEFT BLANK ...
Страница 14: ...Introduction xiv THIS PAGE WAS INTENTIONALLY LEFT BLANK ...
Страница 15: ...1 Manual Legend Setup ...
Страница 16: ...2 THIS PAGE WAS INTENTIONALLY LEFT BLANK ...
Страница 36: ...Section 2 Safety 22 THIS PAGE WAS INTENTIONALLY LEFT BLANK ...
Страница 38: ...24 THIS PAGE WAS INTENTIONALLY LEFT BLANK ...
Страница 70: ...Section 6 Using Your Legend System Quick Setup 56 ...
Страница 71: ...57 Manual Basic Operations and Maintenance ...
Страница 72: ...58 THIS PAGE WAS INTENTIONALLY LEFT BLANK ...
Страница 86: ...Section 7 Using the Epilog Legend Print Driver 72 THIS PAGE WAS INTENTIONALLY LEFT BLANK ...
Страница 91: ...Section 8 Using the Epilog Legend Systems 77 Legend LCD Menu Headings LCD Graphic Display ...
Страница 125: ...Section 10 Material Engraving Techniques 111 ...
Страница 135: ...121 Manual Advanced Operations ...
Страница 136: ...122 THIS PAGE WAS INTENTIONALLY LEFT BLANK ...
Страница 174: ...Section 12 Engraving Machine Maintenance 160 THIS PAGE WAS INTENTIONALLY LEFT BLANK ...
Страница 180: ...166 THIS PAGE WAS INTENTIONALLY LEFT BLANK ...
Страница 181: ...167 Manual Troubleshooting Service and Specifications ...
Страница 182: ...168 THIS PAGE WAS INTENTIONALLY LEFT BLANK ...
Страница 193: ...Section 15 Servicing the Legend 179 Service Module Location Diagram 1 Legend TT Power Supply Laser ...
Страница 194: ...Section 15 Servicing the Legend 180 Service Module Location Diagram 2 Legend TT A Controller Bay ...
Страница 216: ...202 THIS PAGE WAS INTENTIONALLY LEFT BLANK ...
Страница 224: ...Setting Up a Network Connection 210 THIS PAGE WAS INTENTIONALLY LEFT BLANK ...


