2
GB
Installation Water Gauge
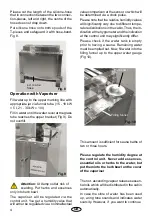
Remove protective fi lm from outer casing.
For protective reasons the glass tube will
be shipped unmounted and separately in
the packaging. Remove packing material
around the glass tube.
Now, loosen glass mounting nut of the
crimp connection (Fig 1) and remove disk
and sealing.
Fig. 1
Fig. 3
Nut
Disk
Sealing
Glass mounting nut
Crimp connection
Now, insert glass tube top down and press
it into upper bracket (Fig 2).
Now attach nut, disk and sealing onto glass
tube (Fig 3).
Fig. 2
Upper bracket
Insert glass tube into screw connections.
Screw nut on crimp connection with mode-
rate stress.
Attention! Do not overtighten nut
– Glass Might Break.
Please consider all important installation
instructions of this instruction manual.
Additionally, this heating device has an
evaporator element. Please note that it
is necessary to use a control unit for the
operation with wet hot air. Please choose
the degree of humidity according to the
information of the instruction manual of
the control unit.
Mount T-piece ½ „, cross connection, bow
90 degree and drain plug according to Fig
1.
T-piece
Bow 90°
D r a i n
plug
Mount upper bracket with screwed-in tap-
ping screw.


