10
BEFORE YOU START
USE
Unpack the appliance. First check whether all the parts are complete and undamaged. If any items are
missing or damaged, please phone our hotline. Keep the packaging material away from children and
dispose of appropriately.
Getting started
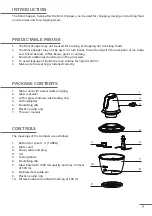
Before using the device for the first time, clean the lid (4), cutting blades (5), emulsifying disc (6) and
glass bowl (7). For more on this, please refer to the “Maintenance/cleaning”.
Preparing food
Wash the food.
•
For meat, remove tendons, bones and skin.
•
For herbs, remove the stalks.
•
Cut solid food (e.g. meat, fish, vegetables) into chunks of around 2 to 3 cm square.
•
Remove the outer shell of nuts.
•
Cream should be kept as cool as possible so it whips better.
Setting up and filling the Mini Chopper
1.
If the power cable (3) is connected to the mains socket, disconnect it from the mains socket.
2.
Place the plastic non-slip ring (9) on an even, dry surface.
3.
Place the glass bowl (7) on the plastic non-slip (9). Make sure that it is centred on the plastic non-
slip ring (9) and the edges of the plastic non-slip ring (9) are not bent.
IF YOU WISH TO CHOP OR MIX FOOD, INSERT THE CUTTING BLADES (5). USE THE EMULSIFYING
DISC (6) TO PREPARE WHIPPED CREAM. ASSEMBLE THE EMULSIFYING DISC (6) TO THE CUTTING
BLADES (5), BEFORE USING THE EMULSIFYING DISC (6). ALIGN HIGH SIDE OF THE EMULSIFYING DISC
(6) TO HIGH SIDE OF THE CUTTING BLADES (5), AND THEN PUSH DOWN THE EMULSIFYING DISC (6).
ALIGN NARROW AND LARGE TONGUES AND GROOVES AND SLIDE THE EMULSIFYING DISC OVER THE
CUTTING BLADE UNTIL IT SNAPS IN. IT’S ASSEMBLED WELL AFTER ONE CLICK.
4.
Depending on what you wish to prepare, place the
cutting blades (5) with or without the emulsifying disc
the emulsifying disc (6) on the stainless steel guide pin
(8).
5.
Prepare the food (see previous section).
6. Fill the glass bowl (7) with the food to be processed.
Note the recommendations and never overfill the glass
bowl (7) beyond the maximum 500 ml level-see fill level
indicator (10).
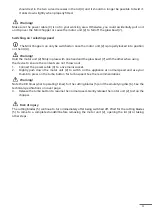
7. Place the lid (4) on to the glass bowl (7). When doing
so, make sure that the thinner cylinder on the axle (see
arrow) is protruding slightly through the hole in the
middle of the lid (4).
8.
Hold the glass bowl (7) in one hand the lid (4) in the other
and twist them gently against one another to check they
are fitted firmly and properly.
9.
Place the motor unit (2) on to the lid (4). Hold the motor
unit (2) in one hand and the lid (4) in the other and twist
them gently against one another. The motor unit (2)
EN
Содержание 145233.01
Страница 19: ...16 IT...
Страница 37: ...16 EN...


