Wireless Video Door Phone
SECO-LARM U.S.A., Inc.
7
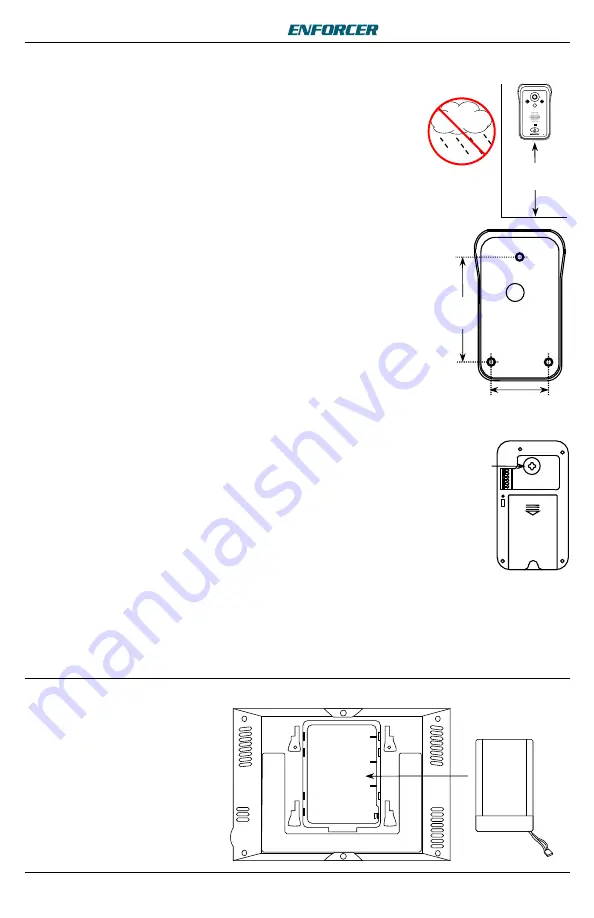
Installation – Camera
Installation – Monitor
5ft
(1.5m)
Installing the Monitor Battery
Remove the battery cover on the
back of the monitor and insert
the included DP-266-BM7
lithium-ion battery.
1.
Position the camera so the area to be monitored is easily visible,
optimally 5ft (1.5m) above the ground. Do not position the camera in
direct sunlight, or where it will be exposed directly to rain or snow.
NOTE:
For best results, the visitor should stand 2.5~5 ft (0.8~1.5 m)
away from the camera
.
2.
Cut a hole large enough to run the min. 21AWG 2-conductor wire to
the door unlock device through the wall, as well as to the included
power supply.
3.
Mount the camera bracket to the wall with three screws. Use screw
anchors if the bracket is mounted on drywall or brick.
4.
Run the 2-conductor wire from the camera, through the wire hole in
the bracket, to the optional door unlock device.
5.
Install the rechargeable lithium-ion battery into the camera. The
battery will act as a backup power source in case of a power outage.
6.
Connect the AC adapter (see
Camera Wiring Diagram
, pg. 6).
7.
Install the monitor battery (see below) and turn on the camera and
monitor. If the camera is not in the bracket, the tamper alarm will
sound. Press the "OK" button on the monitor repeatedly to disable
the tamper alarm.
8.
Experiment with the camera angle using the joystick on the back of
the camera to adjust the direction of the camera while viewing the
image on the monitor.
9.
Mount the camera into the bracket:
Push the top of the camera into the top of the bracket.
Push the bottom of the camera into the bottom of the bracket.
Screw in the bottom of the camera to fix the camera into the
bracket and push the plastic screw cover into the bottom of the
bracket, over the screw.
NOTE:
Do not block the PIR sensor on the camera.
R
es
et
2
1
/
8
" (54mm)
3
3
/
4
"
(96mm)
Camera
Angle
Adjustment
Joystick
DP-266-BM7


