background image


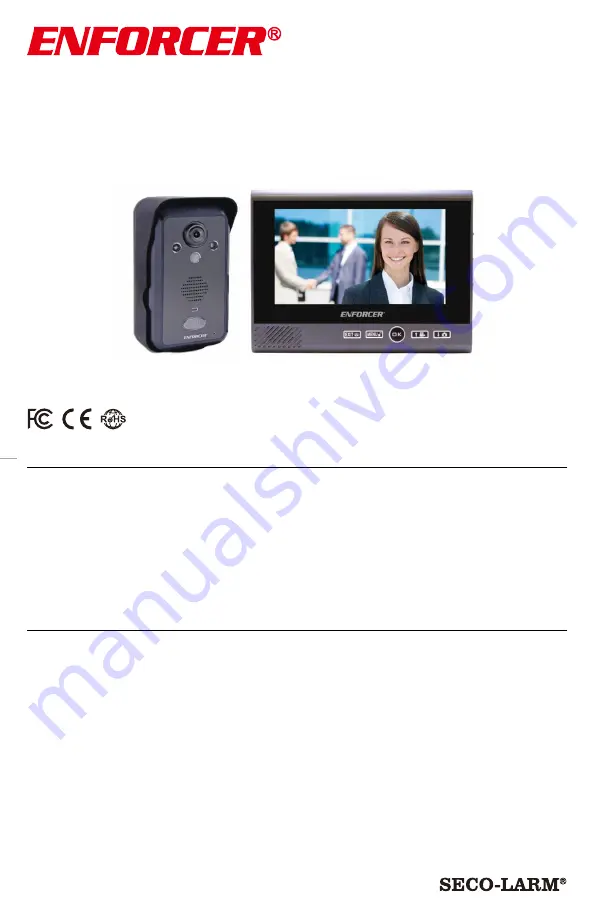
The ENFORCER Wireless Video Door Phone is a convenient and secure way to monitor and 
control an entryway, such as a door or gate, from up to 492 feet (150 meters)* away. When a guest 
or visitor presses the doorbell button on the camera unit, the homeowner can use one of up to 
three lightweight, wireless LCD monitors

 to see who is requesting entry, speak with the caller, take 

a photo, and decide whether to grant entry. The video door phone can be expanded with up to two 
additional monitors and one additional camera. If multiple monitors are set up, then the system can 
also be used as an intercom system between each monitor. 


Wireless Video Door Phone  

DP-266-1C7Q 

Installation Manual 


*Line-of-sight range. Actual range may vary depending on the installation and operating environment. 

Additional monitors and camera sold separately. 


Wireless operation – camera and monitor can 
operate from up to 492ft (150m)* away 


Remotely and securely talk to visitors and unlock 
doors or gates via the monitor 


Monitor can be carried around the premises while 
talking to the visitor 


Connect up to two additional monitors and one 
additional camera


Intercom calling between paired monitors


Camera has built-in IR LEDs for nighttime use  


Camera powered by 9~16 VAC/5~16 VDC 


Camera includes a built-in PIR sensor that 
activates the camera and takes photos of the 
visitor when they approach 


Monitor includes a kickstand 


Monitor front door at any time 


Egress input 


170° wide field of view 


Adjustable camera pan and tilt angle—up to 20° 
from centerline in any direction—to allow for 
mounting variations 

Содержание DP-266-1C7Q

Страница 1: ... of sight range Actual range may vary depending on the installation and operating environment Additional monitors and camera sold separately Wireless operation camera and monitor can operate from up to 492ft 150m away Remotely and securely talk to visitors and unlock doors or gates via the monitor Monitor can be carried around the premises while talking to the visitor Connect up to two additional ...

Страница 2: ...ring Additional Monitors or Cameras on pg 14 Table of Contents Introduction 1 Parts List 2 Specifications 3 Overview 4 Display Overview 5 Installation Notes 5 Camera Wiring Diagram 6 Sample Application 6 Installation Camera 7 Installation Monitor 7 8 On Screen Display Features 8 Programming and Using the On Screen Display 9 10 Programming the Advanced Settings 10 11 Operating the Wireless Video Do...

Страница 3: ... lbs 544g Line of sight range Actual range may vary depending on the installation and operating environment Camera Type Color camera Chip CMOS Resolution 640 TV Lines Lens 2mm Field of view 170 Camera angle adjustment Up to 20 any direction Operating voltage 9 16 VAC 5 16 VDC Relock delay 3 6 8 Seconds Relay output 3A 24VAC 24VDC Current draw Active 300mA 12VDC Standby 15mA 12VDC Battery life Acti...

Страница 4: ...ons see pg 6 Reset button Battery cover Monitor Camera angle adjustment joystick Exit View Menu Unlock Right OK On Off Up Record Down Photo MicroSD Port Brightness Volume USB Power Cover Contrast Monitor Stand PIR Sensor IR LEDs Speaker Status LED Doorbell Microphone Camera Overview ...

Страница 5: ...splay Overview Installation Notes 1 Unpack the video door phone and note the included parts 2 Read this manual thoroughly A clear understanding of the manual will make installation and operation much easier 3 Find a location to mount the monitor and camera Approximately 5ft 1 5m above the ground is optimal where the visitor would stand approximately 2 5 5 ft 0 8 1 5 m from the camera NOTE The came...

Страница 6: ...amera Camera Wiring Diagram 1 Positive power input Connect to the red wire of the included AC adapter or to the positive wire of the doorbell s power supply 2 Negative power input Connect to the black wire of the included AC adapter or to the negative wire of the doorbell s power supply 3 Egress N O negative input Connect to an optional N O egress device The egress device will activate the relay f...

Страница 7: ...gh the wire hole in the bracket to the optional door unlock device 5 Install the rechargeable lithium ion battery into the camera The battery will act as a backup power source in case of a power outage 6 Connect the AC adapter see Camera Wiring Diagram pg 6 7 Install the monitor battery see below and turn on the camera and monitor If the camera is not in the bracket the tamper alarm will sound Pre...

Страница 8: ...and delete photos taken by the camera station There are four different types of photos M Photos taken by the user manually 1 photo taken A Photos taken by the camera station automatically when the doorbell button is pressed 1 photo taken T Photos taken by the camera station automatically when the unit is removed from the bracket and the tamper alarm activates 4 photos taken P Photos taken by the c...

Страница 9: ...e All to delete all photos after an additional prompt 5 Once viewing a photo press the Up or Down buttons to cycle through other photos 6 Press the OK button to either delete or exit the photo viewing mode and go back to the on screen display menu NOTES The monitor can save up to 240 photos Photos are saved in a first in first out method meaning that the system automatically deletes the oldest pho...

Страница 10: ...play 2 Highlight the Language icon and press the OK button to enter the Language screen 3 Use the Up and Down buttons to select a language English default German Spanish French Russian or Chinese 4 Press the OK button when finished programming to go back to the on screen display menu Programming the Advanced Settings 1 While the monitor display is on press the Menu Unlock button to open the on scr...

Страница 11: ...es 8 seconds Pairing See Resetting the Camera and Pairing a First Monitor and Programming Additional Monitors or Cameras on pgs 13 14 for information regarding the Pairing setting Alarm Setting 1 Select Alarm setting and press the OK button 2 Select On or Off to turn the tamper alarm on or off and press the OK button NOTE If multiple cameras are paired to the monitor then select the desired camera...

Страница 12: ... the monitor the camera station can still be heard on the indoor monitor 5 Press the Down Photo button on the monitor to take a manual photo 6 Press the Volume up down button to adjust the audio level 7 Press the OK button when finished with the call View and or Talk to a Visitor Who Has Not Pressed the Camera Doorbell Button 1 Press the OK or Power button to turn the monitor s display ON 2 Press ...

Страница 13: ...xt lowest ID monitor If monitor 1 is calling monitor 2 the user would press the Up button If monitor 3 is calling monitor 2 the user would press the Down button If monitor 3 is calling monitor 1 the user would press the Up button 5 Press the OK button when finished with the call Resetting the Camera and Pairing a First Monitor NOTE By default the monitor in the DP 266 1C7Q Complete Kit is paired w...

Страница 14: ...Code NOTES Up to three total monitors can be learned to the system The intercom feature will not function until the connection is confirmed by the new monitor To Pair an Additional Camera 1 Put the camera into pairing mode a Remove the camera from the bracket b If the tamper alarm is active then the alarm will begin to sound i Disconnect power from the camera by removing the battery and disconnect...

Страница 15: ...r Make sure the monitor s battery is charged Plug the charger directly into the monitor The monitor is not charging Remove the battery from the battery compartment and clean both the battery contacts and the monitor s connection contacts Make sure the kickstand is extended when placing in the charger stand Make sure the power adapter is correctly connected to the charger stand Connect the power ad...

Страница 16: ...arm For more information go to www P65Warnings ca gov WARRANTY This SECO LARM product is warranted against defects in material and workmanship while used in normal service for one 1 year from the date of sale to the original customer SECO LARM s obligation is limited to the repair or replacement of any defective part if the unit is returned transportation prepaid to SECO LARM This Warranty is void...

Отзывы: