Proline Promass 500
Use in protective systems
Hauser
37
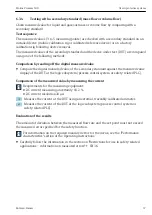
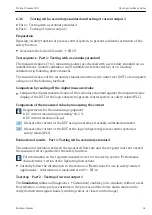
6.3.4
Testing with a secondary standard (mass flow or volume flow)
Check measured value for liquid and gaseous mass or volume flow by comparing with a
secondary standard
Test sequence
The measured values (3 to 5 measuring points) are checked with a secondary standard on an
installed device (mobile calibration rig or calibrated reference device) or on a factory
calibration rig following device removal.
The measured values of the secondary standard and the device under test (DUT) are compared
using one of the following methods:
Comparison by reading off the digital measured value
‣
Compare the digital measured value of the secondary standard against the measured value
display of the DUT at the logic subsystem (process control system or safety-related PLC).
Comparison of the measured value by measuring the current
Requirements for the measuring equipment:
• DC current measuring uncertainty ±0.2 %
• DC current resolution10 µA
1. Measure the current at the DUT using an external, traceably-calibrated ammeter.
2. Measure the current of the DUT at the logic subsystem (process control system or
safety-related PLC).
Evaluation of the results
The amount of deviation between the measured flow rate and the set point must not exceed
the measured error specified for the safety function.
For information on the required measured error for the device, see the "Performance
characteristics" section of the Operating Instructions
‣
Carefully follow the information in the section on "Restrictions for use in safety-related
Содержание HART Proline Promass 500
Страница 2: ......
Страница 8: ...Certificate Proline Promass 500 8 Endress Hauser 2 Certificate A0033748 ...
Страница 50: ......
Страница 51: ......
Страница 52: ...www addresses endress com ...

