Instruction Manual
D200149X012
3610J and 3620J Positioners
September 2017
44
9. Slide the relay manifold (key 9) slightly if necessary, to visually align the relay beam assembly (key 122) flexure with
the summing beam assembly (key 123) flexure along their entire length. Tighten the twelve machine screws
(key 47).
10. Assemble the flexure adjustment (key 156) onto the two minor loop feedback flexures. Slide the flexure adjustment
along the entire length of the flexures making sure it does not rub against the relay at any point. If contact is made
with the relay or diaphragm edges at any point, remove the flexure adjustment, loosen the twelve machine screws
(key 47), slide the relay manifold slightly to provide clearance and tighten the machine screws (key 47). Perform
steps 2 through 5 of the Disassembling the Summing Beam Assembly procedure and loosen the two machine
screws (key 124). Perform steps 4 through 10 of the Assembling the Summing Beam Assembly procedure.
Assemble the flexure adjustment on the minor loop feedback flexures and check for clearance.
11. Check the supply relay head (key 15) and nozzle relay head (key 14) to ensure they are centered in the diaphragms.
If not, loosen the connecting screws (key 50) and center.
(key 55). For 3611JP and 3621JP positioners only, install the parallel flexure (key 179) with the two socket head
screws and lock washers (keys 180 and 181). The parallel flexure is not used on positioners with 585 size 100
actuators.
Assembling the Reversing Plate and Gasket
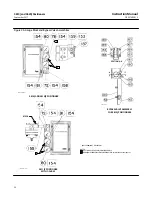
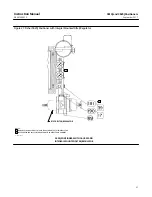
Refer to figure 25 for key number locations while assembling the reversing plate and gasket.
Install the reversing plate gasket (key 24) and reversing plate (key 23) with the reversing plate screw (key 49). When
installing the gasket, make sure one of the three gasket holes is over the exhaust slot in the positioner case (key 115A).
If direct action is required, adjust the reversing plate so the letter D is showing and the letter R is entirely covered. If
reverse action is required, adjust the reversing plate so the letter R is showing and the letter D is entirely covered.
Tighten the screw (key 49).
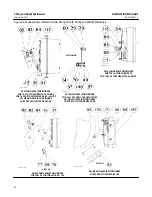
Assembling the Gauge Block
Refer to figure 26 for key number locations, unless otherwise indicated, while assembling the gauge block.
Attach the gauge block (key 158) with the two socket head screws (key 187). During assembly of the gauge block,
ensure that the O‐rings stay in place to avoid leaks.
2. Assemble gauges [keys 79 (not shown), 80, and 81], pipe plugs (keys 72 and 78), or tire valves (key 73, not shown)
as applicable to the gauge block (key 158). Apply sealant (key 154) to the threads of the gauges, pipe plugs, or tire
valves.
3. If other positioner components are removed, refer to the appropriate reassembly procedures and assemble the
positioner completely.
4. Plug the relay A and relay B output connections and apply 2.0 bar (30 psig) to the instrument connection and 2.4
bar (35 psig) minimum supply pressure to the supply connection.
5. Using soap solution or some other solution compatible with Nitrile rubber, check the gauge block O‐rings and any
other O‐rings, gaskets, or diaphragms which were disassembled for leaks.
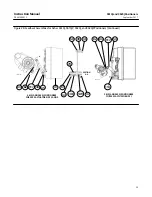
Assembling the 3622 Electro‐Pneumatic Converter
Refer to figure 30 for key number locations, unless otherwise indicated, while assembling the converter.
1. If the 3622 electro‐pneumatic converter was removed from the pneumatic positioner, apply lubricant (key 17) to
the four O‐rings (key 36), and install the O‐rings in the case (key 115A, figure 25). Ensure that the O‐rings remain in
place. Attach the converter assembly to the case with the two socket head screws (key 35) and tighten the socket
head screws.


