10-4
•
E2 RX/BX/CX I&O Manual
026-1614 Rev 4 5-JAN-2013
10.6 Common Screen
Elements
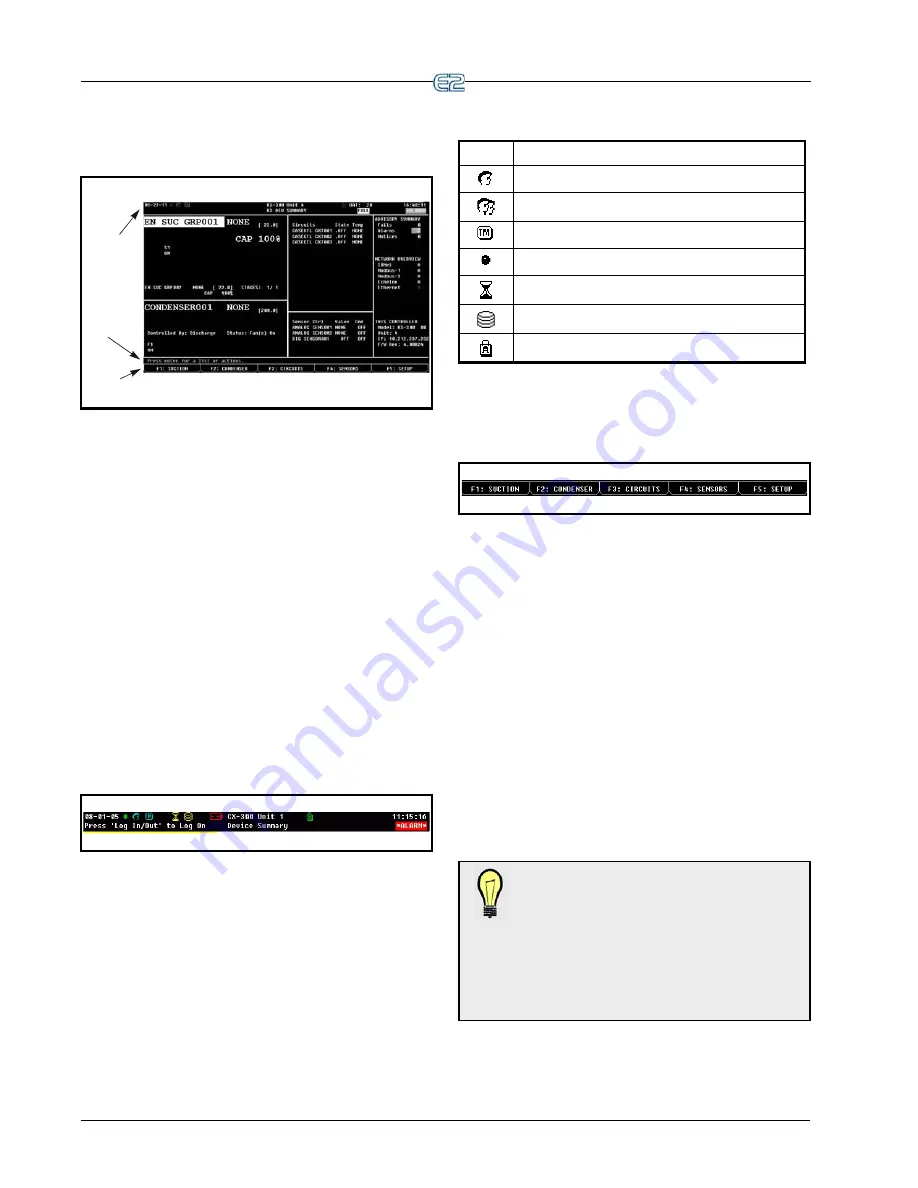
Figure 10-5
- Common Screen Elements (RX version shown)
HEADER
HELP LINE
FUNCTION
KEY DESCRIPTIONS
10.6.1 The Header
The first two lines at the top of the E2 screen are
referred to as the
screen header
. This area of the screen
contains the time and date, controller name, subnet and
node number, and alarm and failure notifications. In addi-
tion, it contains highlighted indicators and icons to show
when a user is operating in a particular mode, such as full
options, edit, macro record, or insert mode.
If the E2’s Global Data feature is being used to supply
outside air temperature and outside relative humidity val-
ues, these values will also be displayed in the header.
10.6.1.1 Header Icons
At the very top of every screen in the E2, there are
icons that indicate various stages of activity, number of
users logged into the controller, battery alerts, connectivity
status, and more.
Figure 10-6
- Header Icons
Table 10-1 - Header Icons and Descriptions
Icon
Description
Single user is logged in
Multi-users are logged in
Terminal mode in use
E2 is connected to Ethernet
Wait, or system is busy
Disk activity, or saving to disk
Caps lock is ON
10.6.2 The Function Keys
Figure 10-7
- Home Screen Function Keys (RX version shown)
At the very bottom of every screen in the E2, there are
five boxes labeled
through
. These boxes are
the function key descriptions. The function key descrip-
tions show what each of the five function keys do when
pressed. (Options will vary depending on the type of con-
troller being used.)
Function key usage often varies depending on which
screen or field E2 is currently in.
10.6.3 The Help Line
The line directly above the function button menu is
called the
help line
. The help line displays information
about the currently selected field, such as general descrip-
tions, possible ranges, and other information to help a user
maneuver around and/or configure the field.
TIP: To see different messages the help line
generates, start from the RX Home screen.
Press
(CIRCUITS). Highlight a circuit
and press
.
Use the arrow buttons to move
around the screen and notice how the help line
changes as the cursor moves from the setpoint to status
sections. When finished, press the
key to return
to the Home screen.
Содержание E2
Страница 2: ......
Страница 4: ......
Страница 16: ......
Страница 24: ......
Страница 48: ......
Страница 55: ......
Страница 56: ......
Страница 72: ...6 16 E2 RX BX CX I O Manual 026 1614 Rev 4 5 JAN 2013 ...
Страница 75: ...BACnet The RS485 Network and Hardware Setup 6 19 ...
Страница 79: ...BACnet The RS485 Network and Hardware Setup 6 23 ...
Страница 80: ...6 24 E2 RX BX CX I O Manual 026 1614 Rev 4 5 JAN 2013 ...
Страница 81: ......
Страница 82: ......
Страница 92: ...8 6 E2 RX BX CX I O Manual 026 1614 Rev 4 5 JAN 2013 ...
Страница 94: ...8 8 E2 RX BX CX I O Manual 026 1614 Rev 4 5 JAN 2013 ...
Страница 114: ......
Страница 144: ......
Страница 203: ......
Страница 204: ......
Страница 226: ......
Страница 253: ......
Страница 254: ......
Страница 257: ......
Страница 258: ......
Страница 267: ......
Страница 268: ......
Страница 270: ......
Страница 282: ......


