


21
SETTING SURFACE CONTROLS
Your range is equipped with burners which allow high,
standard, and simmer cooking.
Simmer Setting Burner: best used for simmering deli-
cate sauces, etc.
Standard Setting Burner: used for most all surface cook
-
ing needs. Always select a utensil that is suitable for
the amount and type of food being prepared. Select a
flame size appropriate to the pan. Never allow flames
to extend beyond the outer edge of the pan.
Your cooktop is also equipped with 240° rotation flame
control valves. These valves provide enhanced control
of the burner flame. Each burner lights automatically
from an electric igniter when its control knob is turn
counter clockwise from the “OFF” position to the “hi”
position.
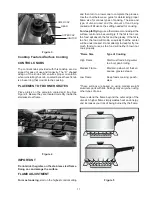
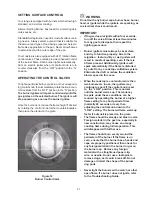
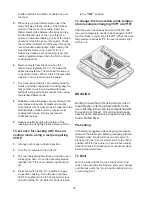
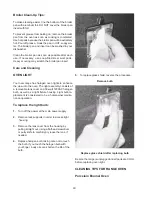
OPERATING THE CONTROL VALVES
To light a particular burner, press in on the correspond-
ing control knob, then immediately rotate the knob coun
-
ter clockwise from the “OFF” position to the “hi”position.
The burner igniters will spark continuously until the
gas ignites on the selected burner. The igniters will
stop sparking as soon as the burner ignites.
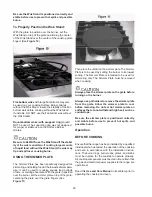
Once the burner is lit, reduce the flame height if desired
by rotating the control knob further counterclockwise,
then place the utensil on the grate.
Figure 12
burner Control Valve
wARNING
Do not touch any burner caps, burner base, burner
head, or igniter while the igniters are sparking, as
an electrical shock could result.
IMPORTANT
•
If the gas does not ignite within four seconds,
turn off the valve. Allow at least two minutes
for any gas to dissipate, then repeat the
lighting procedure.
•
burner igniters must always be kept clean
and dry to function properly. Due to the
reignition feature, dirty or wet igniters will
result in constant sparking, even if there is
a flame present. Additionally, igniters will
spark automatically if the flame is distorted
by a draft or by a cooktop ventilation system.
Eliminate the draft or reduce the ventilation
blower speed in this case.
•
when the cooktop is cool and/or more than
two burners are in use, the igniters may
continue to spark if the control knob is set
to the “LOw” position. This is normal
until the burner warms up. The tendency
to spark under these conditions can be
reduced by operating the burner at a higher
flame setting for a short period of time
(normally 60 seconds or less), then
adjusting the control knob down to the
“LOw” setting. The burner will also warm up
faster if a utensil is placed on the grate.
•
The flame should be steady and blue in color.
Foreign material in the gas line, especially in
new construction, may cause an orange
cooktop flame during initial operation. This
will disappear with further use.
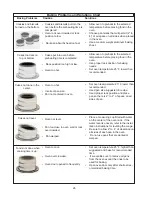
•
The flame should burn evenly around the
perimeter of the burner. If the flame is un
even, ensure that the burner base, heads and
caps are properly positioned, then check for
any foreign material in the burner ring or on
the burner cap. Remove any foreign
material with a straightened paper clip,
wire, or needle. Do not use a toothpick to
remove clogs, as it could break off. Do not
damage or distort the shape of the burner
ring ports.
•
Never light the burners with a match or other
open flame. If a burner does not ignite, refer
to the Troubleshooting Guide.
Содержание E30GF74GPS - 30" Pro-Style Gas Range
Страница 9: ...9 sample wiring diagram always refer to the wiring diagram with the product ...
Страница 10: ...10 WIRING DIAGRAM MODEL E36GF76GPS sample wiring diagram always refer to the wiring diagram with the product ...
Страница 11: ...11 WIRING DIAGRAM MODEL E36GF75GPS sample wiring diagram always refer to the wiring diagram with the product ...
Страница 43: ...43 GENERAL DIMENSIONS 30 27 3 4 44 5 16 36 1 16 3 7 16 36 ...
Страница 95: ...95 ...
Страница 96: ...96 ...