INSTALLATION & SETUP
VistaPro 2000 User's Manual
2-12
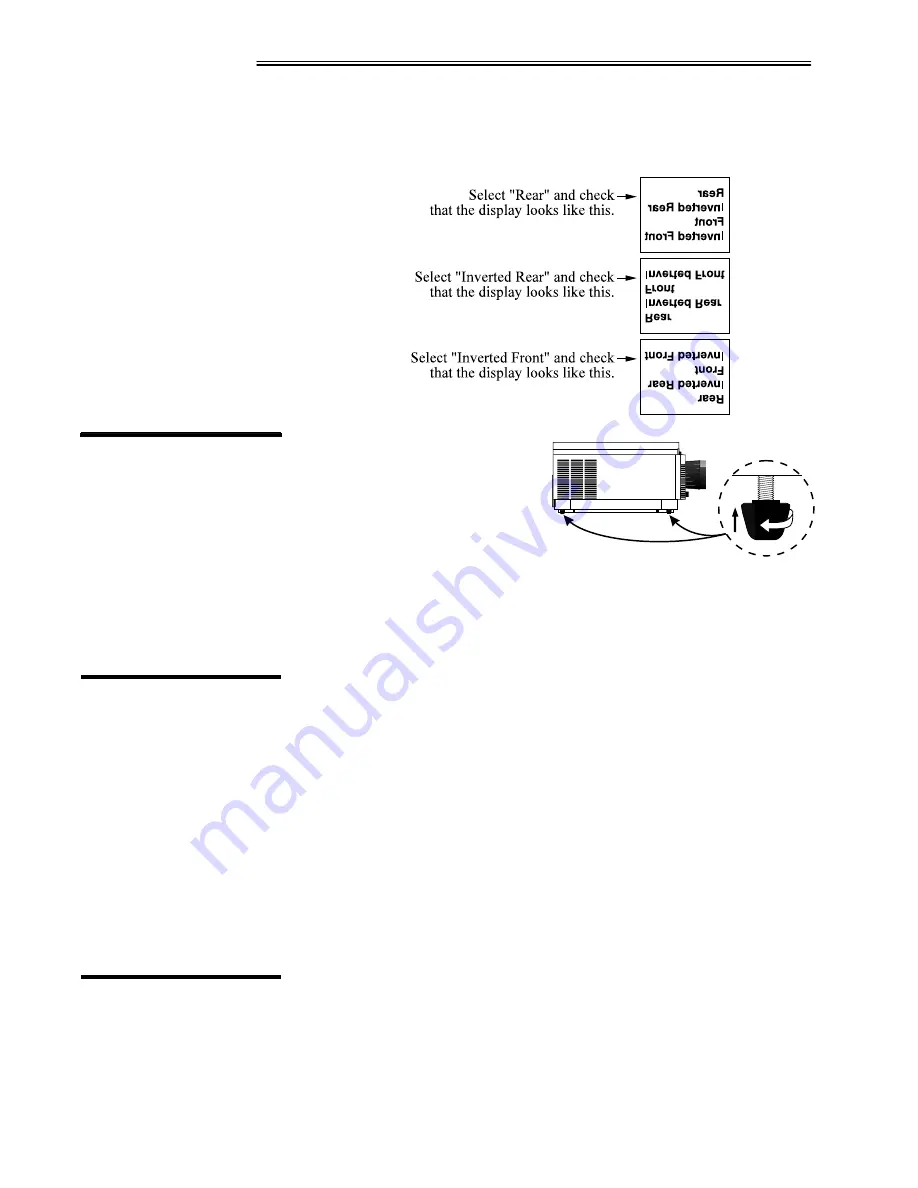
In the Preferences menu, highlight and select the "Image Orientation" pull-down
list. From a front screen floor mount installation, select from Rear, Inverted
Rear, Front or Inverted Front according to your intended installation:
For most installations the lens
surface of the VistaPro 2000
projector must be parallel to the
screen to prevent keystoning. To
make small corrections to the
projector's level, rotate each leg as
necessary to raise or lower.
WARNING
The projector must tilt no more than 45° from
side-to-side to ensure that the lamp
operates properly and safely.
Once the VistaPro 2000 is properly set up and projecting an image on screen,
you are ready to make quick manual display adjustments.
If you are using a zoom lens, turn the outer shell of the lens barrel to decrease or
increase the size of the image at the current throw distance. Note: Do not touch
the lens surface as it can be easily damaged.
Turn the Focus adjustment knob (next to lens barrel) until you obtain the best
overall image clarity.
VistaPro 2000 includes a Vertical Offset adjustment knob to provide vertical
image shifting (raising and lowering) without causing keystone distortion. Proper
adjustment can also maximize display brightness. Turn the knob until you
achieve the best overall brightness without causing a distortion in picture
geometry. See Section 3, Operation for complete display adjustments.
Use RS-232 connections when controlling VistaPro 2000 with a personal
computer with an RS-232 serial interface or when using the projector with a
Marquee switcher. The VistaPro 2000 RS-232 ports are located on the lower
right portion of the projector's rear control panel as shown in Figure 2.13.
2.7
Leveling
2.8
Zoom, Focus &
Vertical Offset
Zoom
'
Focus
'
Vertical Offset
'
2.9
Serial Port
Connections


