Elba EGC 833 series Скачать руководство пользователя страница 8

8

It is important that the diameter of the pot 

be suitable to the potentiality of the burner 

so as not to compromise the high output 

of the burners and therefore energy waste.
A small pot on a large burner does not give 

you a boiling point in a shorten amount of 

time since the capacity of heat absorption 

of a liquid mass depends on the volume 

and the surface of the pot.

Fig. 3.4

Fig. 3.3

BATTERY IGNITION

If the electronic ignition does not work 

make sure that the battery, installed on the 

back of the cooker, is not flat and has been 

installed correctly (see the chapter “Battery 

installation”, page 29).

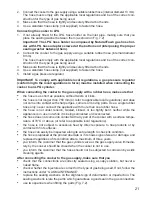
LIGHTING THE BURNERS

To ignite the burner, the following instruc-

tions are to be followed:
1.  Press in the corresponding knob and 

t

urn counter-clockwise (fig. 3.2 )

 to the 

full  flame  position  marked  by  the 


(full on) symbol (fig. 3.1).

2.  Press the ignition button marked by 

the symbol 

(fig. 3.3).


The sparks produced by the electro-

des situated next to the burner will 

light the selected burner.


In the case of a mains failure light the 

burner with a match or lighted taper.

3.  Adjust the gas valve to the desired po-

sition.

To turn it off, turn the knob towards the 

right, up to the safety click. 

If your local gas supply makes it difficult to 

light the burner with the knob set to maxi-

mum, set the knob to minimum and repeat 

the operation.

CHOICE OF THE BURNER

On the control panel, near every knob, the-

re is a diagram that indicates which burner 

is controlled by that knob.
The suitable burner must be chosen accor-

ding to the diameter and the capacity used.
As an indication, the burners and the pots 

must be used in the following way:

DIAMETERS OF PANS WHICH MAY 

BE USED ON THE BURNERS

BURNERS

MINIMUM

MAXIMUM

Semi-rapid

16 cm             24 cm

Rapid

24 cm             26 cm

Triple-ring

26 cm             28 cm

Wok pan

Max 36 cm

do not use pans with concave or con-

vex bases

Содержание EGC 833 series

Страница 1: ...Made in Italy H O M E A P P L I A N C E S 100 ELBAQUALITY MADE IN ITALY GAS COOKERS Models EGC 833 EGC 933 Instructions for the use Installation advices...

Страница 2: ...ease preserve this booklet carefully It may be useful in futu re either to yourself or to others in the event that doubts should arise relating to its operation This appliance must be used only for th...

Страница 3: ...nvironment Read the instructions carefully before installing and using the ap pliance CAUTION this apparatus must only be installed in a permanently ventilated room in compliance with the applicable r...

Страница 4: ...who could play with unused appliances After use ensure that the knobs are in the off position Household appliances are not intended to be played with by children Keep children away from the cooker dur...

Страница 5: ...cordance with the regulations in force in your country Always use oven gloves when removing the shelf and food tray from the oven whilst hot Do not hang towels dishcloths or other items on the cooker...

Страница 6: ...00 kW 3 Triple ring burner TR 3 50 kW Fig 1 1 CONTROLS DESCRIPTION 1 Gas oven control knob 2 Rear left burner control knob 3 Front left burner control knob 4 Central right burner control knob 5 Gas b...

Страница 7: ...educed rate The maximum aperture position per mits rapid boiling of liquids whereas the minimum aperture position allows slower warming of food or maintaining boiling conditions of liquids To reduce t...

Страница 8: ...symbol fig 3 1 2 Press the ignition button marked by the symbol fig 3 3 The sparks produced by the electro des situated next to the burner will light the selected burner In the case of a mains failure...

Страница 9: ...pan support When using a WOK you need to place the supplied stand in the burner to avoid any faulty operation of the triple ring burner Figs 3 5a 3 5b IMPORTANT The special grille for wok pans fig 3 5...

Страница 10: ...lue The thermostat which regulates the flow of gas to the oven burner has a safety valve which automatically shuts off the gas sup ply when the flame goes out Fig 4 1 9 1 0 6 7 8 3 4 5 1 2 OVEN BURNER...

Страница 11: ...o the required tem perature If the flame extinguishes for any reason the safety valve will automatically shut off the gas supply to the burner To re light the burner first turn the oven control knob t...

Страница 12: ...se injury ENAMELLED PARTS All the enamelled parts must be cleaned with a sponge and soapy water or other non abrasive products Dry preferably with a microfibre or soft cloth Acidic substances like lem...

Страница 13: ...ily removed for cleaning by unscrewing the two lateral fixing screws fig 5 1 BURNERS They can be removed and washed with soapy water only They will remain always perfect if cleaned with products used...

Страница 14: ...14 A B S Fig 5 4 Fig 5 5 Fig 5 6 S F C Fig 5 3 Fig 5 2...

Страница 15: ...REGULATING OF THE BALANCE Lower the lid and check the correct balance While opened at 45 it should hang up If necessary register the calibration of the hinge springs using the screws R fig 5 7 Do not...

Страница 16: ...ance correctly could invalidate any manufacturer s warranty The appliance must be installed in compliance with regulations in force in your country and in observation of the manufacturer s instruction...

Страница 17: ...left between the side of the cooker and the furniture The veneered syntetical material and the glue used must be resistant to a temperature of 90 C in order to avoid ungluing or deformations Curtains...

Страница 18: ...s The openings should be near the floor and preferably on the side opposite the exhaust for combustion products and must be so made that they cannot be blocked from either the outside or the outside W...

Страница 19: ...tion label attached on the appliance Appliances supplied for use on Natural gas they are adjusted for this gas only and cannot be used on any other gas LPG or Town gas without modification The applian...

Страница 20: ...making sure that you place the sealing washer between them as shown in Fig 7 2 ok ok THE PIPE DOES NOT CROSS THE REAR PANEL OF THE COOKER IN CASE OF CROSSING THE BACK PANEL ENSURE THE PIPE IS POSITION...

Страница 21: ...onger than 750 mm or refer to applicable local regulations and does not come into contact with sharp edges corners or moving parts Use a single rubber hose only never connect the appliance with more t...

Страница 22: ...PIPES OR A FLEXIBLE PIPE The gas connection is made up of the terminal fitting of the inlet pipe the brass connector sealing washers Important If fitted remove the hose holder from the terminal fittin...

Страница 23: ...the appliance should be closed when the cooker is not in use you inform the customer that the rigid or flexible pipe should not be subjected to corro sion by acidic cleaning agents After connecting th...

Страница 24: ...over the hose connectors to the full depth IMPORTANT Only 13 kg maximum cylinders may be used in the cylinder compartment and they must be positioned in such a way that the regulator and shut off cock...

Страница 25: ...BURNERS Nominal power kW Reduced power kW LPG G30 28 30 mbar G31 37 mbar Natural Gas G20 20 mbar Town Gas G110 8 mbar injector 1 100 mm Ring opening mm injector 1 100 mm Ring opening mm injector 1 100...

Страница 26: ...with tho se most suitable for the kind of gas for which it is to be used The burners are conceived in such a way so as not to require the regulation of the primary air ADJUSTING OF THE MINIMUM OF THE...

Страница 27: ...damage the wire to the safety valve probe Using a 7 mm box spanner unscrew the injector indicated by the arrow in fig 7 8 and replace it by the proper one according to the kind of gas Then replace the...

Страница 28: ...bru sque passage from the maximum position to that of minimum The flame adjustment is done in the fol lowing way turn on the burner by setting the ther mostat knob on position 10 maxi mum remove the k...

Страница 29: ...Only use a type C 1 5 Volt battery Check for correct polarity fig 8 2 and label to the side of the battery com partment Important notes Remove the battery if the cooker is not going to be used for a l...

Страница 30: ...30...

Страница 31: ...31...

Страница 32: ...due to printing or transcription errors in the present booklet The manufacturer reserves the right to make all modifications to its products deemed necessary for manufacturer commercial reasons at an...

Отзывы: