35
would be the pointer finger of your right hand. If a finger ID is already in use a
red dot appears in the lower right hand corner of the display.
Press the OK-key.
You can now define the relay which is to be activated by the previously selected
finger.
Entering relay: “o1” is visible in the display of the control panel, which indicates
that the first relay (motor lock) has been chosen (default setting). Select the
desired relay by using the keys < or > and press the OK-key. Now “EF” will
appear in the display.
Options:
„o1“
Relay 1
typically a motor lock
„o2“
Relay 2
external relay contact
3.6
ENROLING FINGER
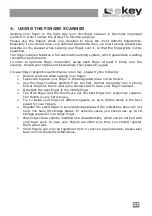
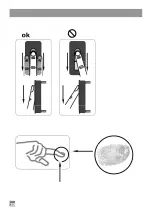
Once “EF” (enrol finger) is visible in the display of the control panel, you have
60 seconds to swipe your finger over the sensor, starting from the first finger
joint.
The enrolment should be done as described in chapter 3.4.
The scanner is equipped with a status display (LED), which indicates the
operating mode:
Red:
The finger could not be scanned successfully
please try again!
Orange:
The device is waiting for a finger to be scanned.
Green:
Successful scan
3.7
DELETING A USER FROM THE SYSTEM
3.7.1
ENTERING THE SECURITY CODE
Press the
OK
-key in the control panel.
Enter the first digit of the security code using
<
and
>
(standard setting is 9)
Press the
OK
-key.
Enter the second digit of the security code using
<
and
>
(standard setting is 9)
Press the
OK
-key.
In the display “Eu” (enrol user) is visible.
3.7.2
DELETING A USER
Press the >-key until “du” (delete user) is visible in the display of the control
panel.
Press the OK-key.
Press the < or >-key to select the user ID to be deleted from the system.
Confirm the user ID to be deleted by pressing the OK-key.
In the display of the control panel, “OK” will be visible for a short moment and
the system will return to the standard operating mode.
3.8
CHANGING THE SECURITY CODE
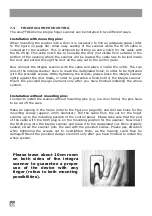
Please note that without the security code you are unable to operate the system. If the
wrong security code is entered 3 times, the system will be disabled for 30 minutes.
Содержание TOCAhome 2 integra
Страница 11: ...11 ...
Страница 16: ...16 6 2 ABMESSUNGEN DER STEUEREINHEIT INTEGRA ...
Страница 17: ...17 6 3 ABMESSUNGEN DES FINGERSCANNER INTEGRA ...
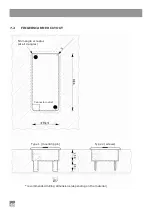
Страница 19: ...19 7 2 AUSFRÄSUNG FINGERSCANNER empfohlene Fräsmasse können je nach Werkstoff variieren ...
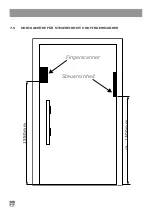
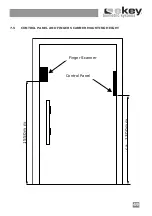
Страница 22: ...22 1550m m c a 1 300m m Fingerscanner Steuereinheit 7 5 MONTAGEHÖHE FÜR STEUEREINHEIT UND FINGERSCANNER ...
Страница 28: ...28 ...
Страница 38: ...38 ...
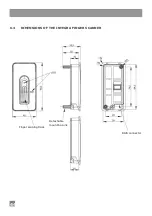
Страница 43: ...43 6 2 DIMENSIONS OF THE INTEGRA CONTROL PANEL Shield width ...
Страница 44: ...44 6 3 DIMENSIONS OF THE INTEGRA FINGER SCANNER Finger swiping track Detachable mounting pins RJ45 connector ...
Страница 54: ...54 ...

