77
III-3-5-2. Guest/Multiple SSID
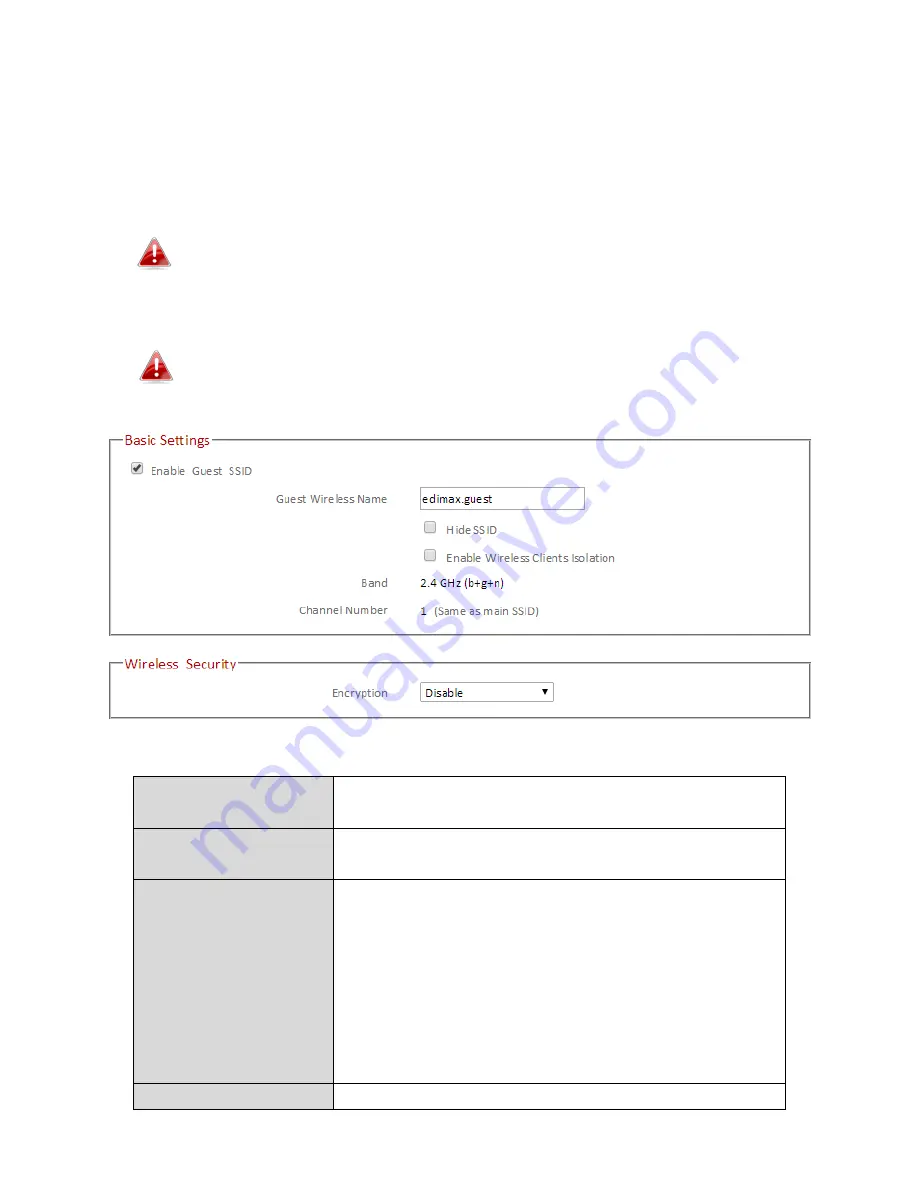
You can setup an additional “Guest” Wi-Fi network so guest users can enjoy
Wi-Fi connectivity without accessing your primary network. The “Guest”
screen displays settings for your guest Wi-Fi network.
The guest network is separate from your primary network. The
settings for your primary network can be found in the “Basic”
menu.
In access point mode, the “Guest” feature in the menu is replaced
by “Multiple SSID”. The BR-6478 AC V2 supports up to four
additional SSIDs for each wireless band in access point mode.
Enable Guest SSID
Check/uncheck the box to enable/disable the
guest Wi-Fi network.
Wireless Guest
Name
Enter a reference/ID name for your guest
wireless network.
Hide SSID
Enable or disable hide SSID. When disabled,
the SSID will be visible to clients as an available
Wi-Fi network. When enabled, the SSID will not
be visible as an available Wi-Fi network to
clients – clients must manually enter the SSID
in order to connect. A hidden (disabled) SSID is
typically more secure than a visible (enabled)
SSID.
Enable Wireless
Check the box to enable wireless clients
Содержание BR-6478 AC V2
Страница 1: ...BR 6478 AC V2 User Manual 08 2015 v1 0 ...
Страница 7: ...3 I 3 Back Panel Internet WAN Port LAN Ports 1 4 Reset WPS Button USB Port ...
Страница 46: ...42 3 You will arrive at the Status screen Use the menu down the left side to navigate ...
Страница 53: ...49 description of security settings ...
Страница 75: ...71 ...
Страница 95: ...91 ...
Страница 122: ...118 ...
Страница 126: ...122 ...
Страница 128: ...124 ...
Страница 130: ...126 4 Click Properties 5 Select Internet Protocol Version 4 TCP IPv4 and then click Properties ...
Страница 131: ...127 6 Select Obtain an IP address automatically and Obtain DNS server address automatically should be selected ...
Страница 135: ...131 ...
Страница 137: ...133 ...
Страница 142: ...138 3 Click Local Area Connection 4 Click Properties ...
Страница 146: ...142 5 Choose your connection and right click then select Properties ...
Страница 150: ...146 6 Click Apply to save the changes ...
Страница 157: ...153 3 Your router s IP address will be displayed next to Default Gateway ...
Страница 159: ...155 3 A new window will open type ipconfig and press Enter ...
Страница 160: ...156 4 Your router s IP address will be displayed next to Default Gateway ...
Страница 162: ...158 4 Click the TCP IP tab and your router s IP address will be displayed next to Router ...
Страница 164: ...160 3 After correctly entering your password you will be successfully connected to the BR 6478 AC V2 s wireless network ...
Страница 168: ...164 ...
Страница 177: ...173 ...


